

When working on a contact or matter record in LollyLaw, it may be helpful to save notes for yourself or your team members to reference later. The Journal tab within each contact and matter record is the ideal place to create and save these case notes.
This article will cover how to save notes to the journal in a contact or matter record in LollyLaw.
Creating a New Journal Entry
There are three methods for creating a new journal note: through the Actions button, in the Contact or Matter menus, or within a Contact or Matter record. All methods result in a created journal entry, so any method can be used based on your preference.
Method 1: Create a Journal Note from the Actions Button
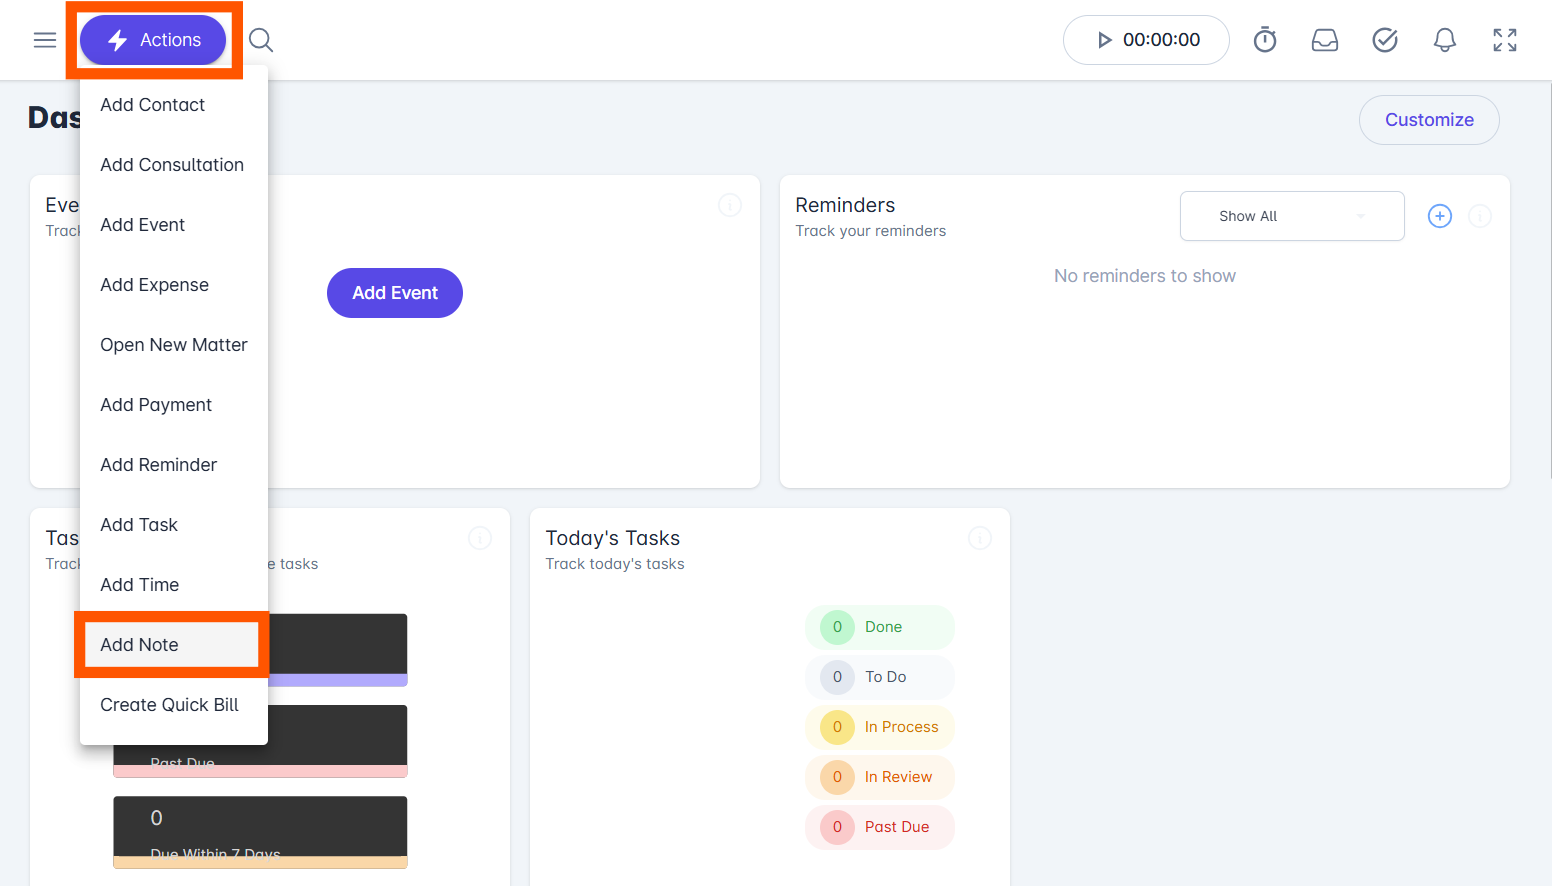
Select Actions at the top left of your screen and choose Add Note.
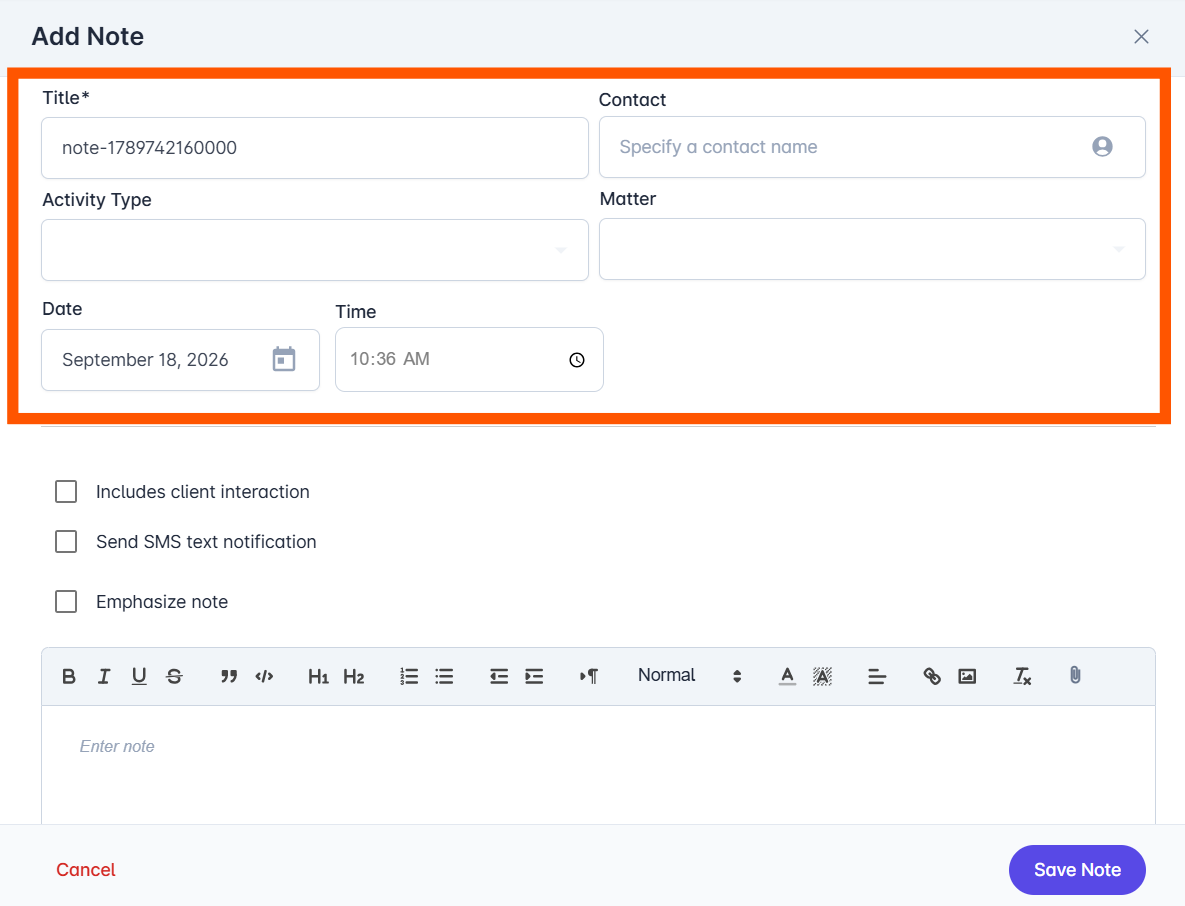
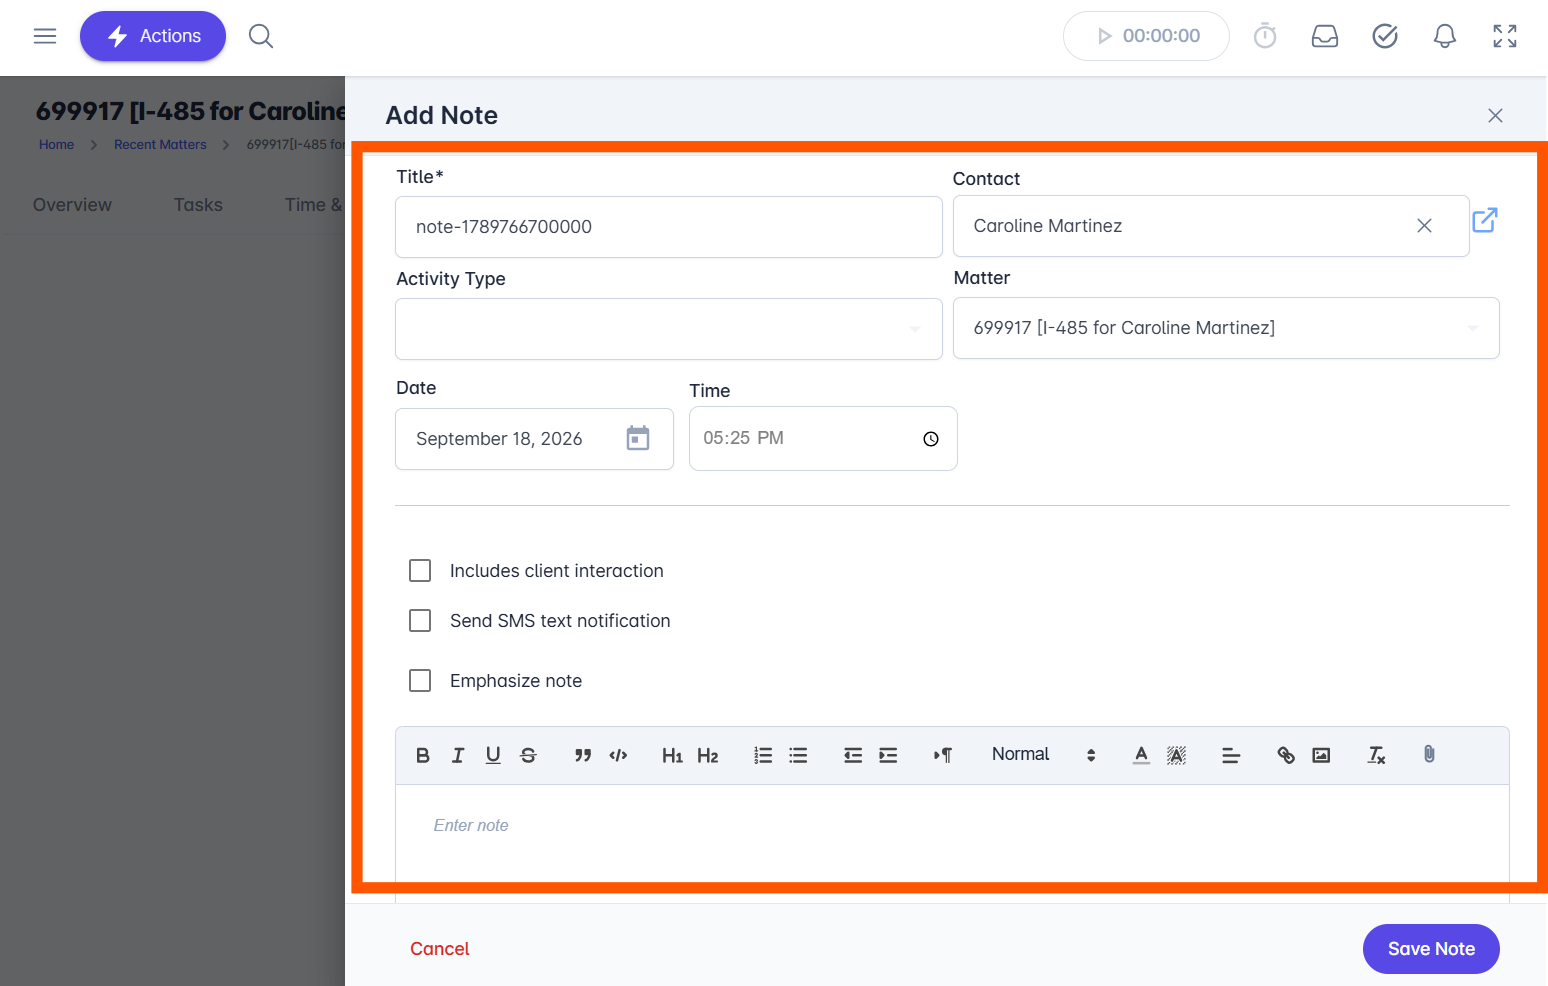
An Add Note drawer will open. Fill in the Title (or keep the auto-generated title), related Contact, Activity Type, related Matter, Date, and Time.
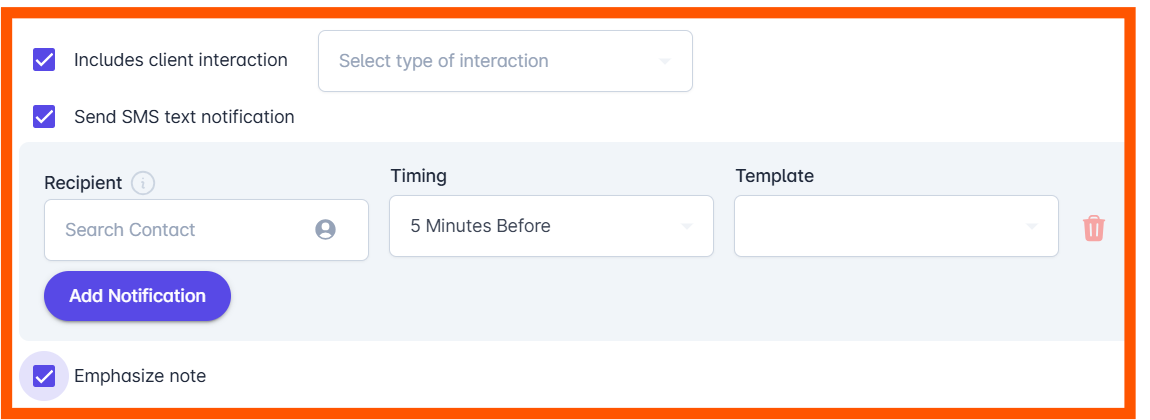
If applicable, check the boxes to:
Include Client Interaction (a box will appear to select the type of interaction)
Send SMS Text Notification (an Add Notification button will appear where you can add Recipients, Notification Timing, and a default or custom Notification Message Template)
Emphasize Note (adds a priority icon to the notification to signify importance)
In the text box, type the details of your note. You may also tag other users in the note by typing ‘@’ followed by their name. This will alert the tagged user via an in-app notification in Lollylaw and an automated email. In the bottom right-hand corner, you can select your language preference and click the Microphone symbol button to dictate your note instead of typing.
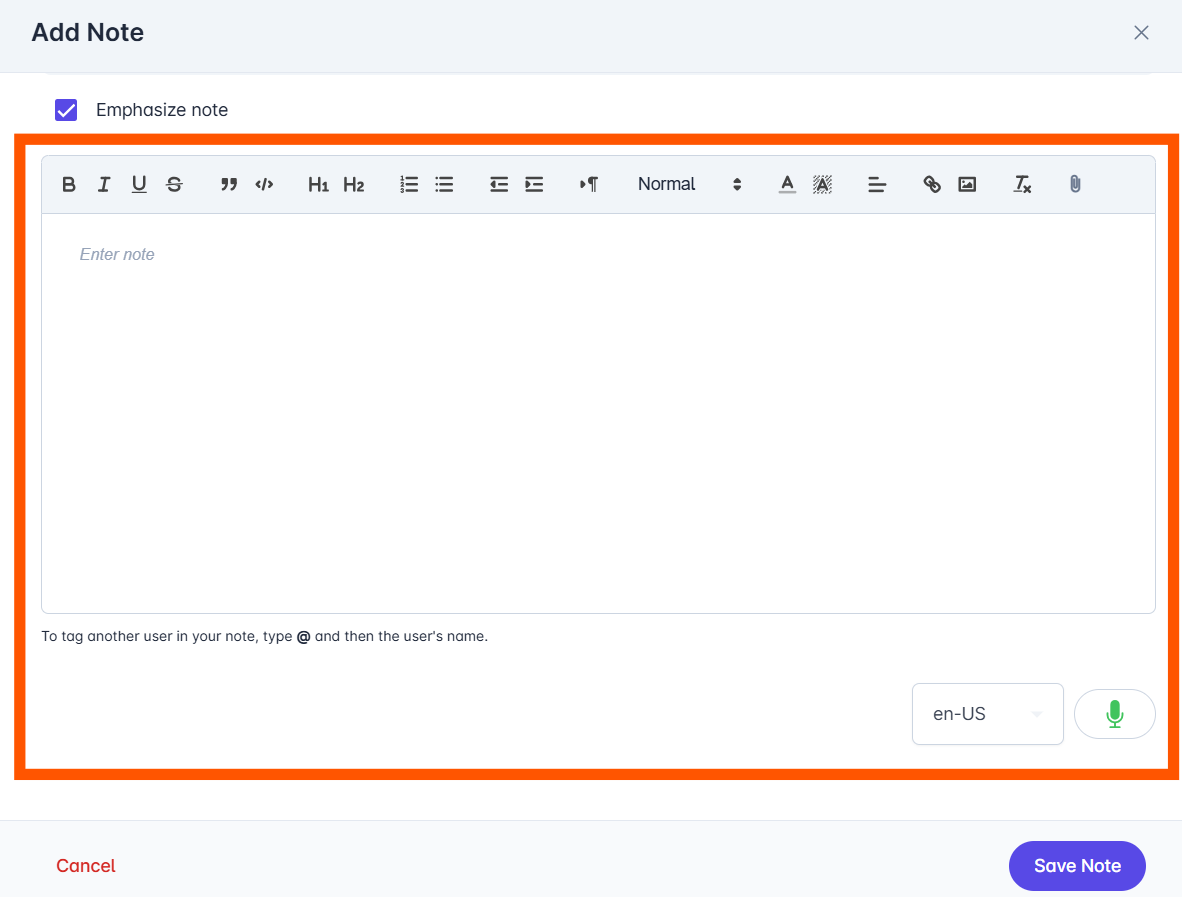
Click the Save Note button once finished. The note will be saved to the Journal tab within the related Contact and/or Matter you selected in Step 2.
Method 2: Create a Journal Note from the Recent Contact or Matter Menu Shortcut
Select the Contacts or Matters tab on the left side of your screen.
Click the menu on the right side of the Contact or Matter you would like to add a note to. You can filter and search for a specific Contact or Matter in the search bar at the top of the page.
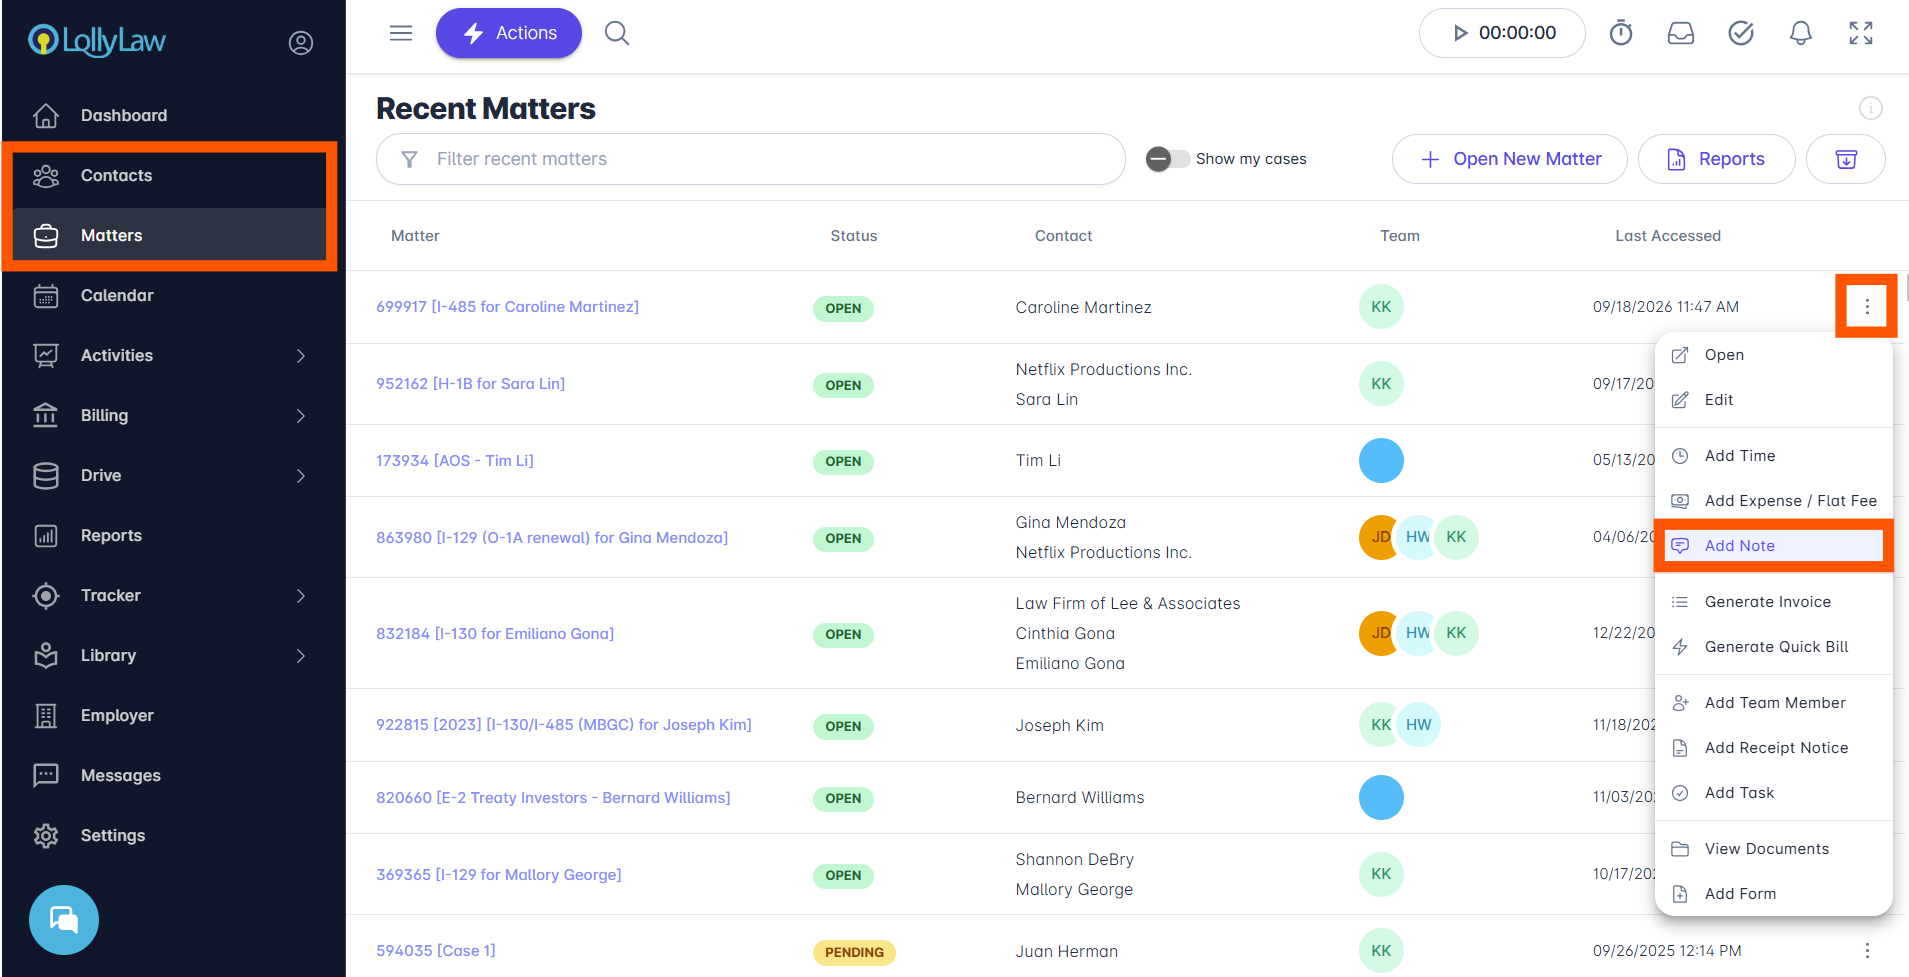
Similar to Method 1, an Add Note drawer will open. Fill in the Title (or keep the auto-generated title), related Contact, Activity Type, related Matter, Date and Time, check the applicable boxes, and type or dictate the note details in the text box.
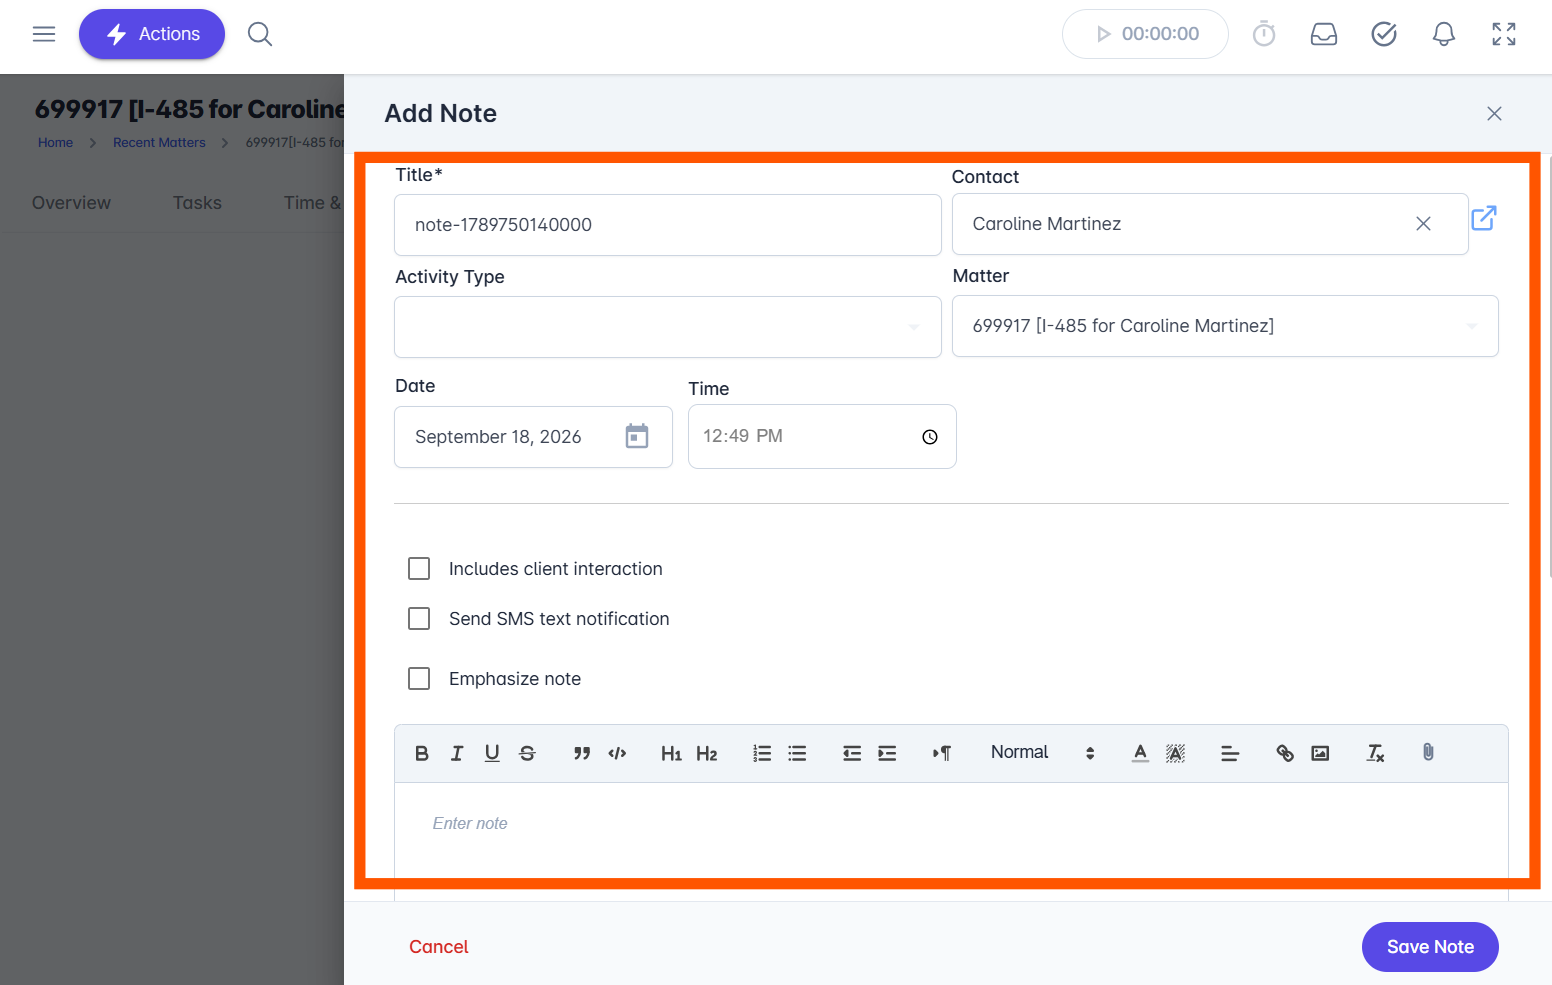
Click the Save Note button once finished. The note will be saved to the Journal tab within the related Contact and/or Matter you selected in Step 2.
Method 3: Create a Journal Note from the Journal tab within a Contact or Matter Record
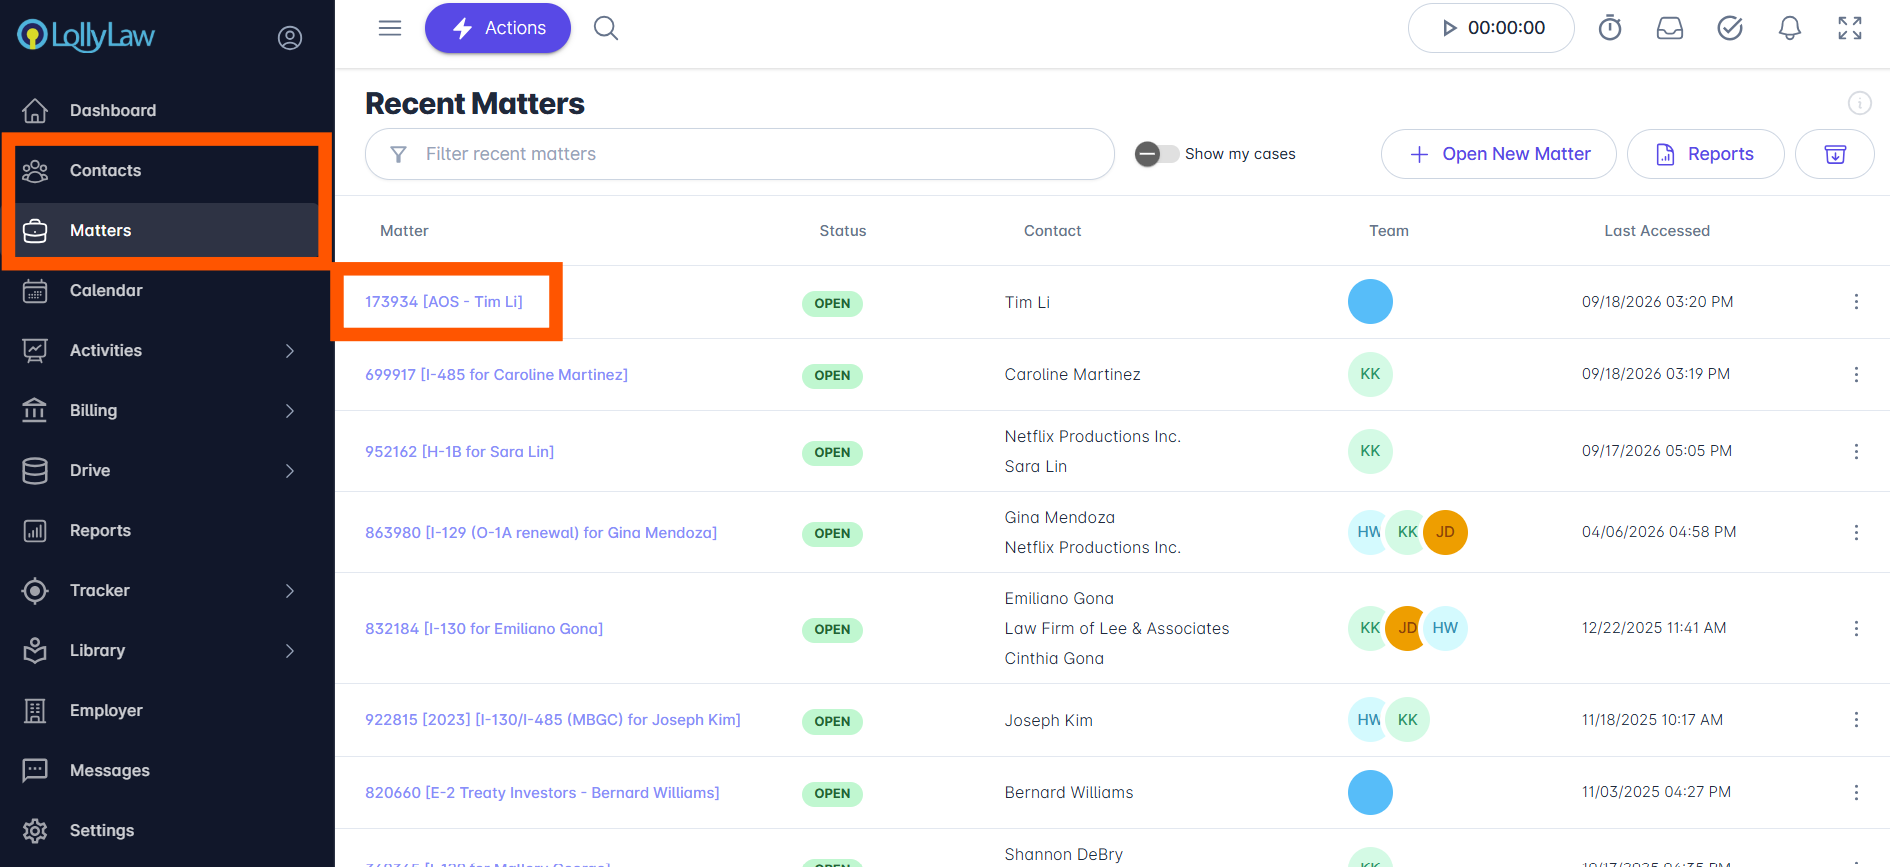
Select the Contacts or Matters tab on the left side of your screen.
Click the hyperlinked Contact or Matter name to open the record you would like to add a note to. You can also filter and search for a specific Contact or Matter in the search bar at the top of the page.
Once in the Contact or Matter record, click the Journal tab.
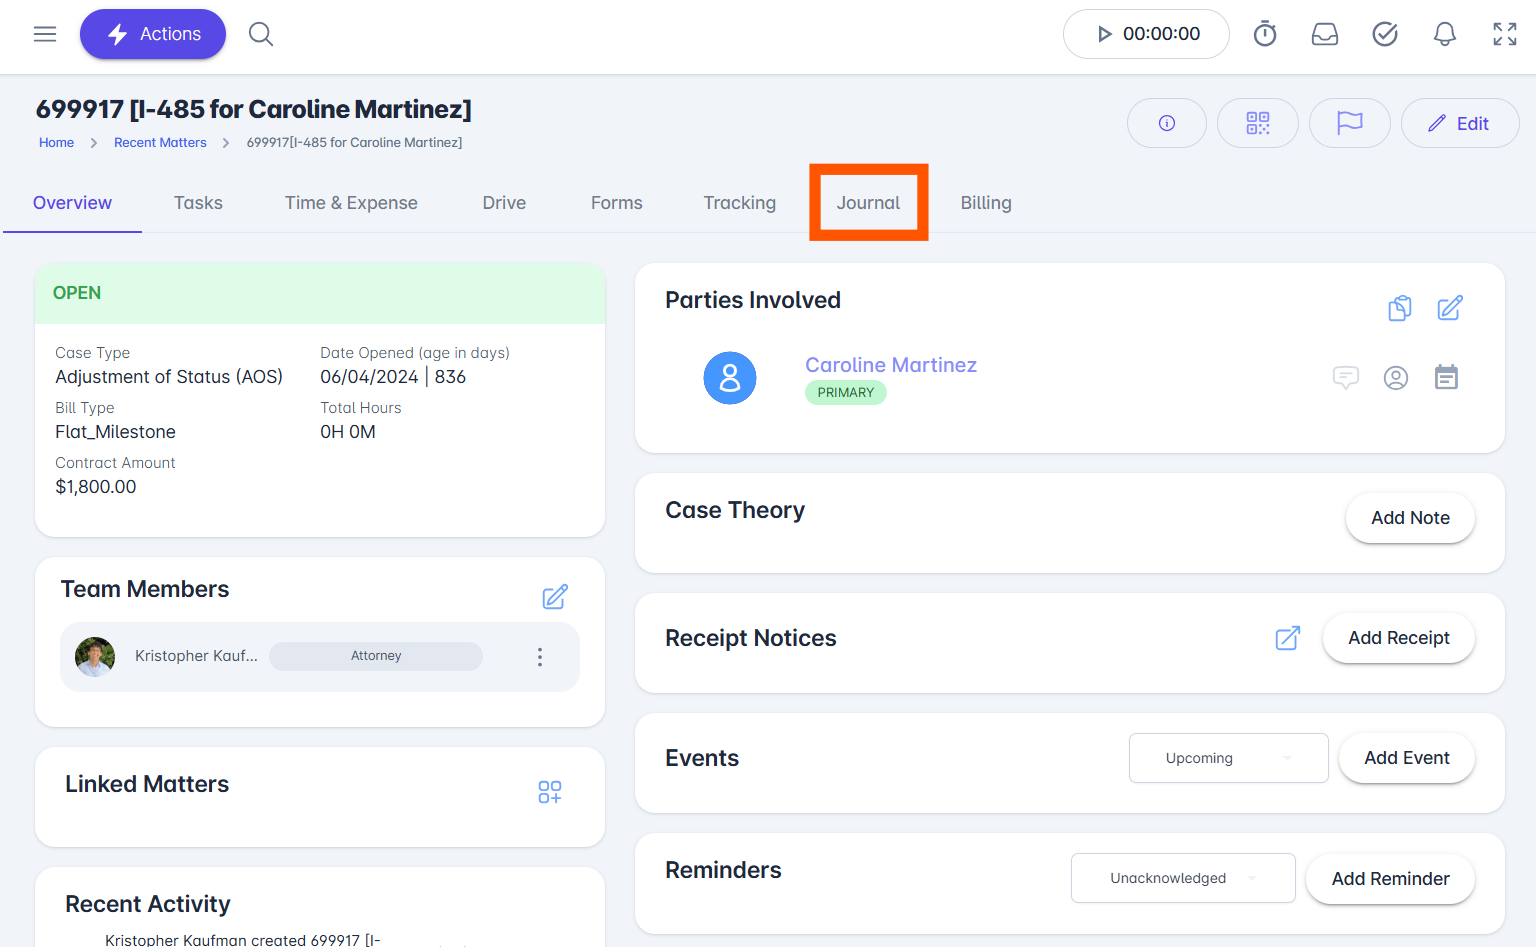
If the Contact or Matter record Journal is empty, choose the Add Note button to start a new entry.
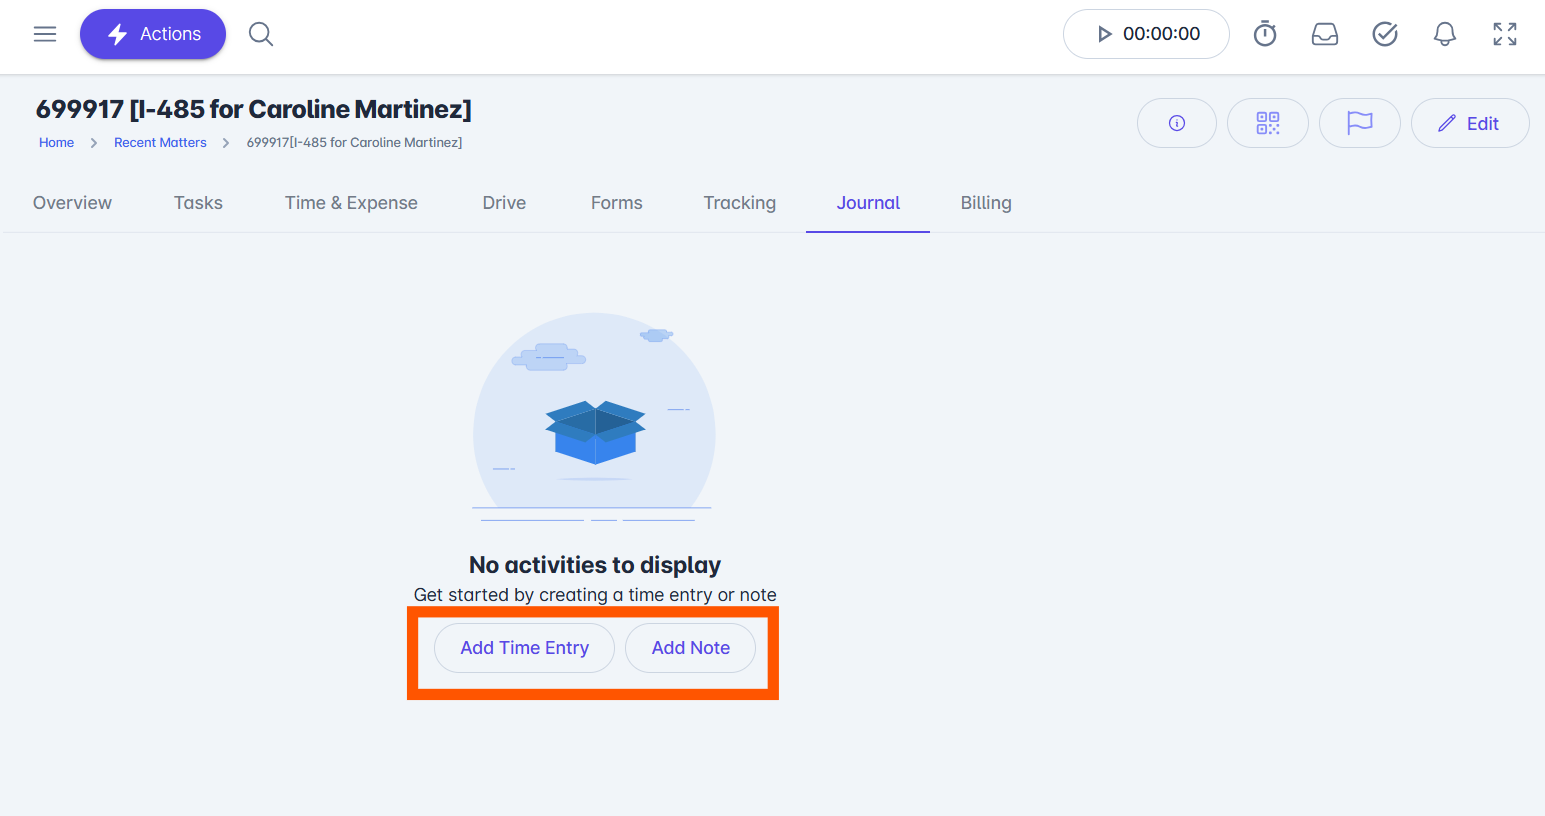
When you click Add Note, an Add Note drawer will open, similar to Method 1 & 2. Fill in the Title (or keep the auto-generated title), related Contact, Activity Type, related Matter, Date and Time, check the applicable boxes, and type or dictate the note details in the text box.
Click the Save Note button once finished. The note will be saved to the specific Contact or Matter’s Journal tab you selected in Step 2.
Managing Journal Entries
To manage Journal Entries:
Once a journal note is created, you will see it populate in the Journal tab within a Contact or Matter Record. Each note in the Journal is organized by entry date.
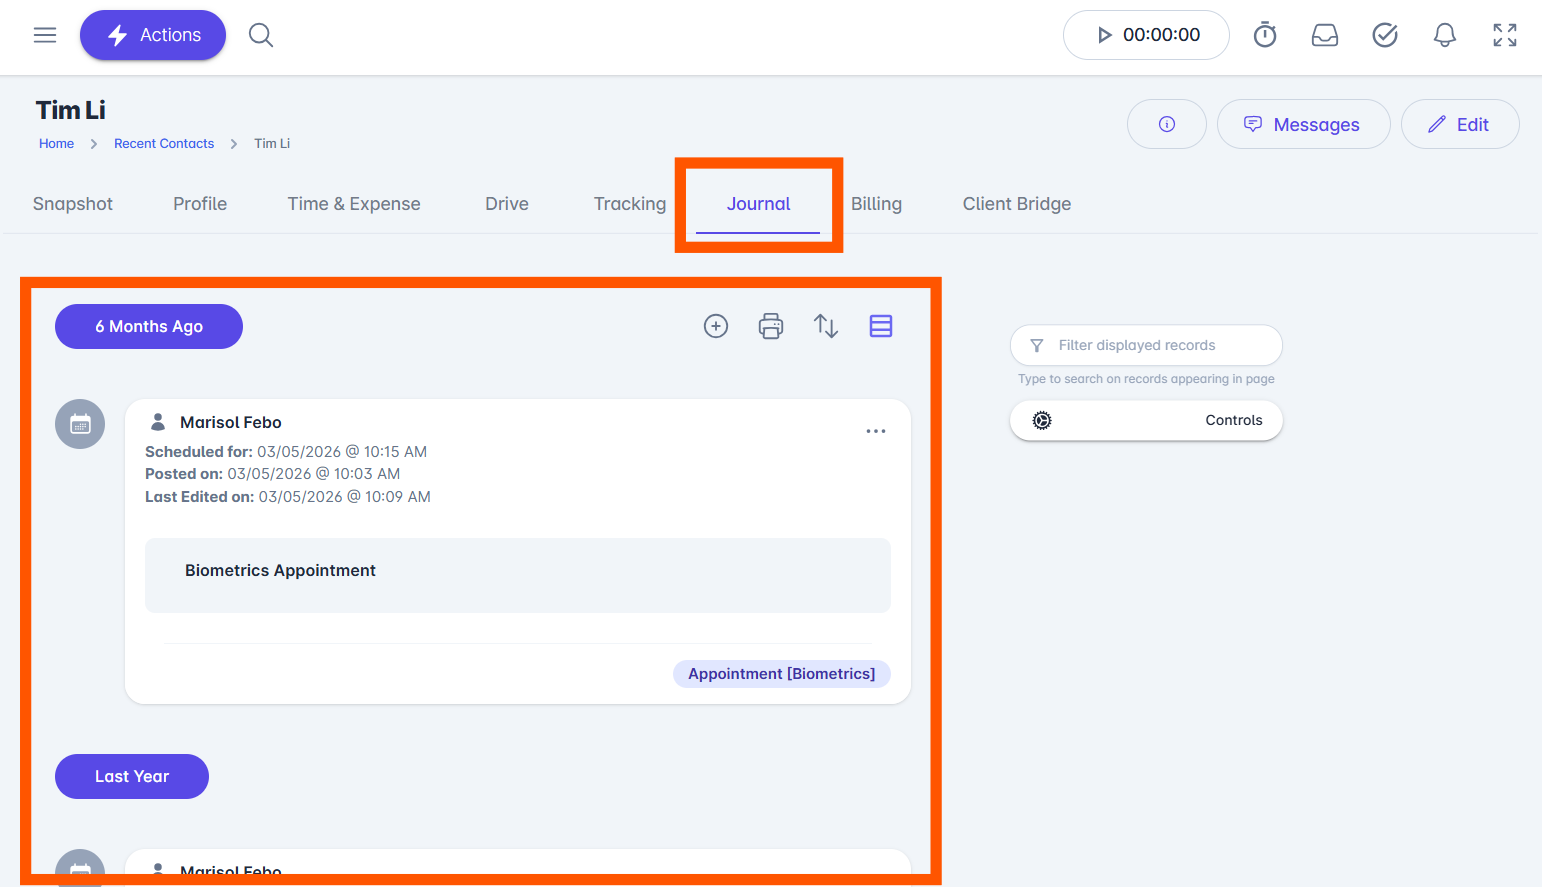
From this view, users can Add New Notes, Print the journal list, Reverse Order of the list, and switch the journal from a list view to a Table view.
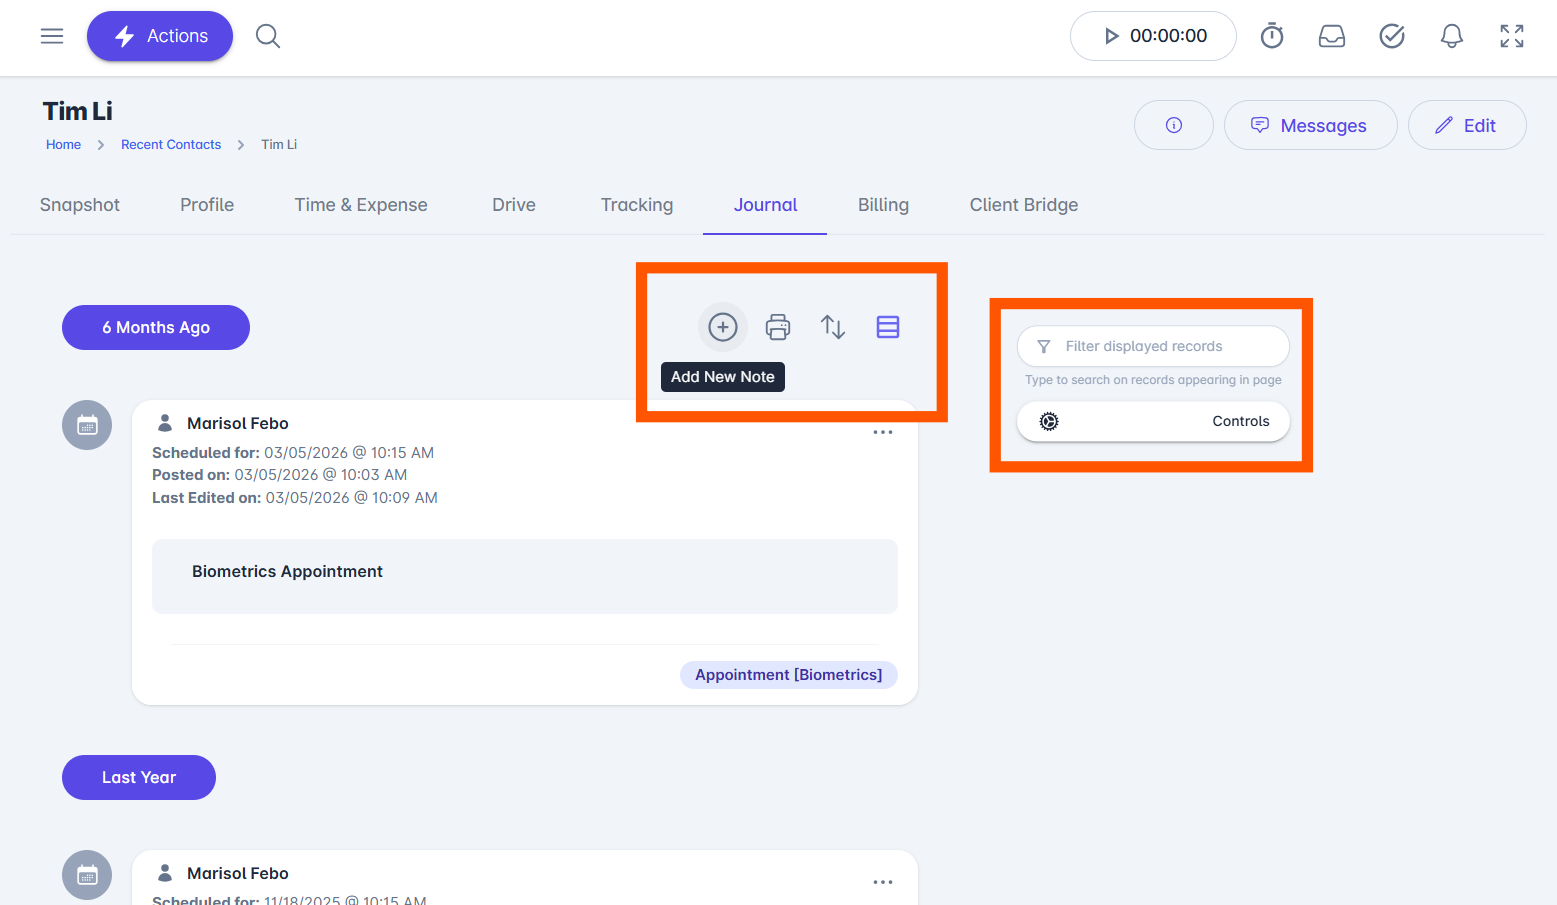
With each Contact or Matter Journal having more notes added over time, users can filter the Journal list to find specific notes.
If you need additional assistance, contact our support team at support@lollylaw.com.