
How to Manage Tasks Within a Matter
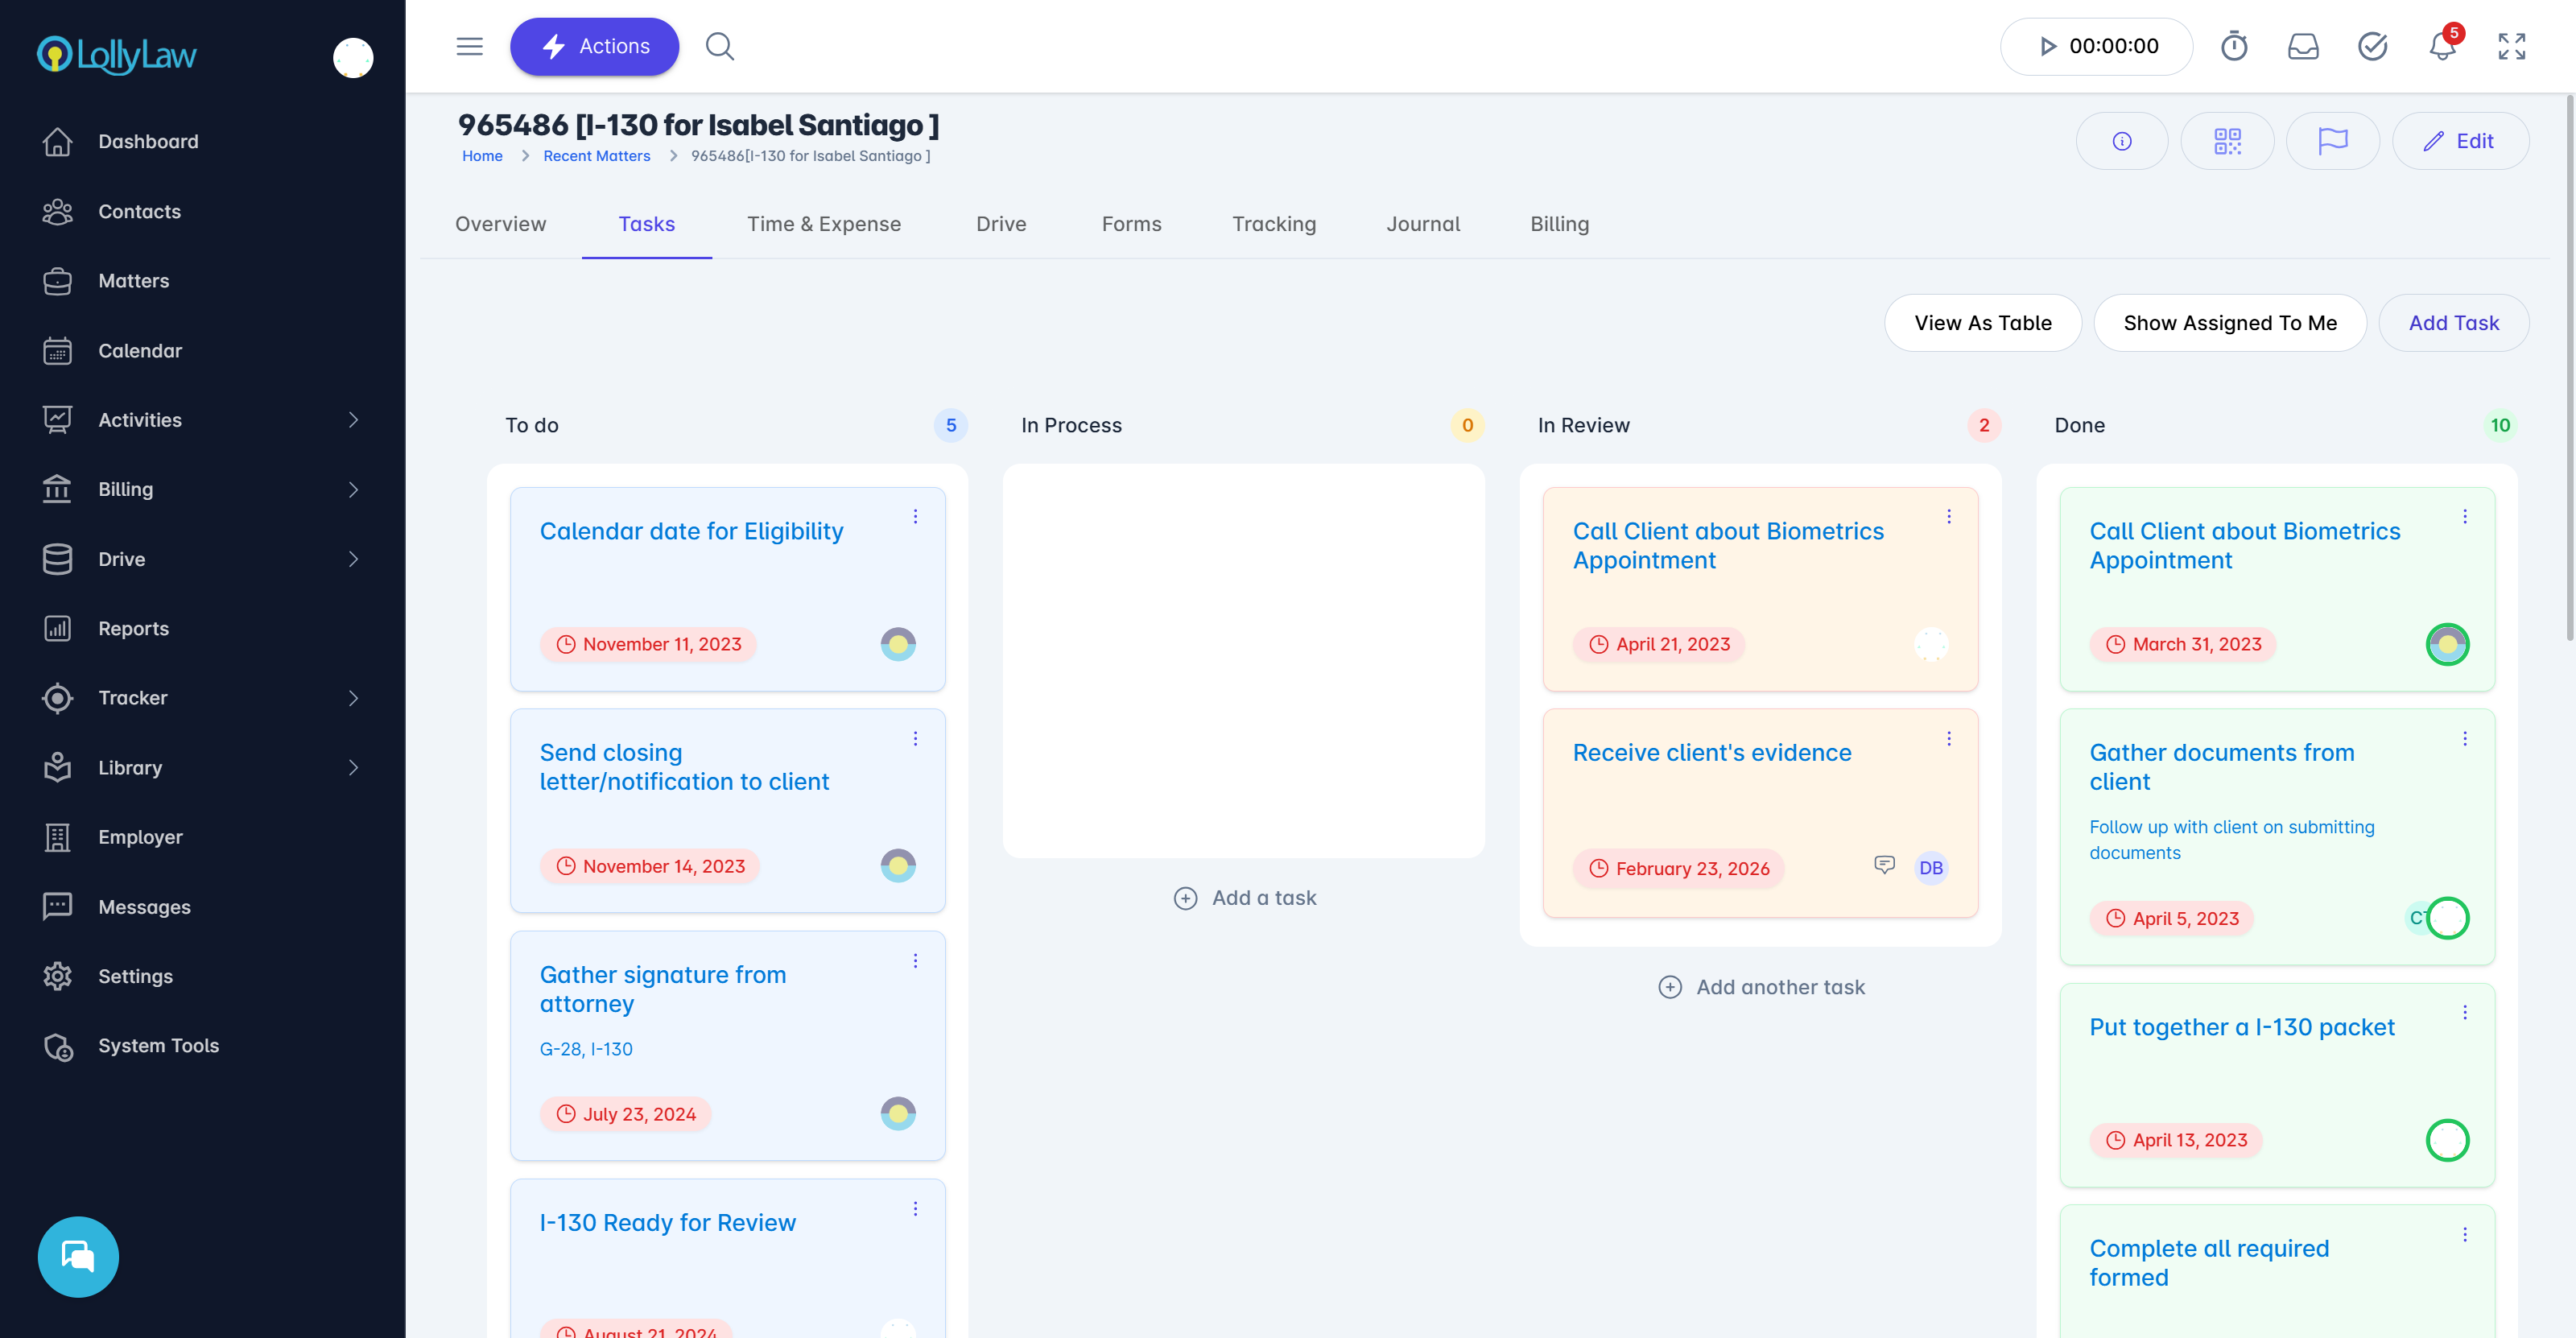
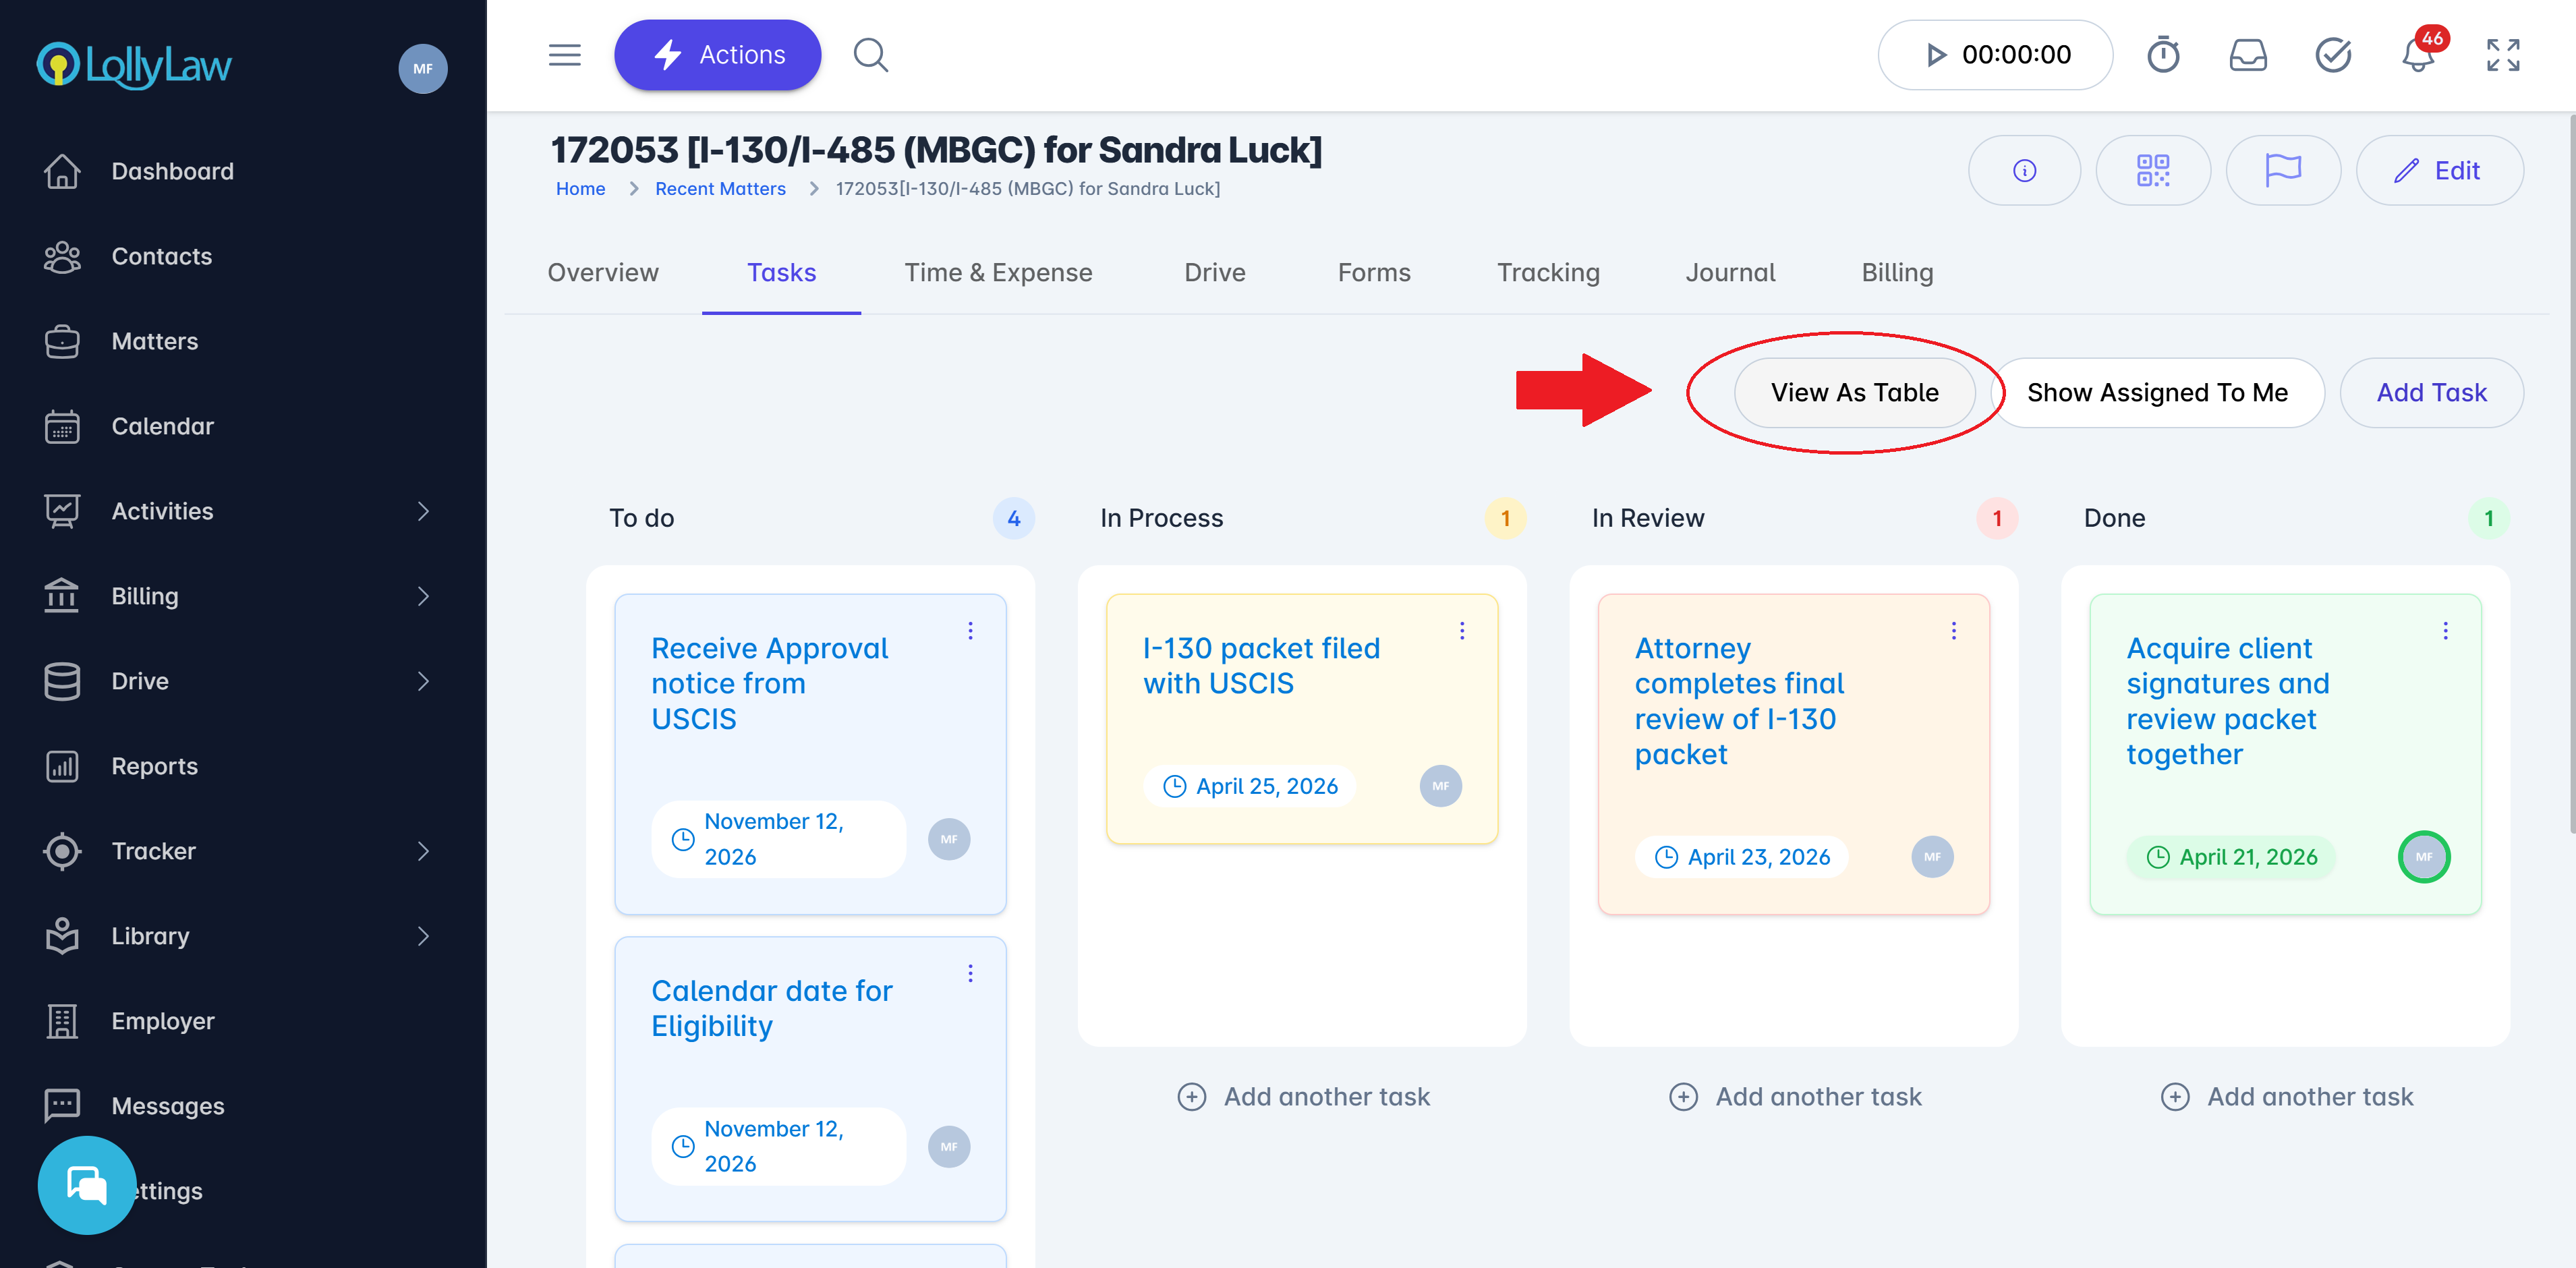
Open the matter record you're working on and navigate to the 'Tasks' tab. By default, your tasks will be displayed in the board format shown below. This allows you to drag and drop tasks from one status (such as to-do) to another (such as in review).
By selecting 'View as Table' you can view the tasks in a more traditional table format. In the table format, you will use the dropdown status menu to toggle the status of a specific task.
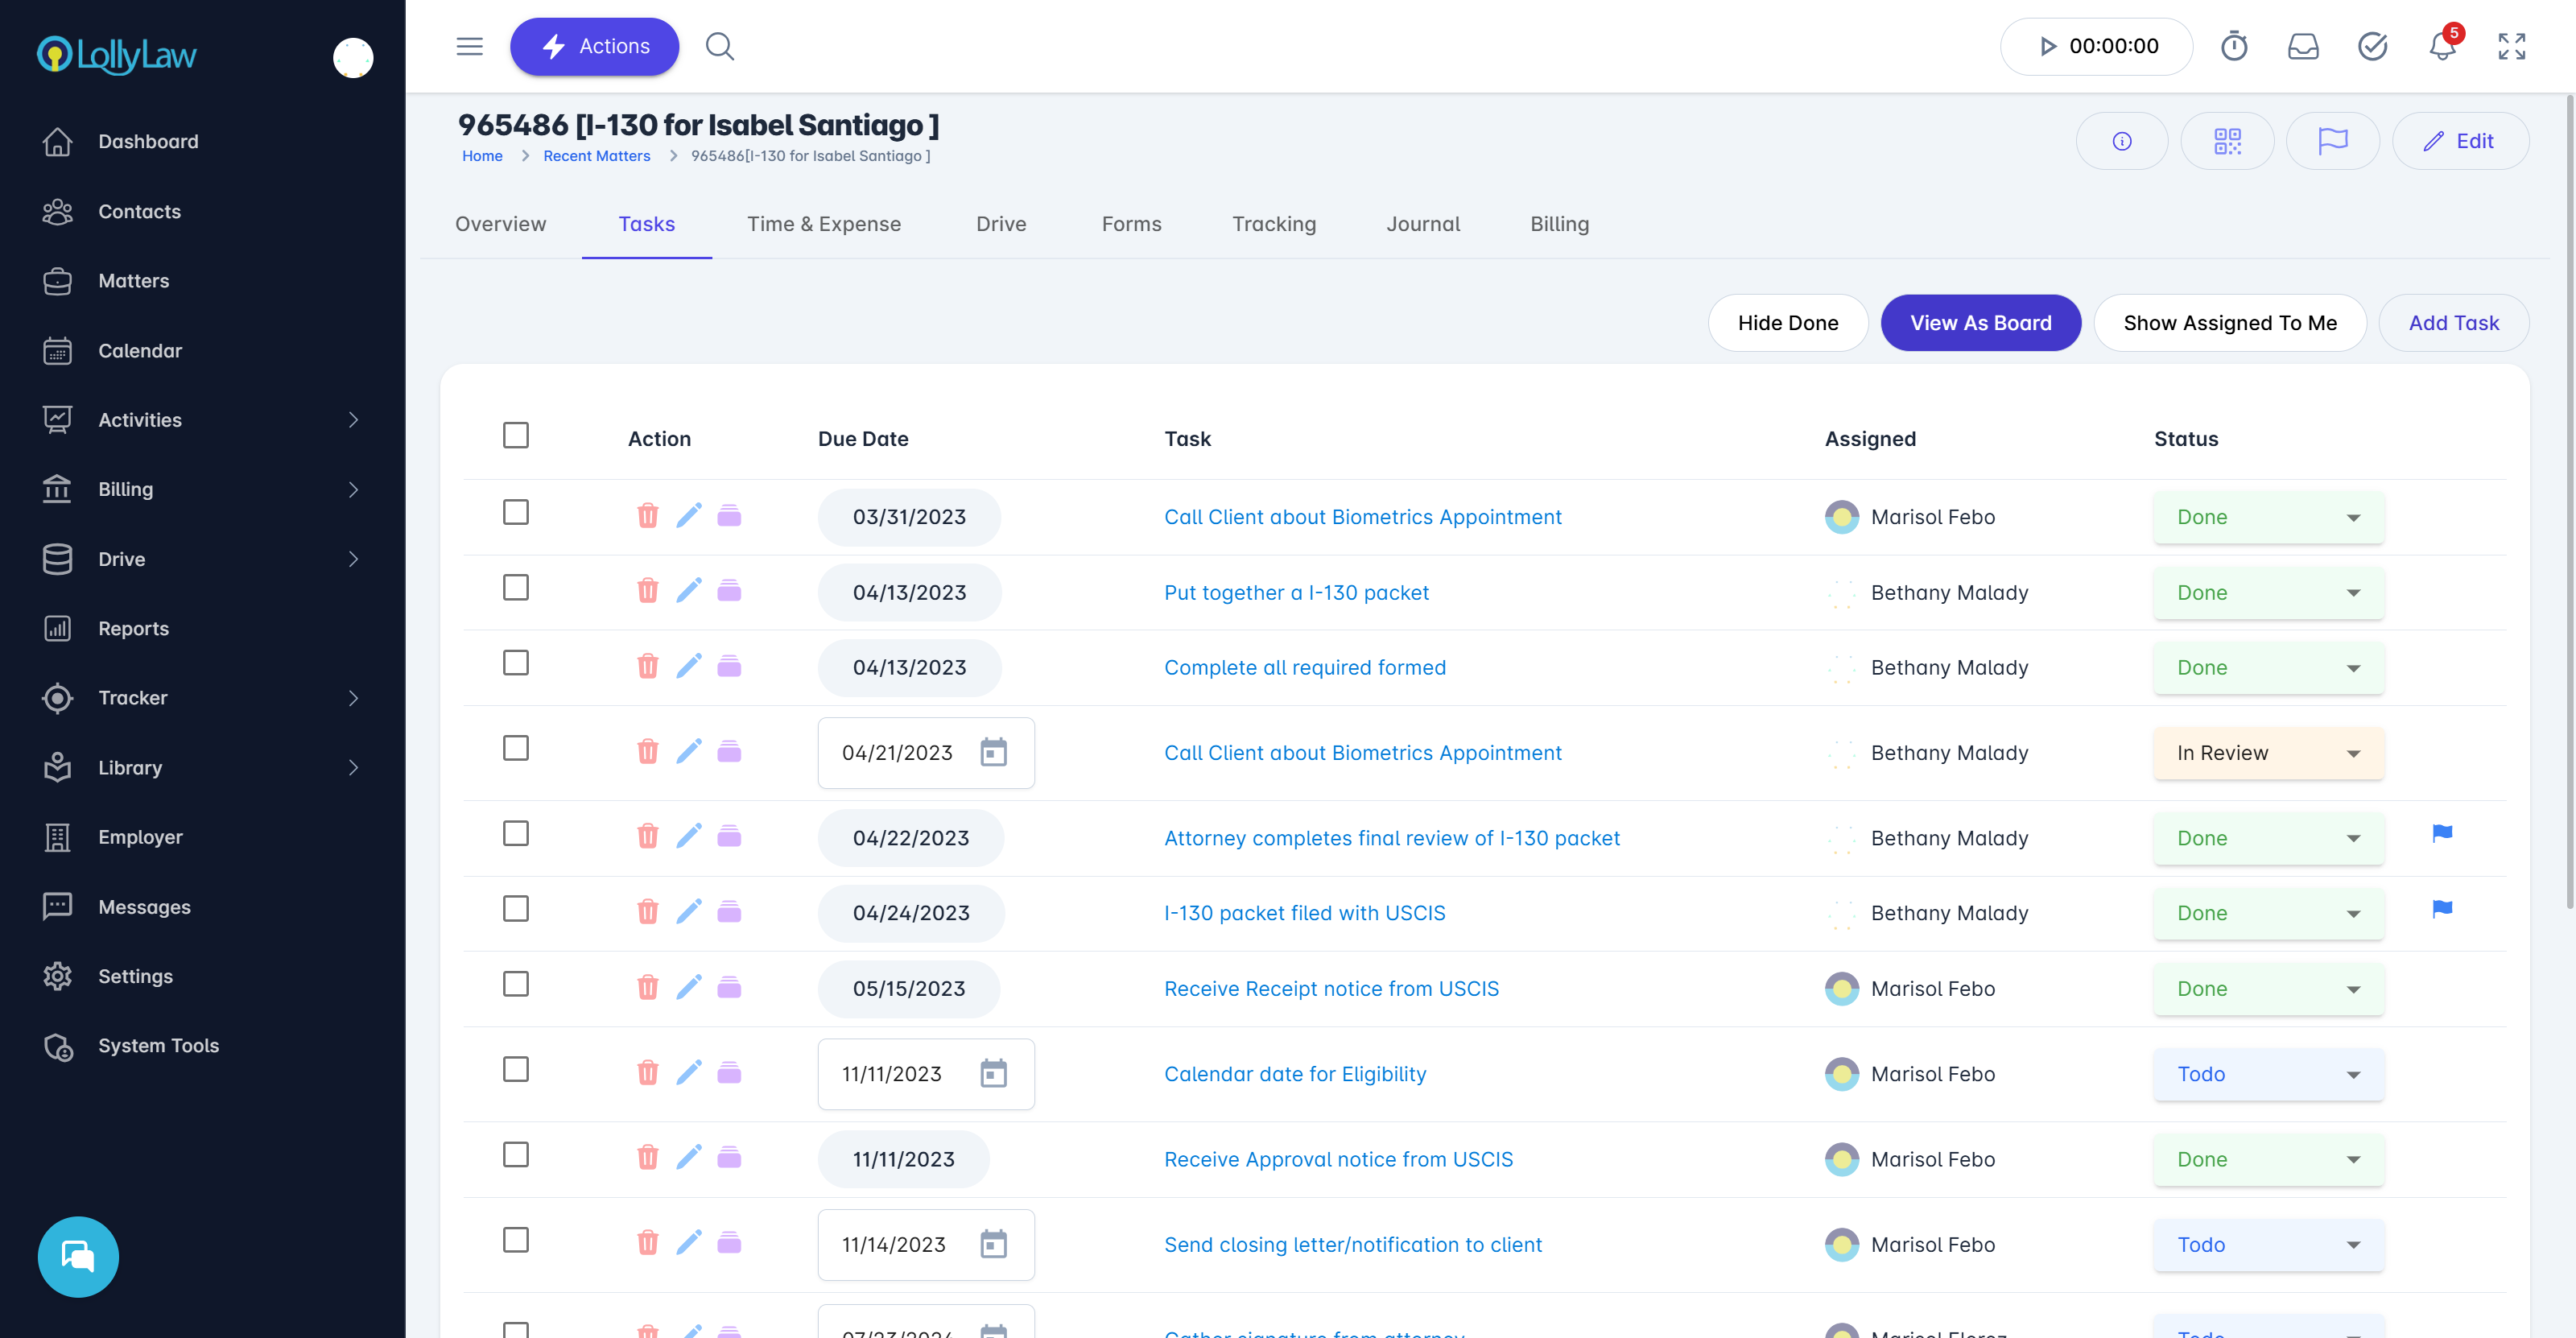
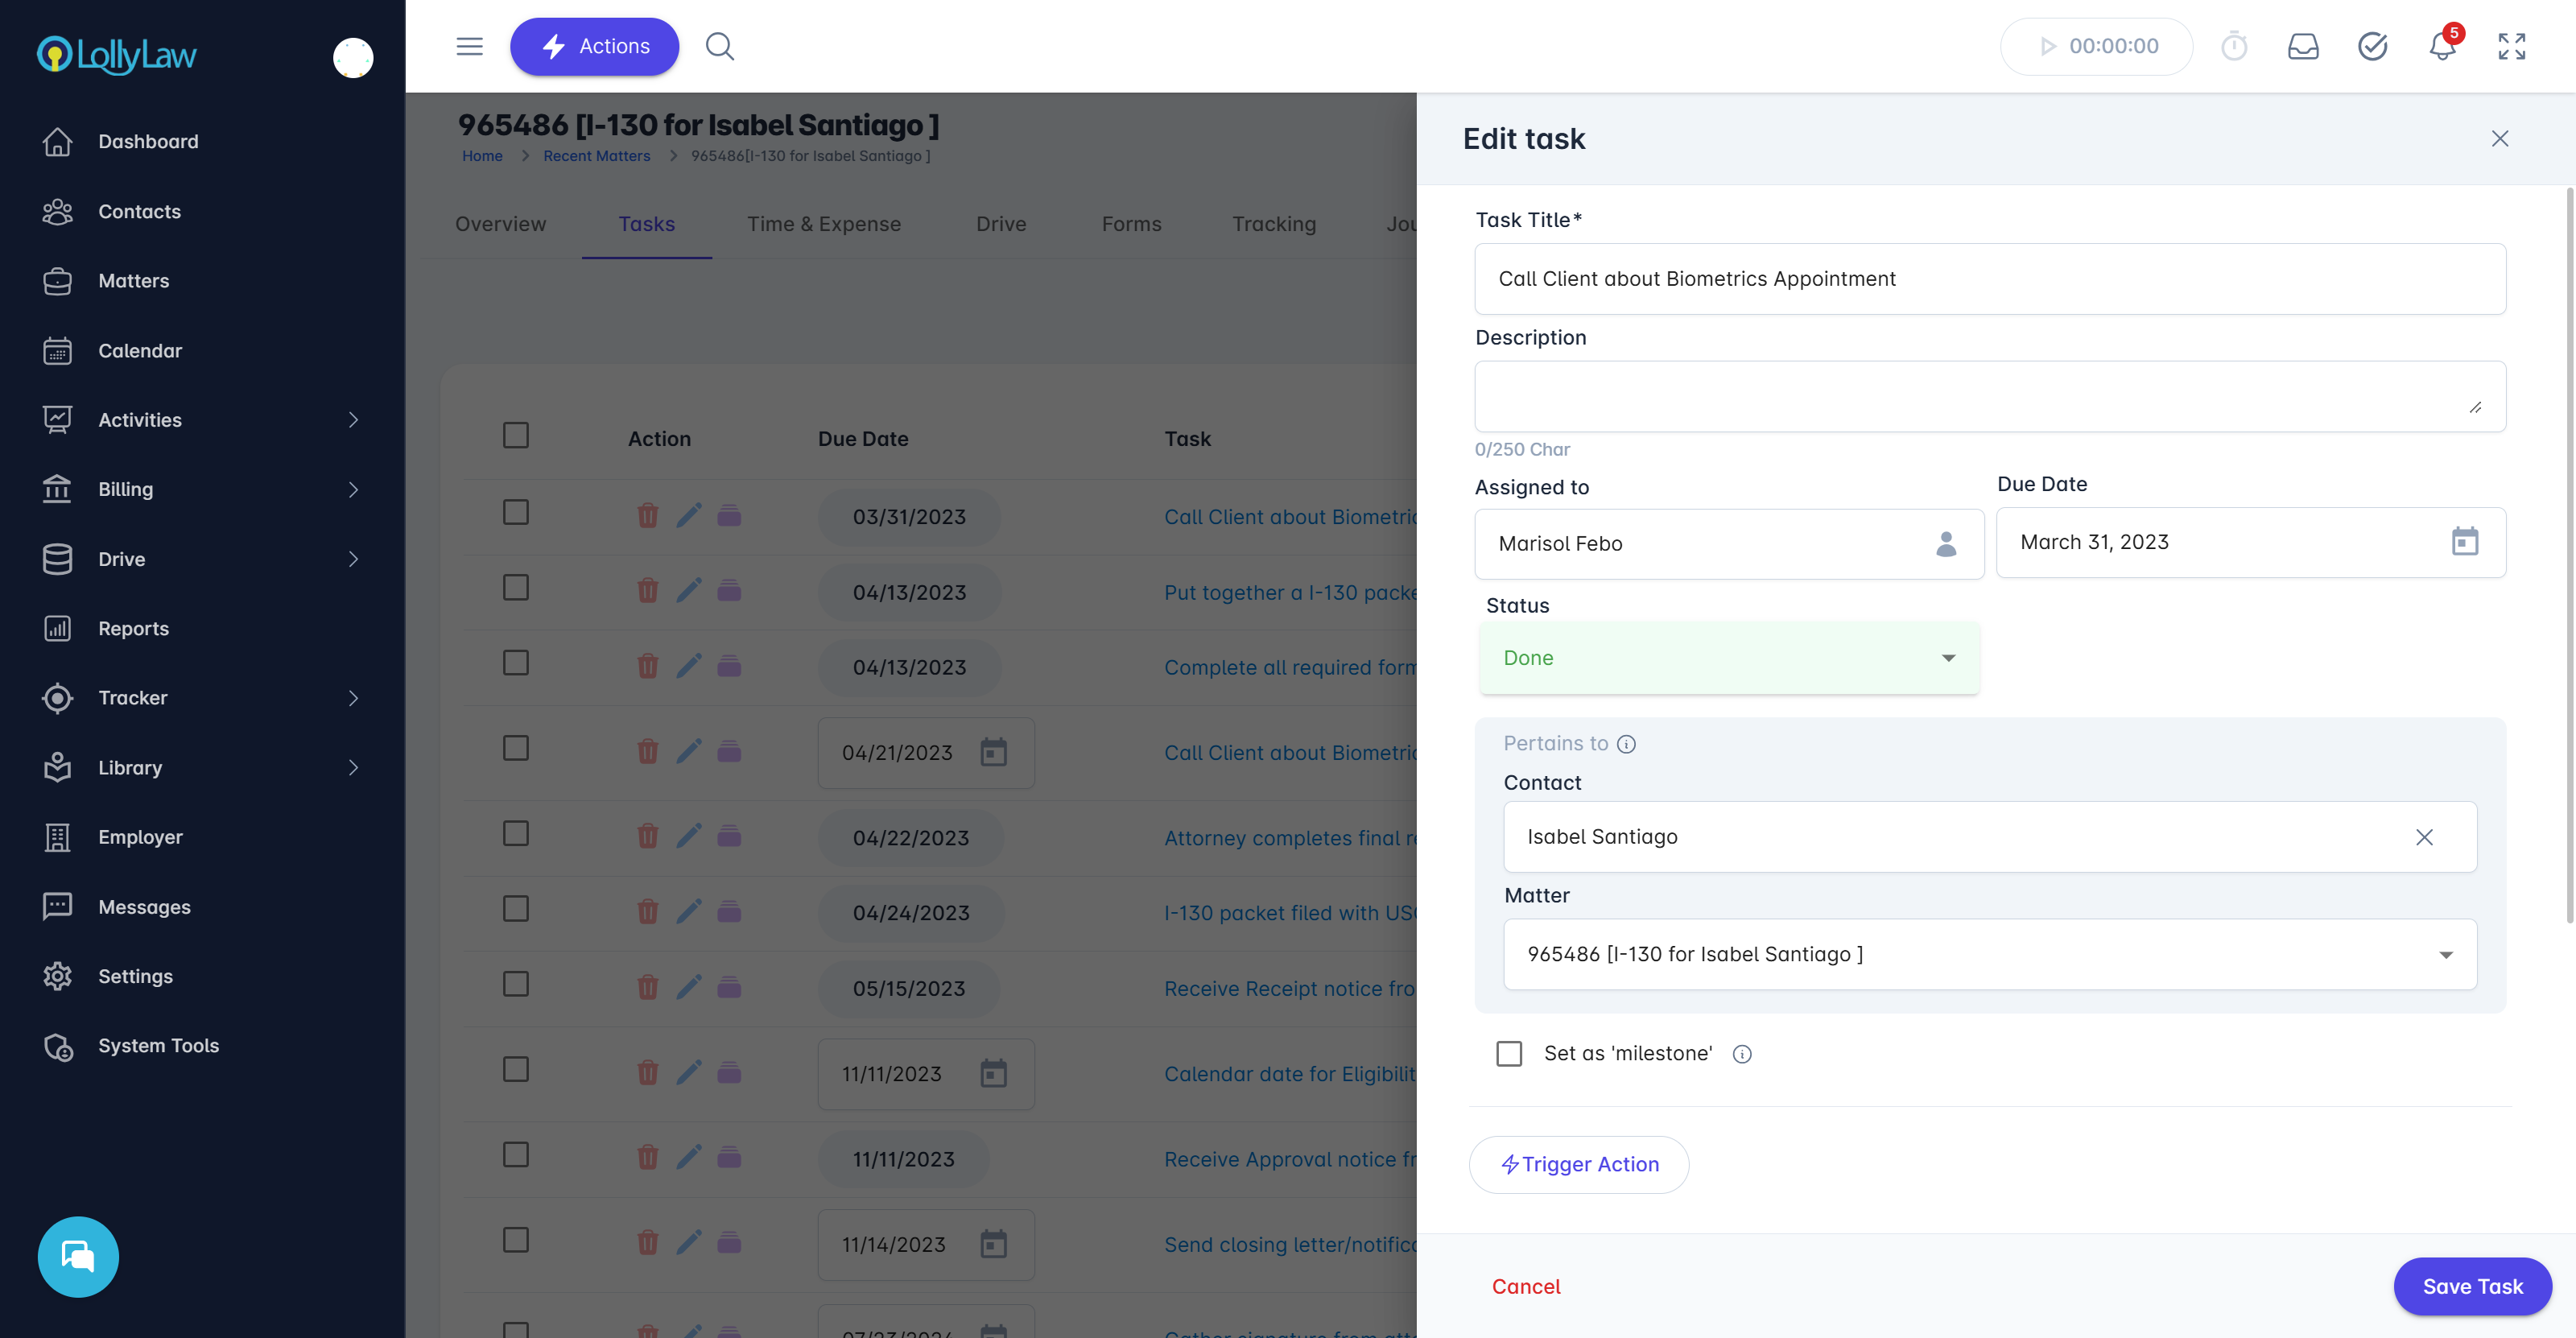
The status of the task is important for collaboration amongst the team in making sure that everybody is always on the same page about the next steps in a case. To edit a task, select the blue pencil next to the task you want to edit. A drawer will open where you can update the user assigned to the task, provide a due date, and update the description.
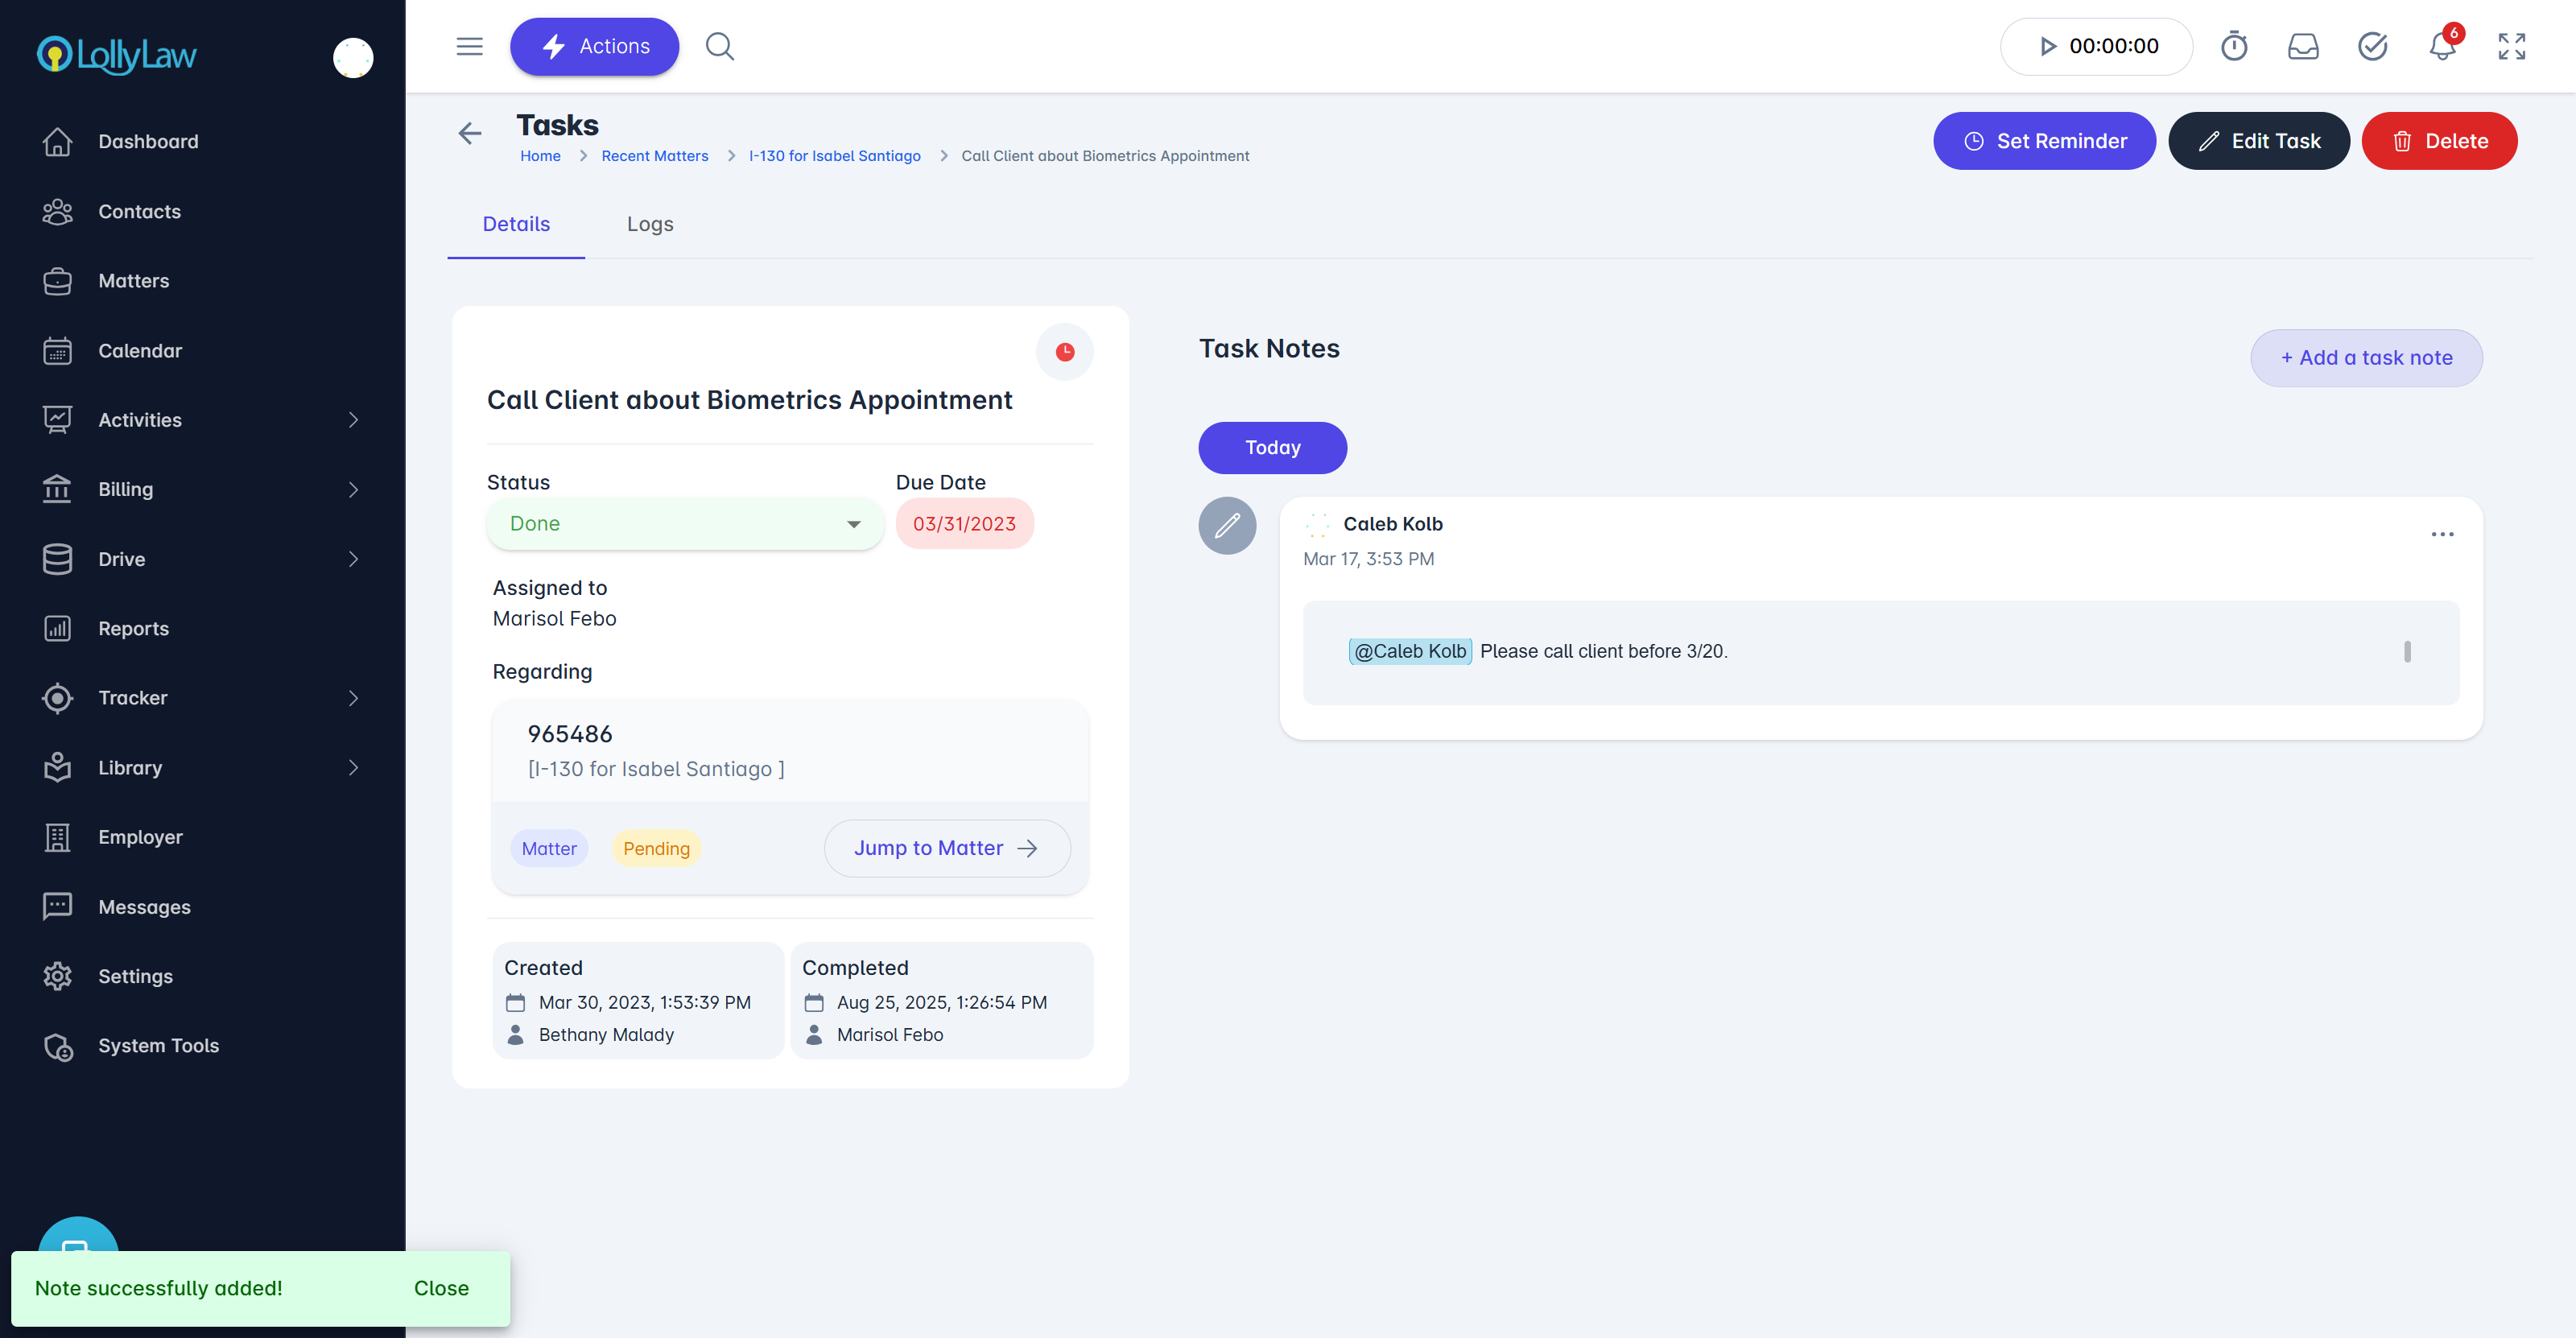
If you select a specific task, LollyLaw will bring you to the Task Details section for this task where you can collaborate with your coworkers regarding the status of the task.
Editing Tasks in Bulk
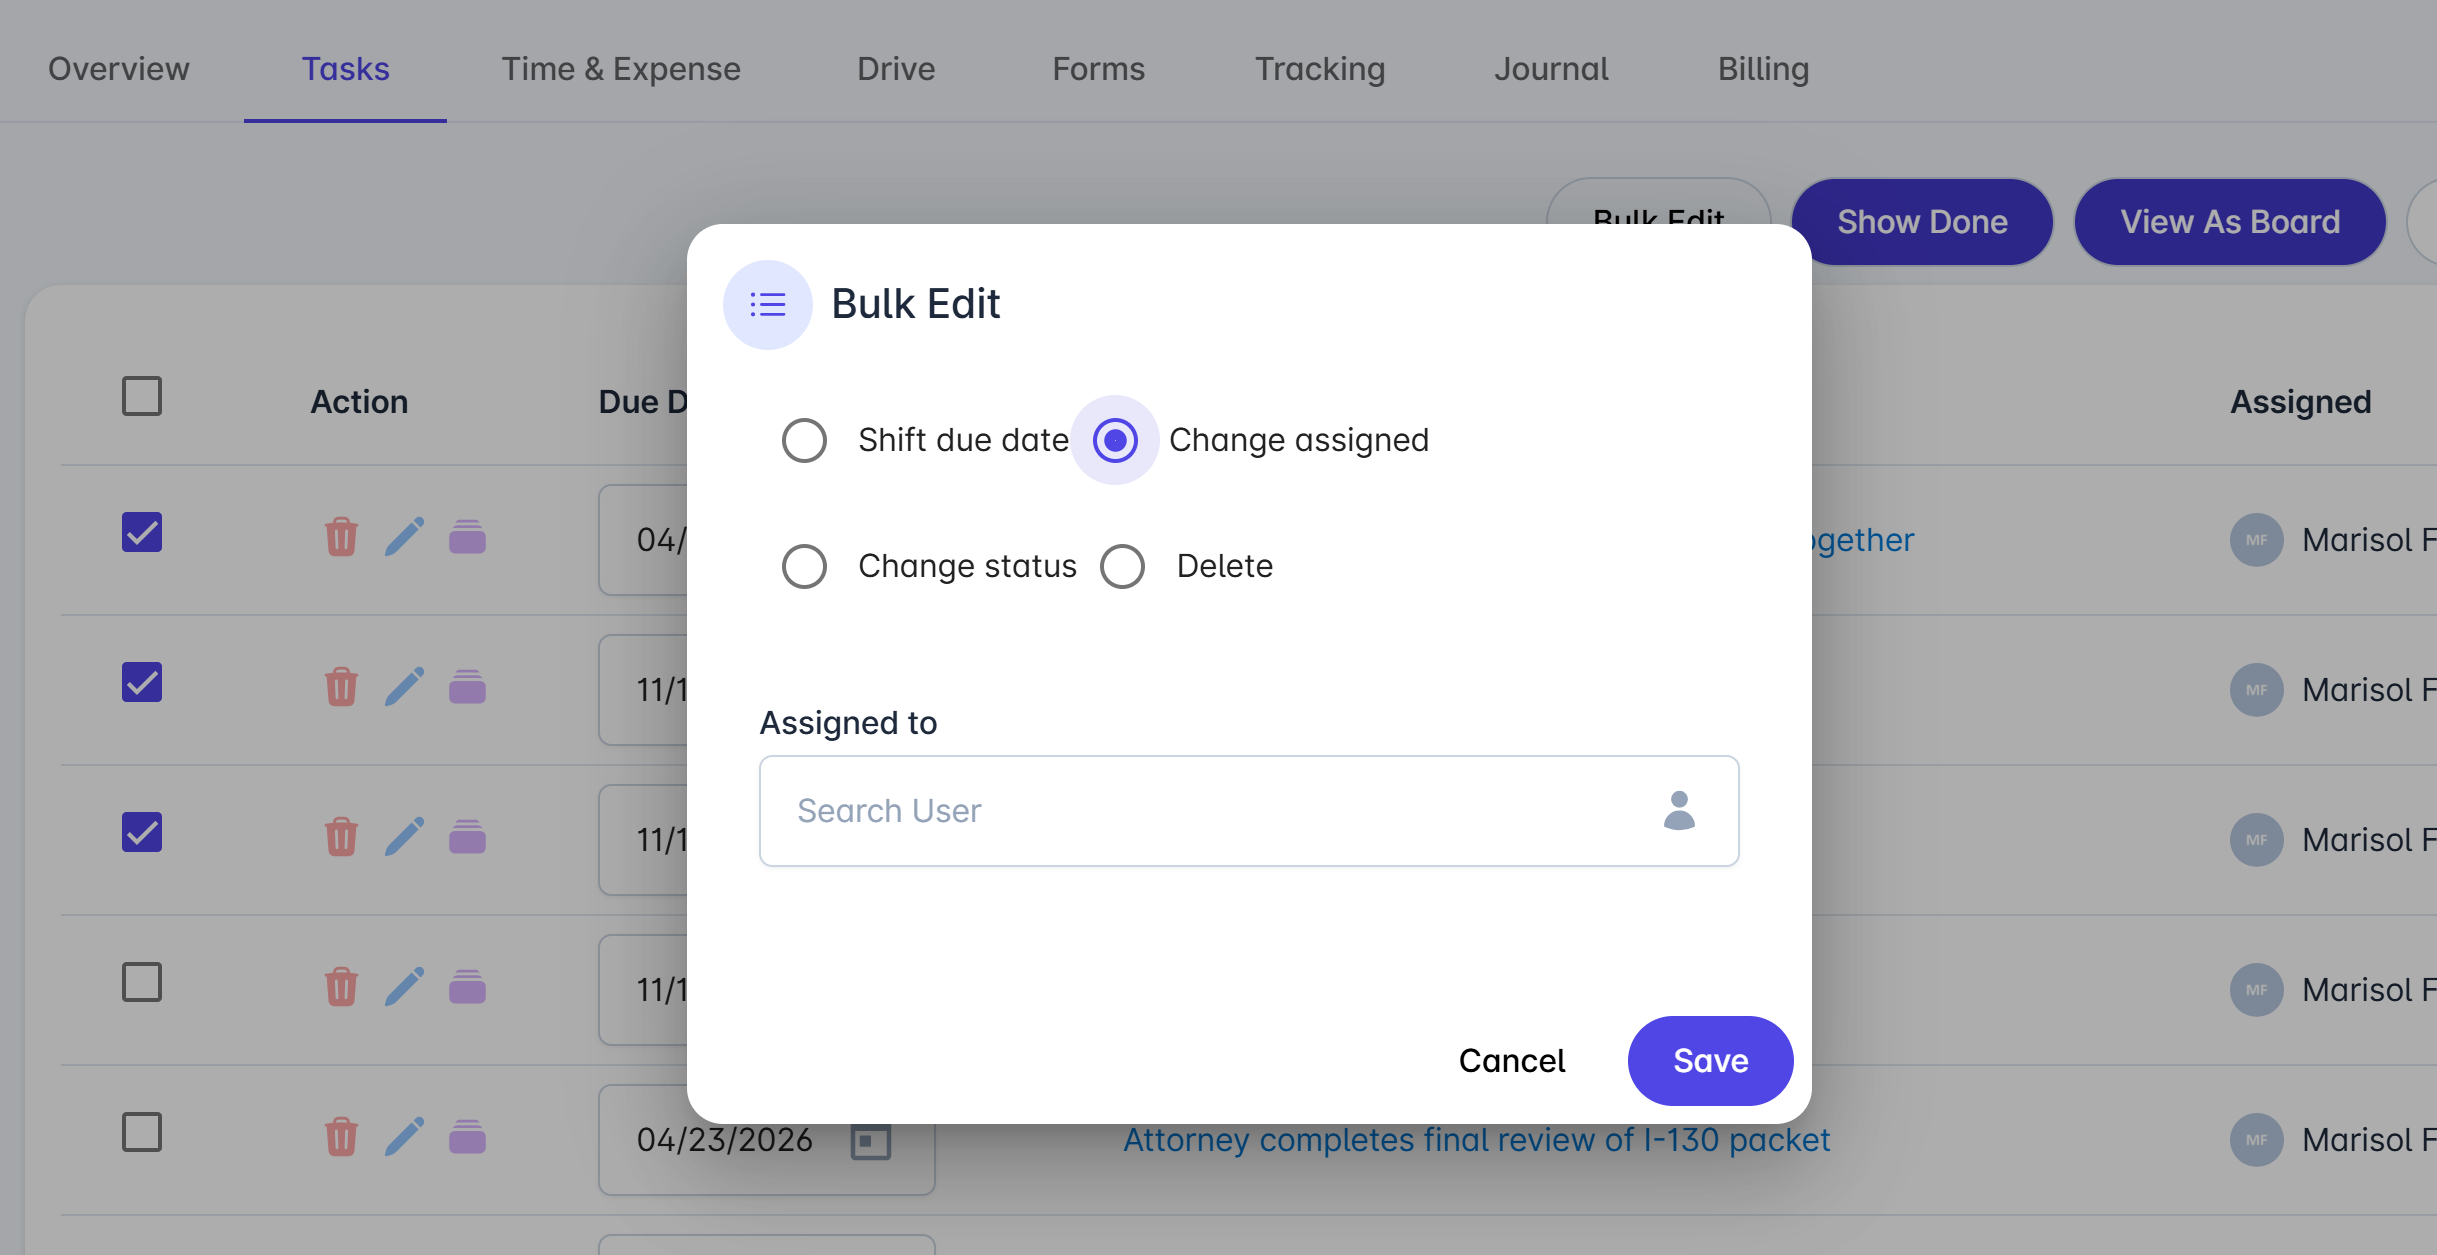
Tasks can easily be edited in bulk. This function will allow you to shift the due date, change the user assigned, change the status, or delete tasks.
Go to the matter's Tasks tab
Select View as Table (if not already in table view)
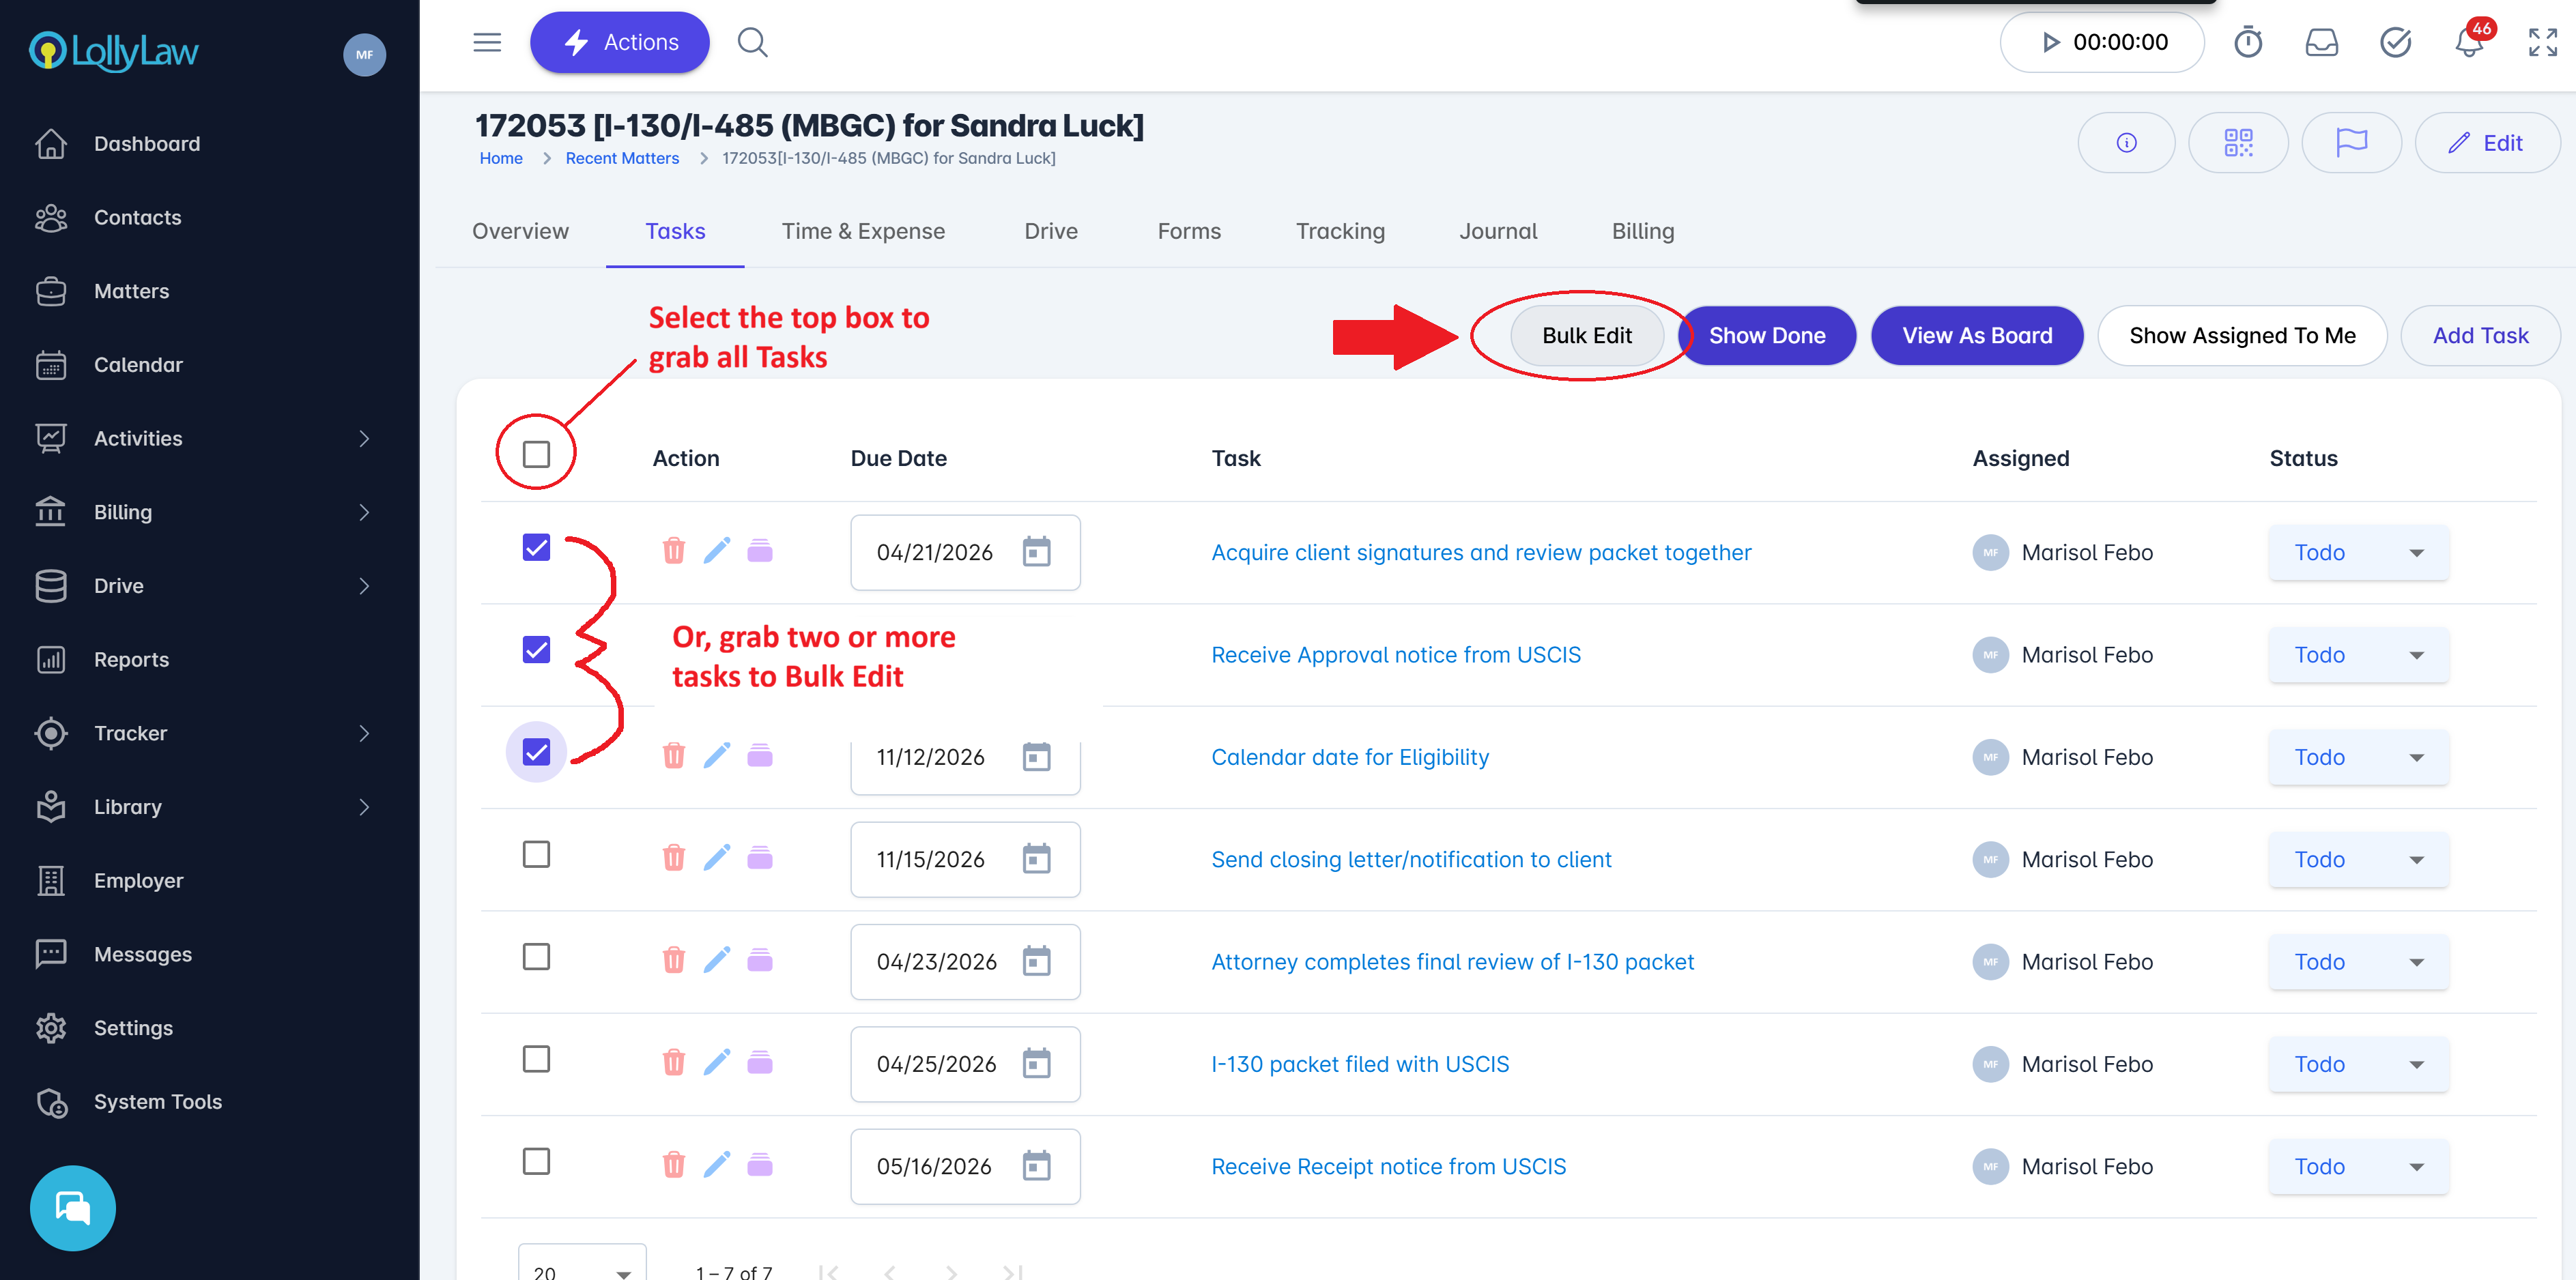
Select the box in the top left corner to grab all tasks, or, grab two or more tasks. This will reveal the Bulk Edit button.
Select Bulk Edit
Select the desired option
Click Save
Creating New Tasks
To create a new task in LollyLaw, please follow these steps:
Click the 'Create New' button at the top of LollyLaw and select 'Add Task'.
A pop up window will appear where you can enter the task details, including the task title, the user assigned, due date and time, and the contact or matter this task pertains to.
Click 'Save' to finish creating the task.
Saved tasks will appear under the 'Tasks' tab of the matter it pertains to. Additionally, users can view all tasks across matters under Schedule > Tasks.