The Zoom integration allows your firm to schedule, launch, and track events with Zoom meetings directly from within LollyLaw. Before you begin, please note that you will need a Zoom account to proceed and that only Administrators with privileges to update account settings can enable integrations within your LollyLaw account.
Step 1: Navigate to Add-Ons
Log in to LollyLaw with an Admin account.
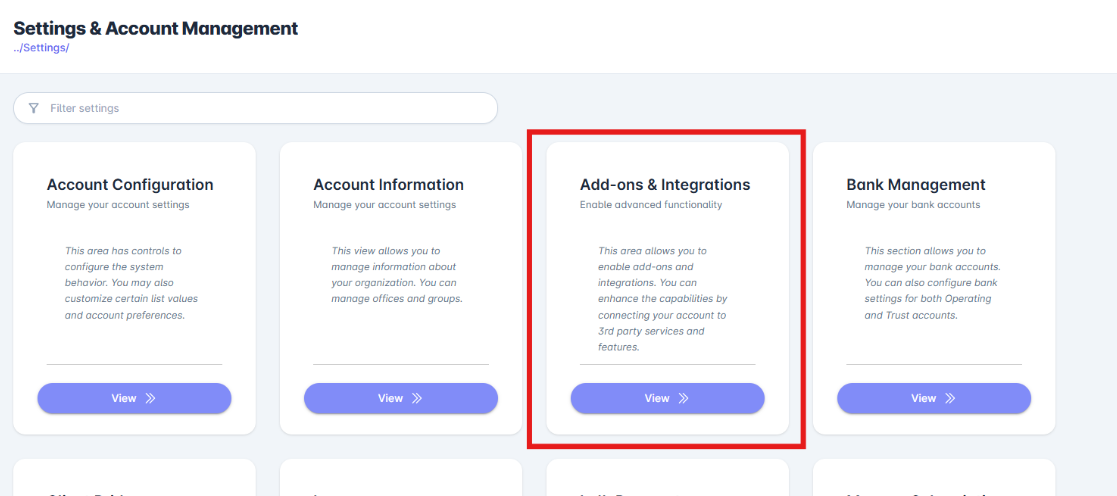
From the left menu, go to Settings.
Click on Add-Ons.
This section displays available app integrations and new modules.
Step 2: Locate the Zoom Integration
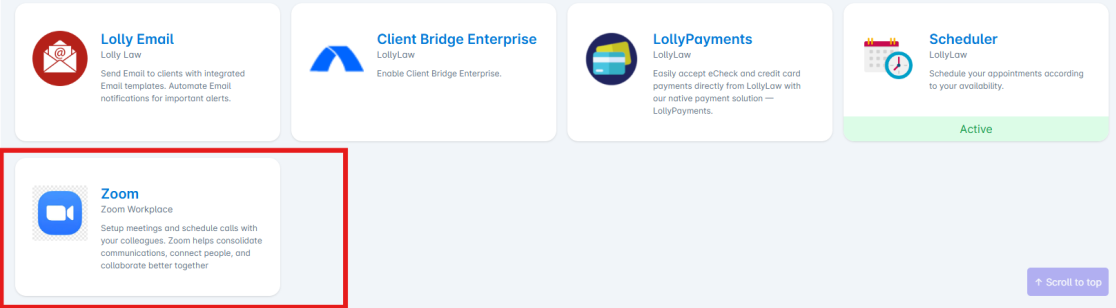
In the Add-Ons list, find the Zoom integration.
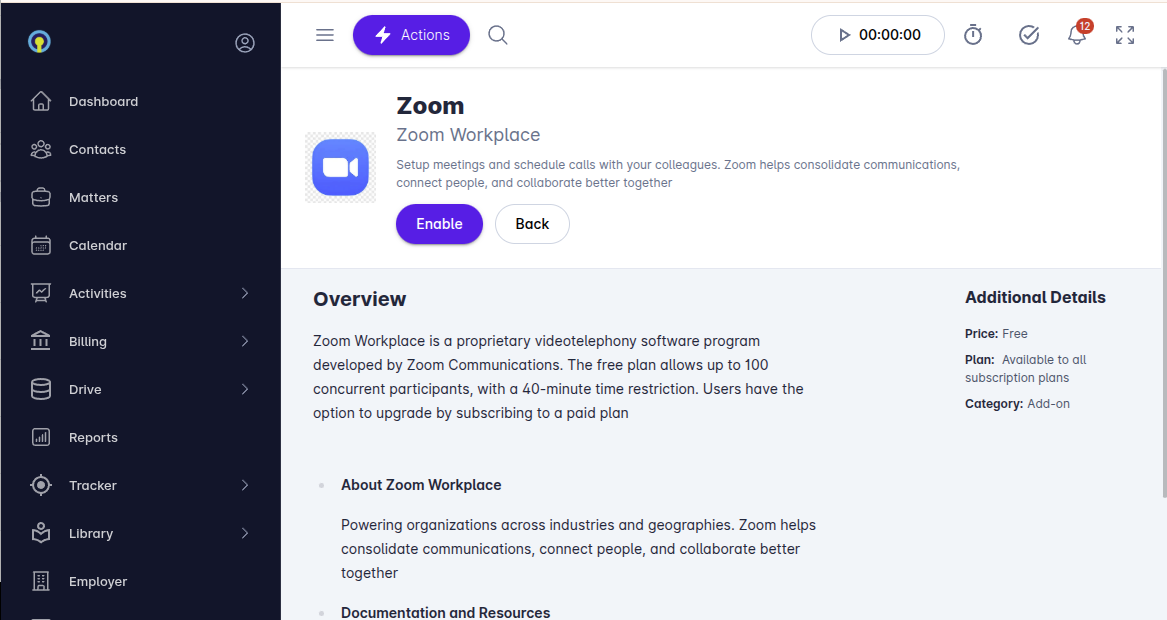
Click on the Zoom tile to open its details.
Step 3: Enable Zoom
Click the Enable button.
You will be redirected to Zoom’s sign-in page.
Log in with your Administrator Zoom account (the one your law firm uses for meetings).
Step 4: Grant Permissions
Review the requested permissions.
These permissions allow LollyLaw to connect to Zoom for scheduling and meeting management.
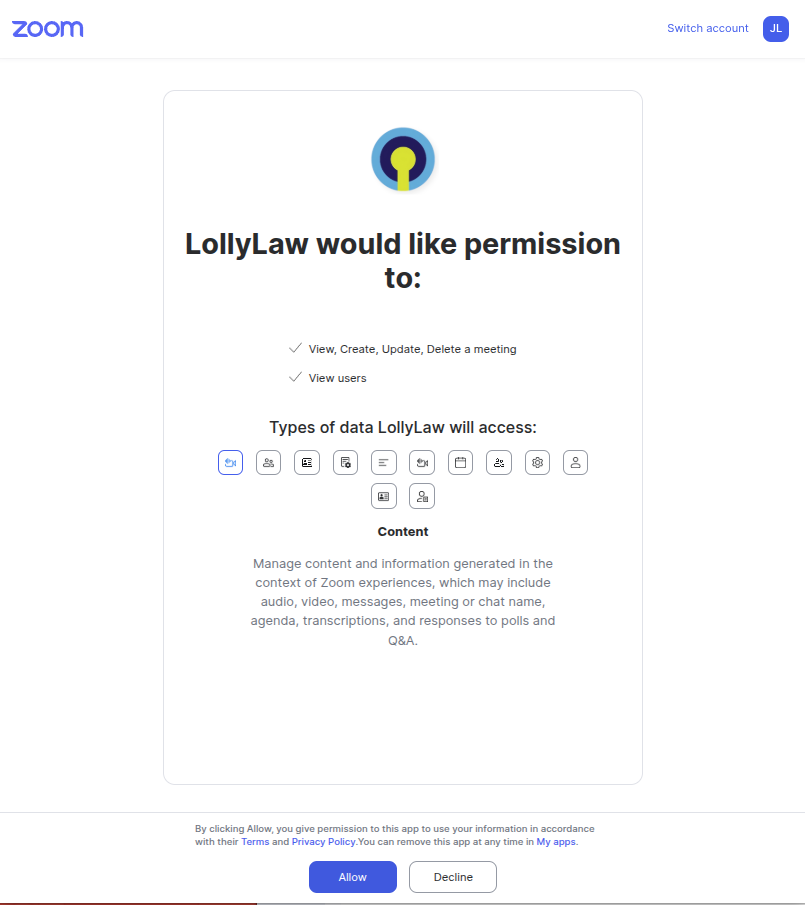
Click Authorize to grant permissions.
Step 5: Confirmation
Once authorized, the Zoom integration will be enabled within your LollyLaw account.
You can now schedule and manage Zoom meetings directly from LollyLaw.
Note: Disabling the Zoom integration will affect all users within the account, regardless of whether there are upcoming meeting events. These events will not be automatically modified or cancelled. To disable the Zoom integration and prevent disruptions, you will need to contact your account manager at support@lollylaw.com.
Step 6: Create Scheduler Booking Link
Create booking links whereby other people can make appointments and schedule consultations on your calendar
Use main menu to navigate to the Scheduler section and click on 'Booking Pages'
Create a New Booking Link by clicking on 'Add New' in the upper right
Complete the wizard form by entering in the information about your booking link
Note: for automatic notifications, if your office has a scheduler coordinator or similar function on staff, it is recommended that you include a group email through which notifications can be sent to others in the office that may need notice.
Note: When constructing weekly hours, it is recommended to also set 'Offset Days' to account for known holidays and office closure days so as to avoid allowing bookings on those off days.
Note: You may set optional requirements for people to complete the booking such as completing a custom intake or making a consultation payment (LollyPayments is required for automatic payment processing)
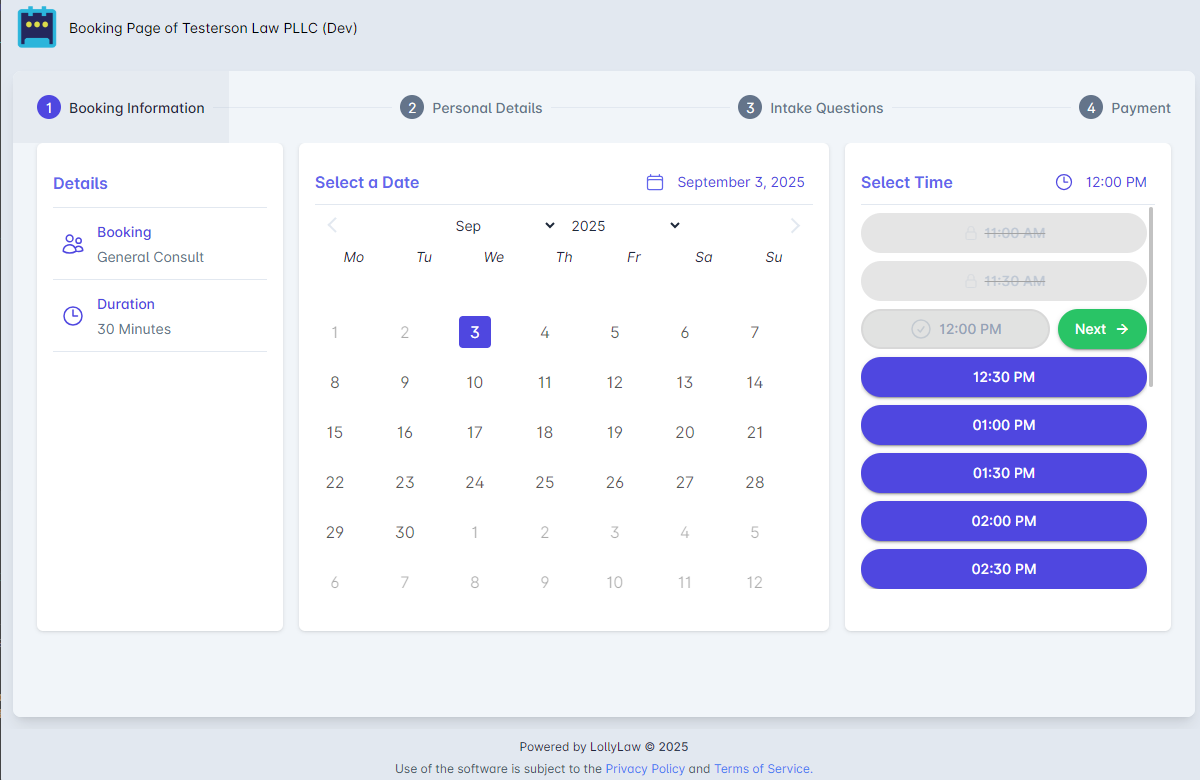
Once complete, you can copy the URL to this custom booking calendar and share it with others either on your firm web site or directly with those you want to have access to book an appointment on your calendar.
Note: People who use the Booking Link will NOT see any details of events on your calendar, only slots of availability given your schedule preferences.

Note: People who use the Booking Link will go through a step-by-step flow to pick the appointment time, provide basic information on their needs and questions, as well as optional steps such as completing a custom intake questionnaire and making payment for a consultation.
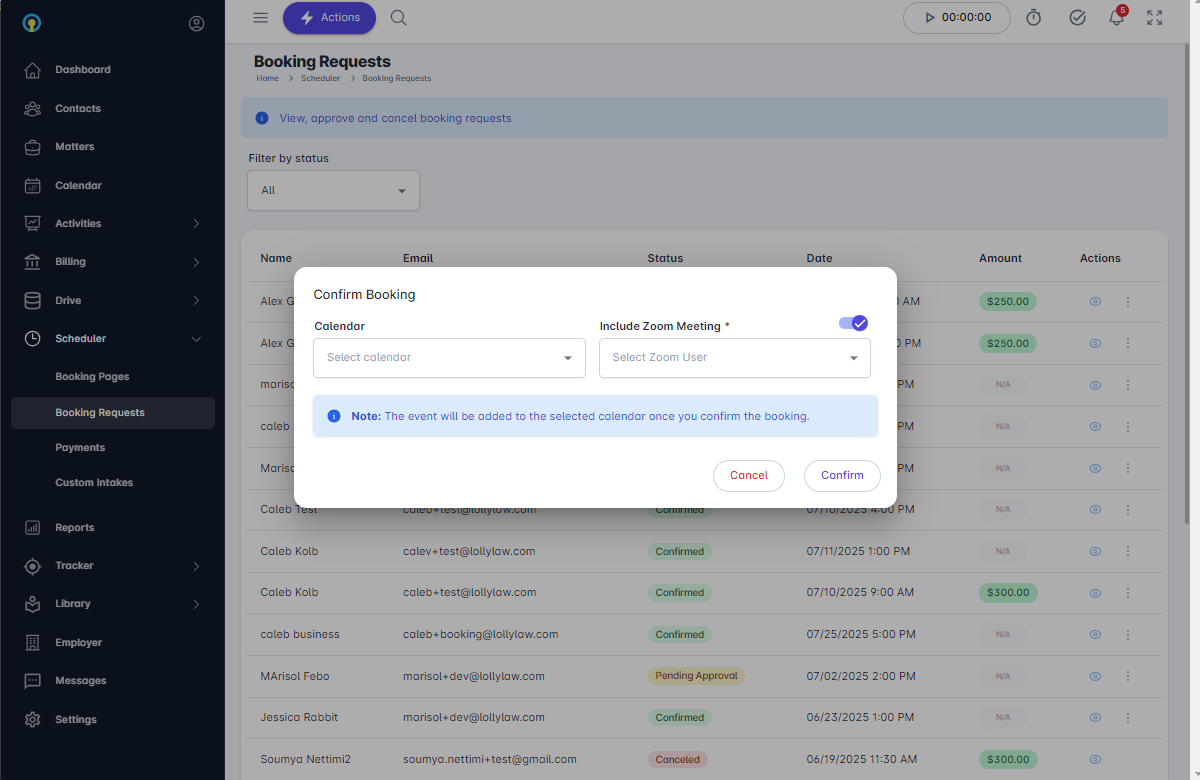
Step 7: Create Event with Zoom
When an event is created by approving a Booking Request, you are now able to create the Zoom conference link.
All appointments created via a booking link must go through the 'Booking Request' review and approval process. This step allows the firm to perform any routine conflict checks that may be part of internal process. Once approved, an event is created on the calendar of your choosing along with options to create the Zoom conference and link for one of the users in the Zoom account. The system will automatically notify attendees and include the Zoom link in the event.
---------
How to Disable Zoom Integration
To disable the Zoom integration, you may either perform the action manually under your account settings, or you can contact your LollyLaw account manager via phone (323-607-9023), email (support@lollylaw.com) or chat to request deactivation of the Zoom integration for the whole account.
Log in to your account and go to Settings->Add-Ons.
Click on the card labeled 'Zoom'. You will navigate to the Zoom integration page.
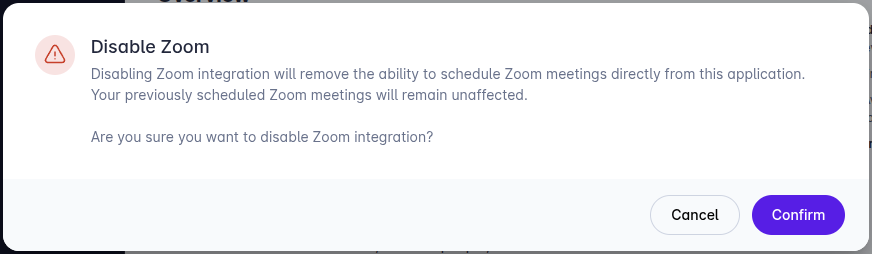
At the top, click the 'Disable' button. A confirmation prompt will appear.
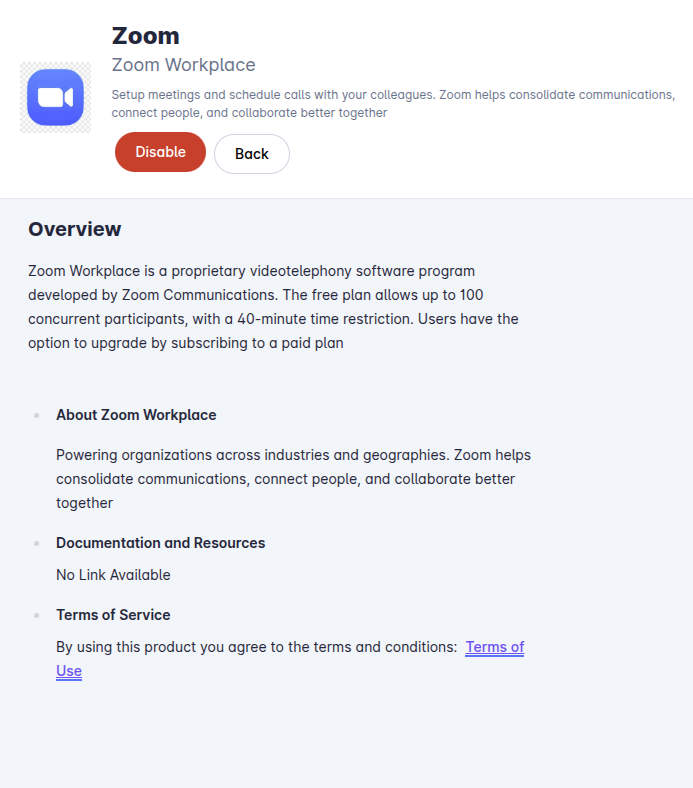
Click 'confirm' on the confirmation prompt to deactivate the Zoom integration.
Note: Disabling the zoom integration will disconnect LollyLaw from Zoom and the system will no longer provide functionality for creating Zoom conferences when creating events or consultations. This change will affect all users within the LollyLaw account. Any upcoming calendar events such as pending consultations will also be affected. To minimize impact on firm processes, it is recommended that a communication be sent to firm users in advance of the deactivation. On deactivation of the zoom integration, the system will remove all tokens for the Zoom app integration. Any previously created calendar event will not be deleted and will still be visible in the account and available for reporting and billing purposes.