
Labels in LollyDrive allow you to create custom tags to help organize your files. They make it easier to sort, search, and filter documents across your account. A single file can have multiple labels, and labels can be applied across many files, making them a flexible way to group related documents.
Manage Your Labels
You can create, edit, and delete labels from the Labels page.
Navigate to Drive > Labels using the left-hand menu.
Review your existing labels.
To create a new label, type a name into the New Label field and press Enter.
To edit a label, click on its name and make your changes.
To delete a label, click the trash can icon next to the label.
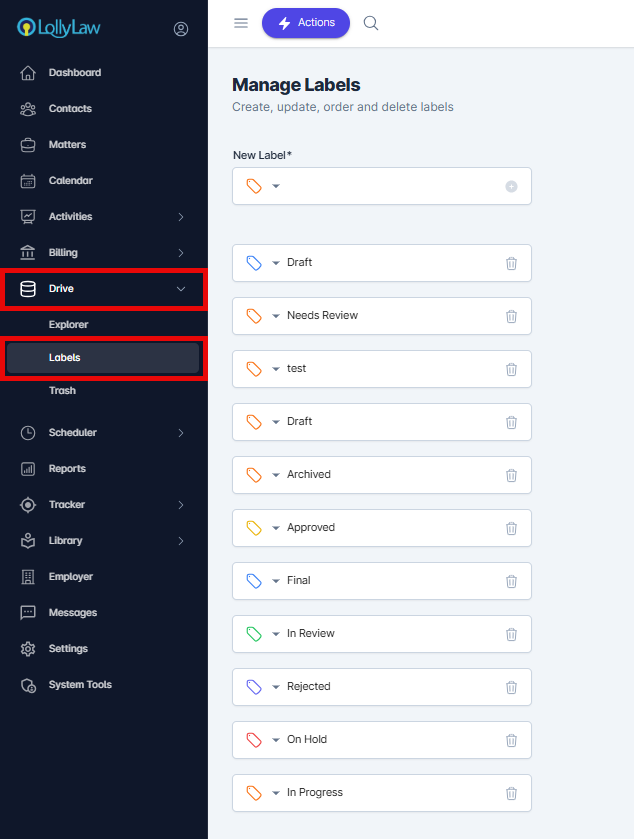
Keeping your labels clear and consistent will make it easier to find documents later when using search and filters.
Add a Label to a Document
Once labels are created, you can apply them to individual files.
Locate the file you want to label.
Click the three vertical dots next to the file.
Select Organize > Labels.
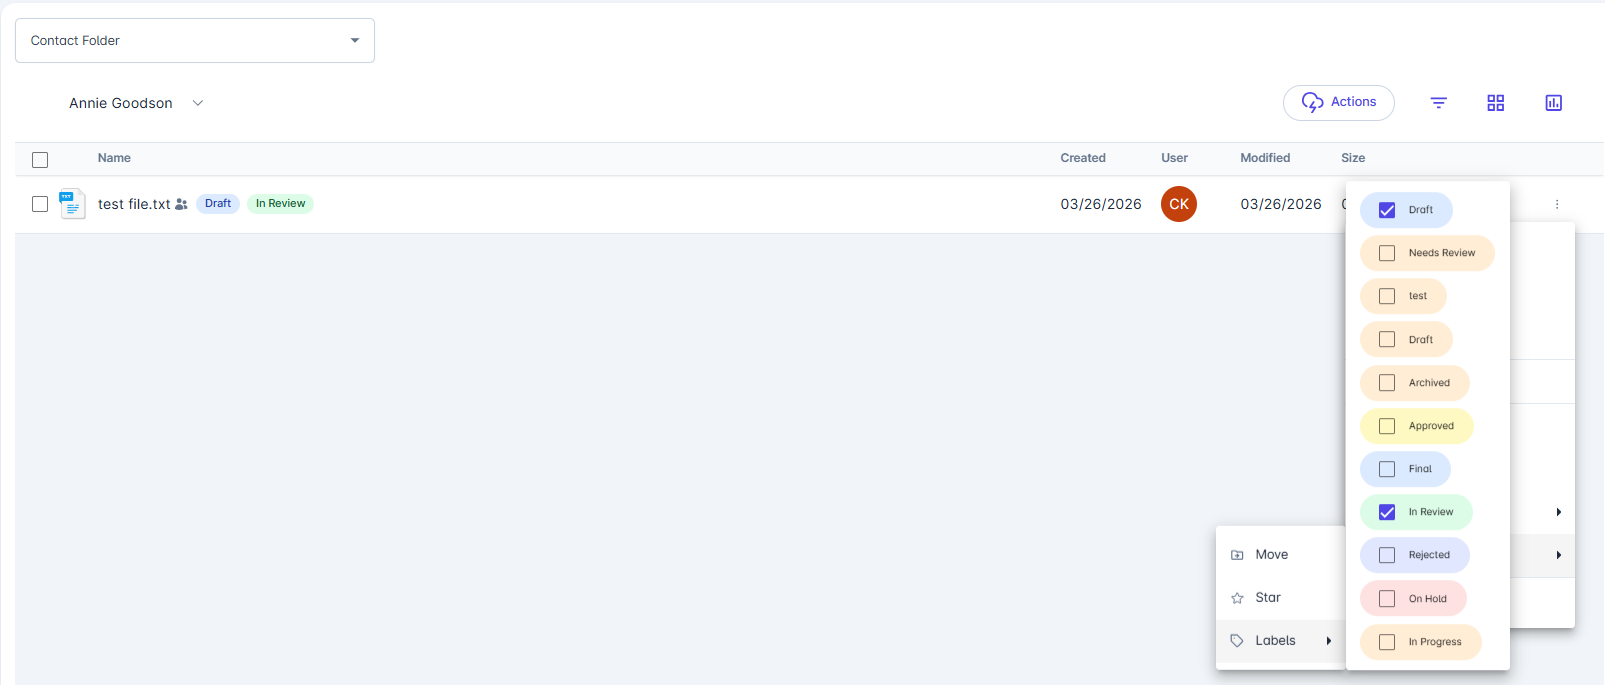
Choose the label you want to apply.
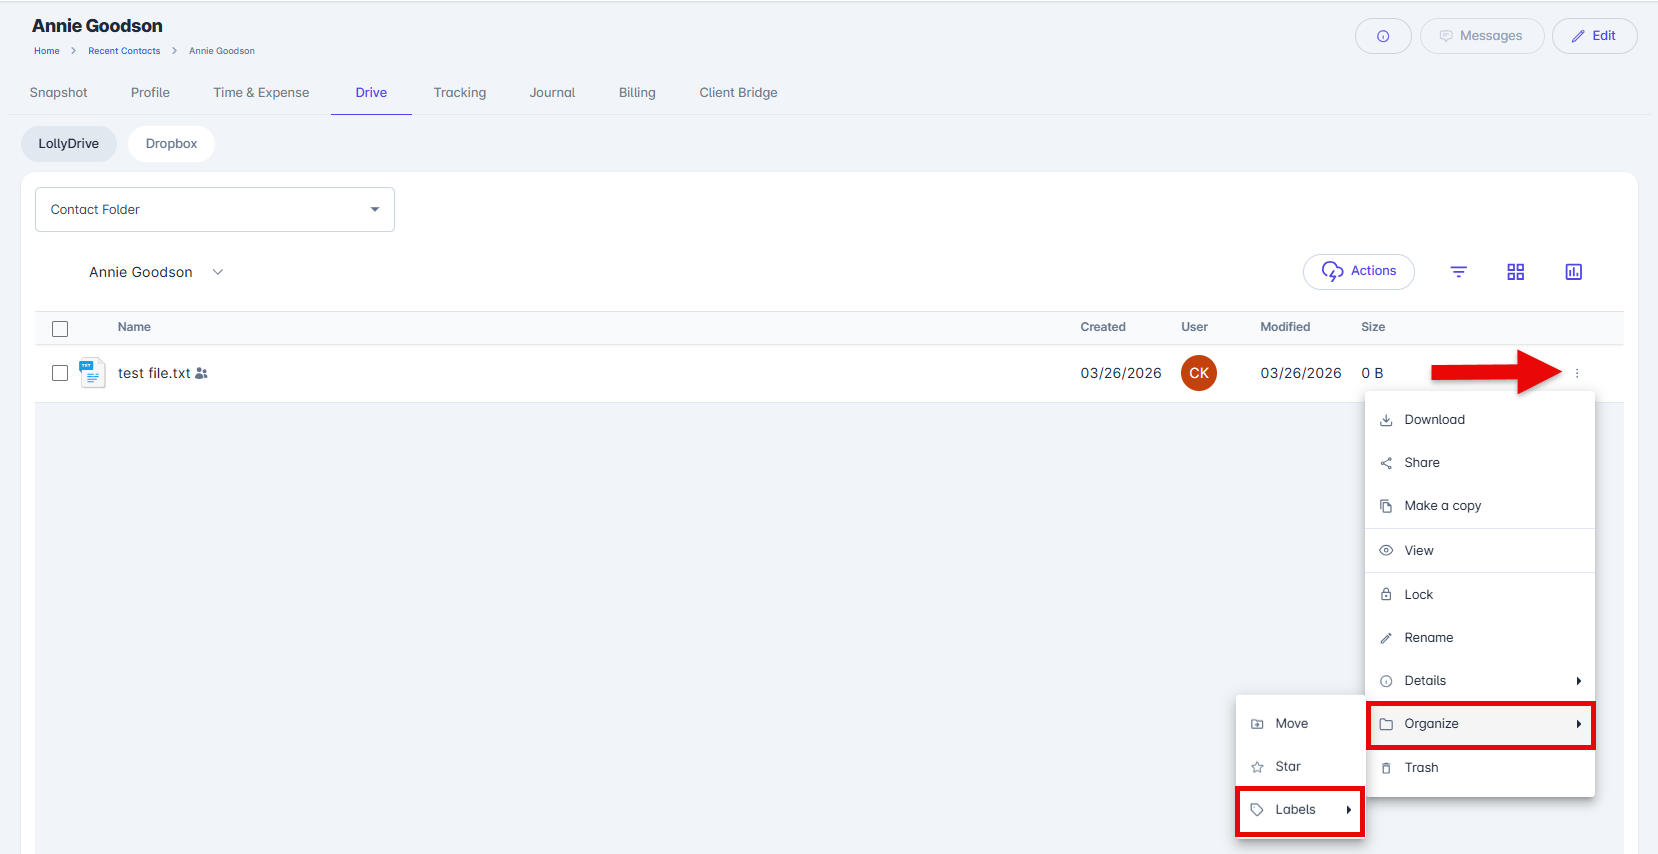
You can apply multiple labels to the same file if needed, depending on how you want to organize your documents.
Search and Filter Using Labels
Labels can be used to quickly find documents in LollyDrive and work alongside other filters for more precise results.
Navigate to Drive > Explorer using the left-hand menu.
Click the Show Filters icon.
Use the available filters to narrow your results by:
Date modified
File type
Favorites
Label
Open the Labels dropdown and select the label you want to filter by.

The system will display all files that match the selected label, helping you quickly locate related documents.