Managing User Permission Groups for Mail Log
Go to Settings > Security Groups
Click on edit next to your group
Find "Manage Mail Record Information" and make sure it is marked on
Press Save
How to "Add Mail" for Incoming or Outgoing Mail
Go to Tracker>Mail Log
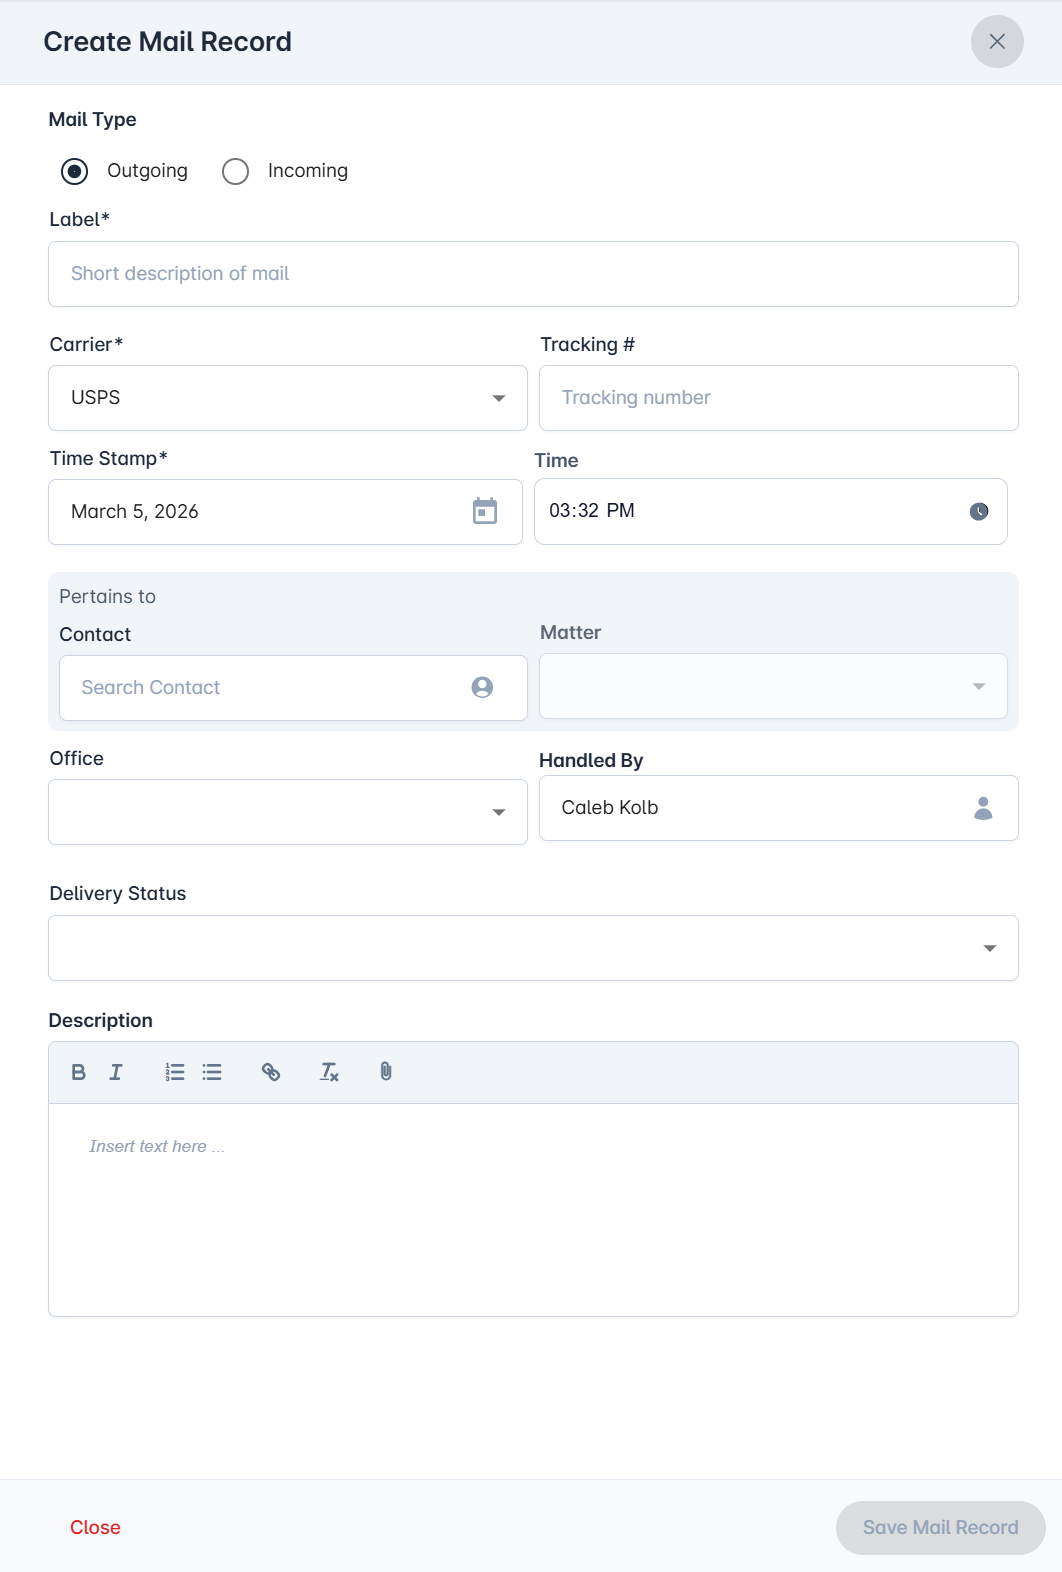
Click on Add Mail
Toggle either Incoming or Outgoing mail
Set a Label/Description
Select a Carrier and input a tracking number if available. This will turn into a link when viewing it in contact and matters.
Save the record to a contact/matter
Mark if you want the team members of the matter notified
Set the date and time received
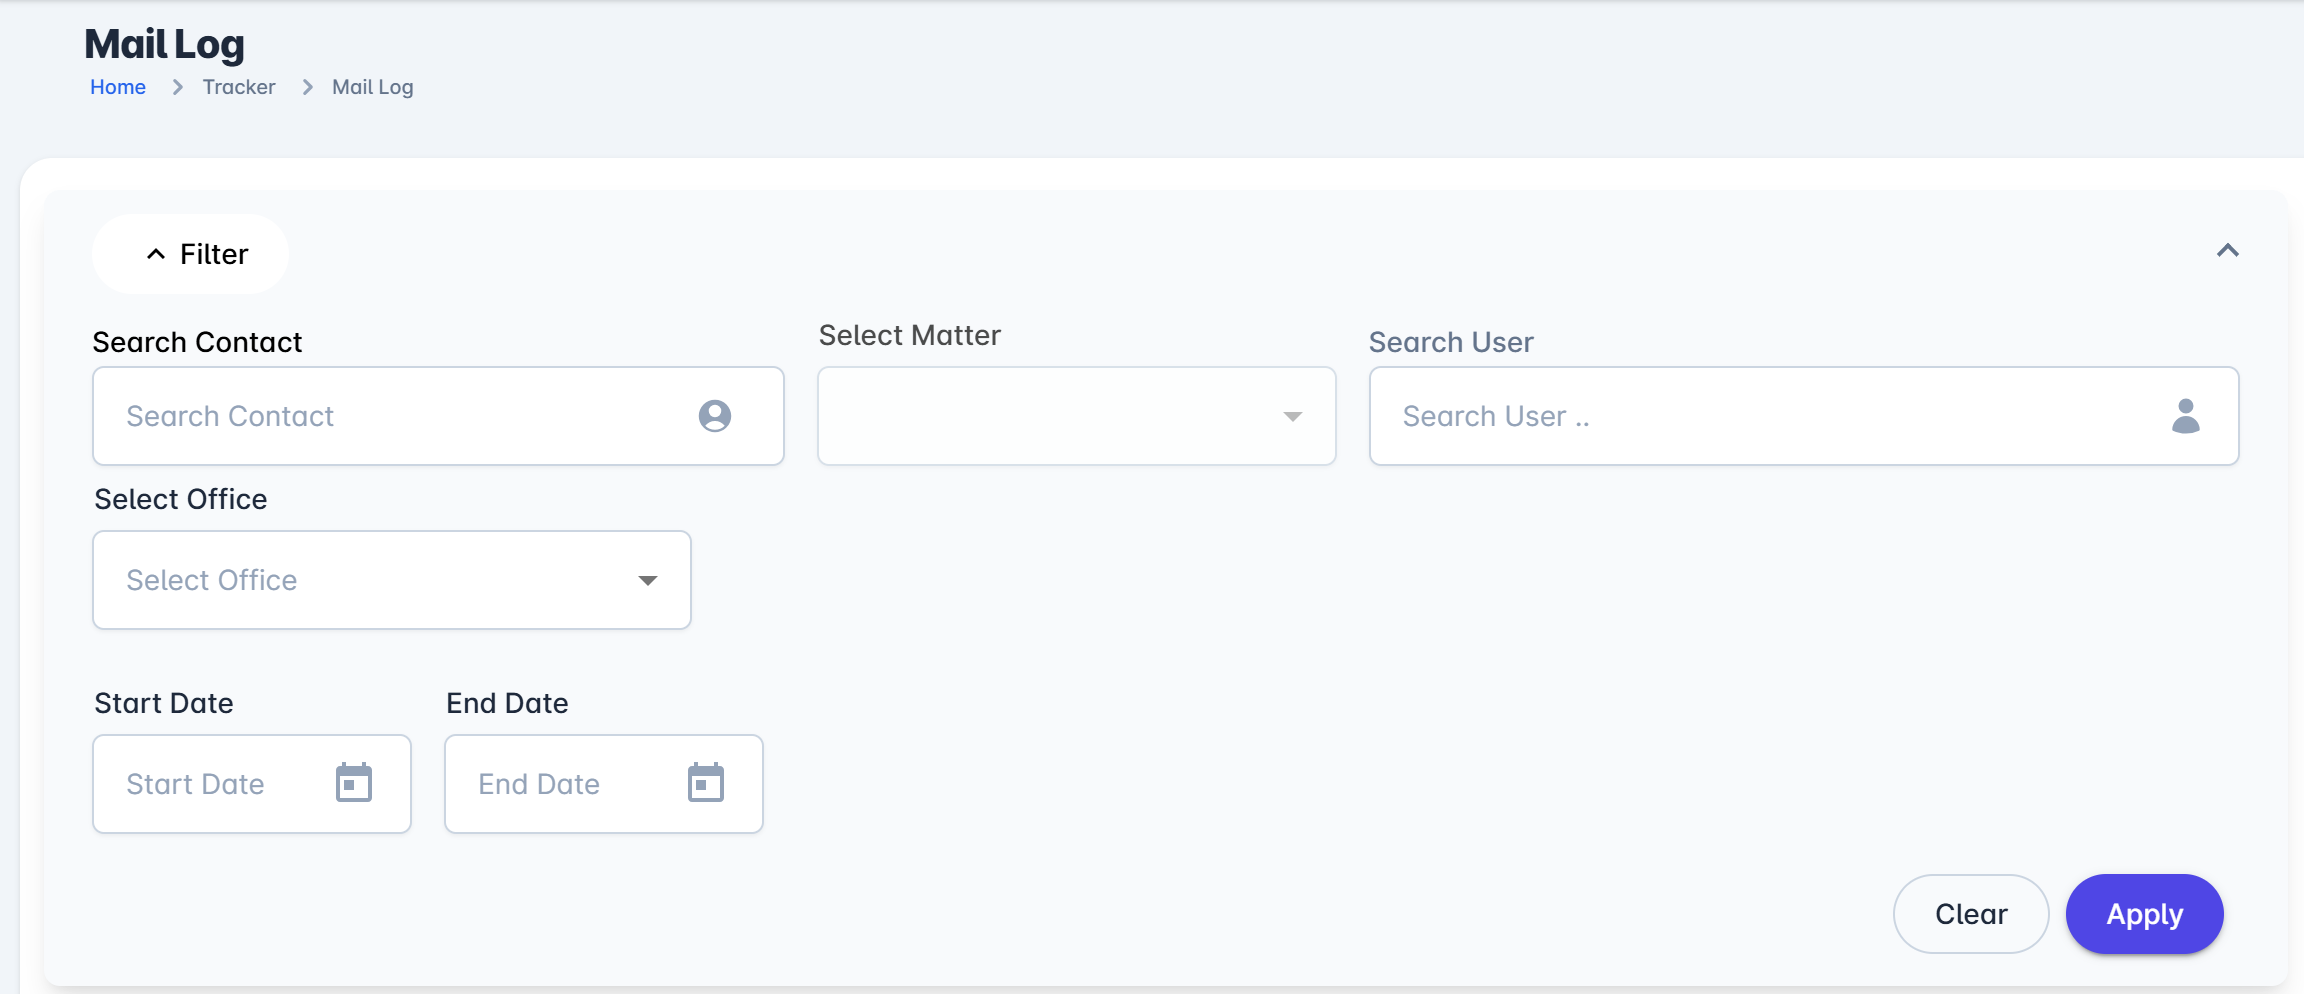
Searching for Logs
Go to Tracker > Mail Log
Click on Filters
Use the available options to filter by contact, matter, carrier, and date range
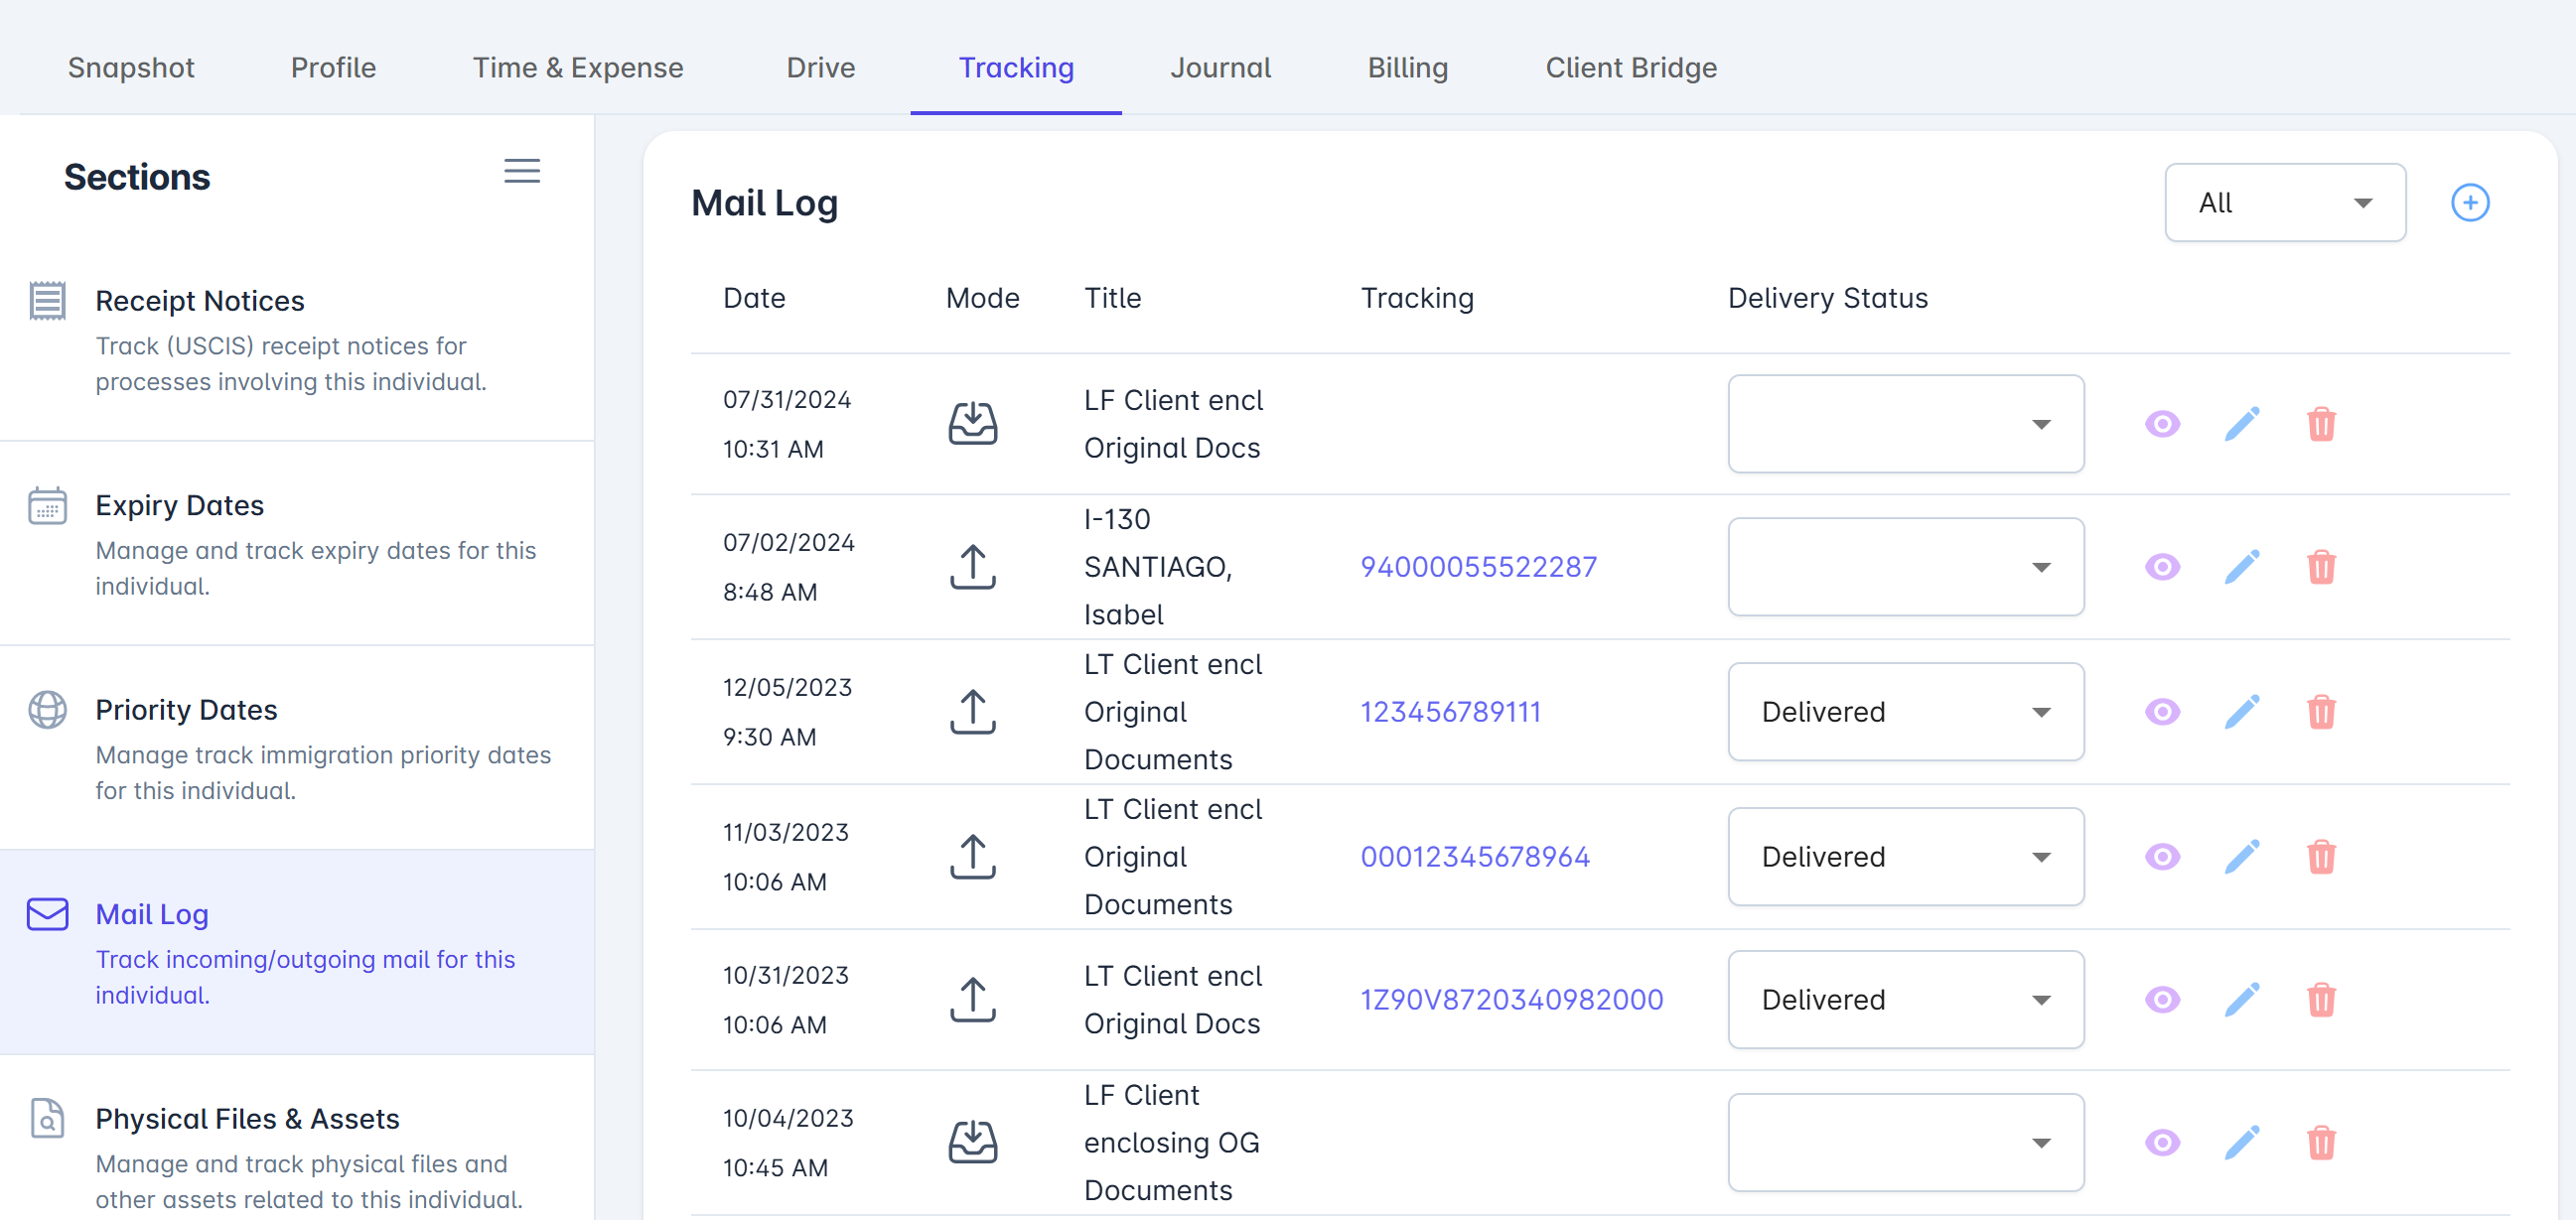
Viewing Mail Logs for Contacts and Matters
Open a Contact or Matter
Go to the Tracking tab
Use the Mail Log card to review received/outgoing mail
Filter either by All, Incoming, or Outgoing records
Click on the add ⊕ button to log mail