

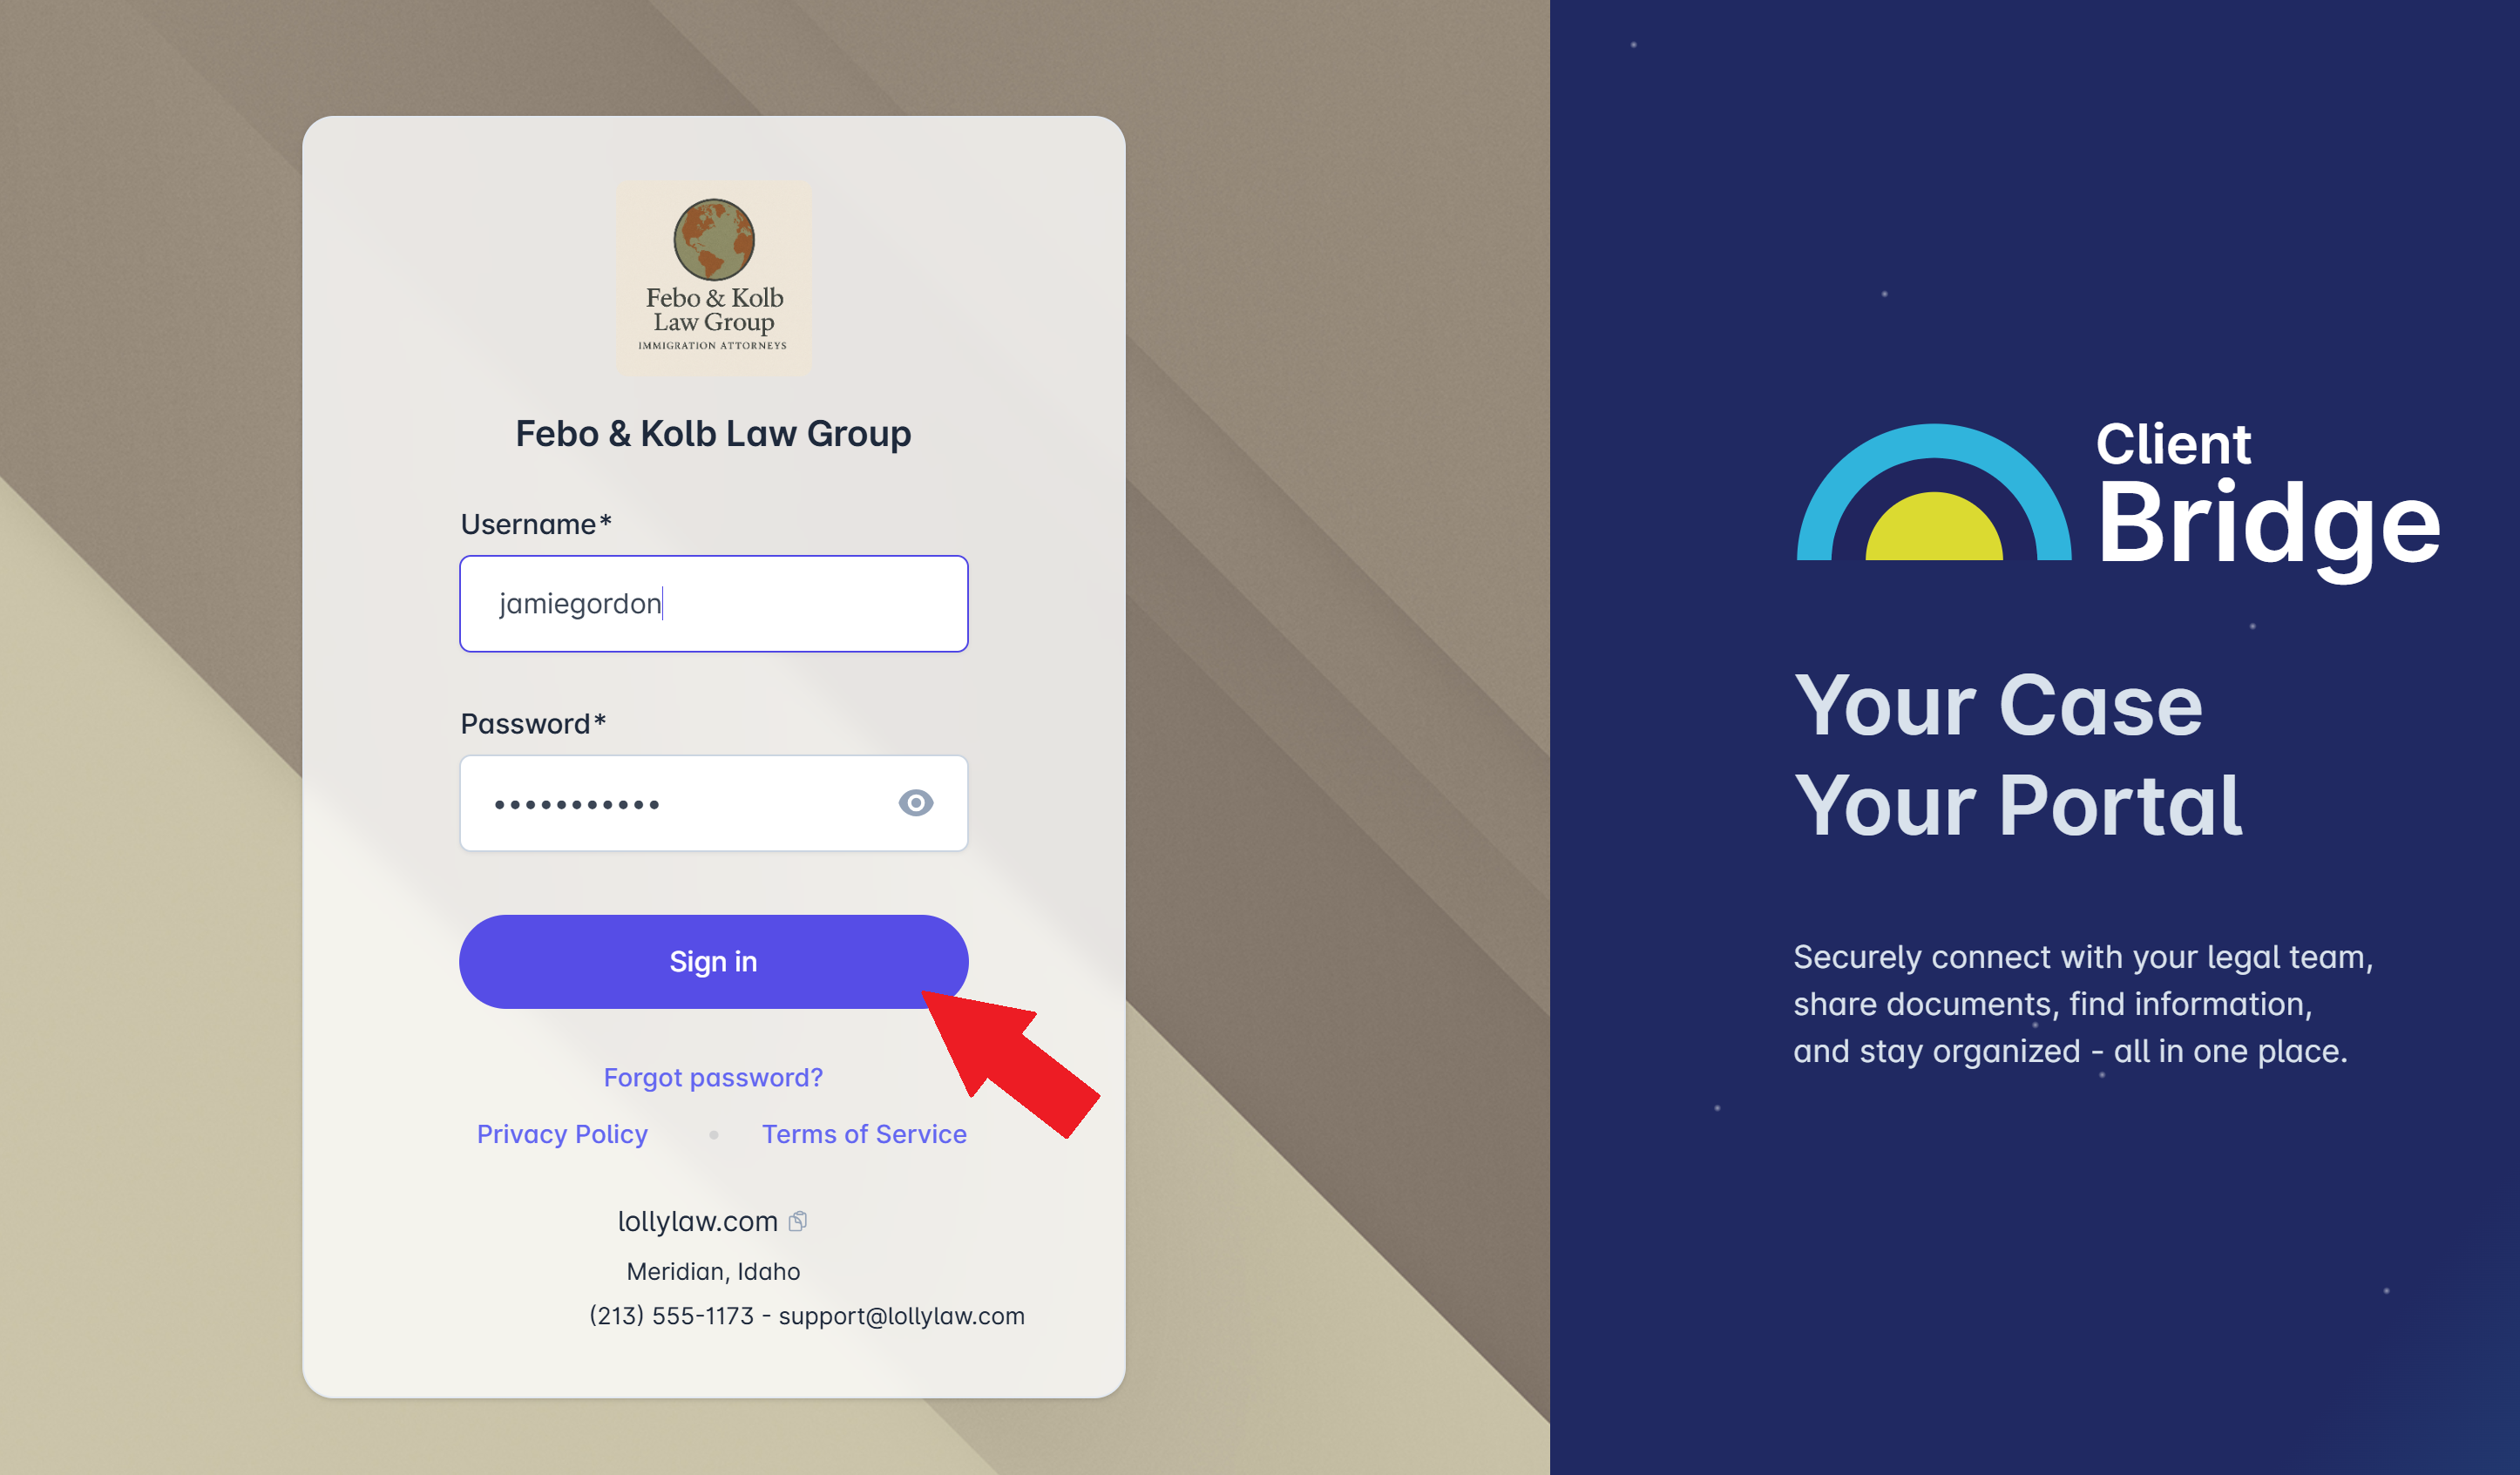
Step 1: Log into your firm's Client Bridge portal.
Enter your assigned username and password. If you forgot your password, click, "Forgot password?" or contact your law office for assistance.
Click the Sign In button to log in.
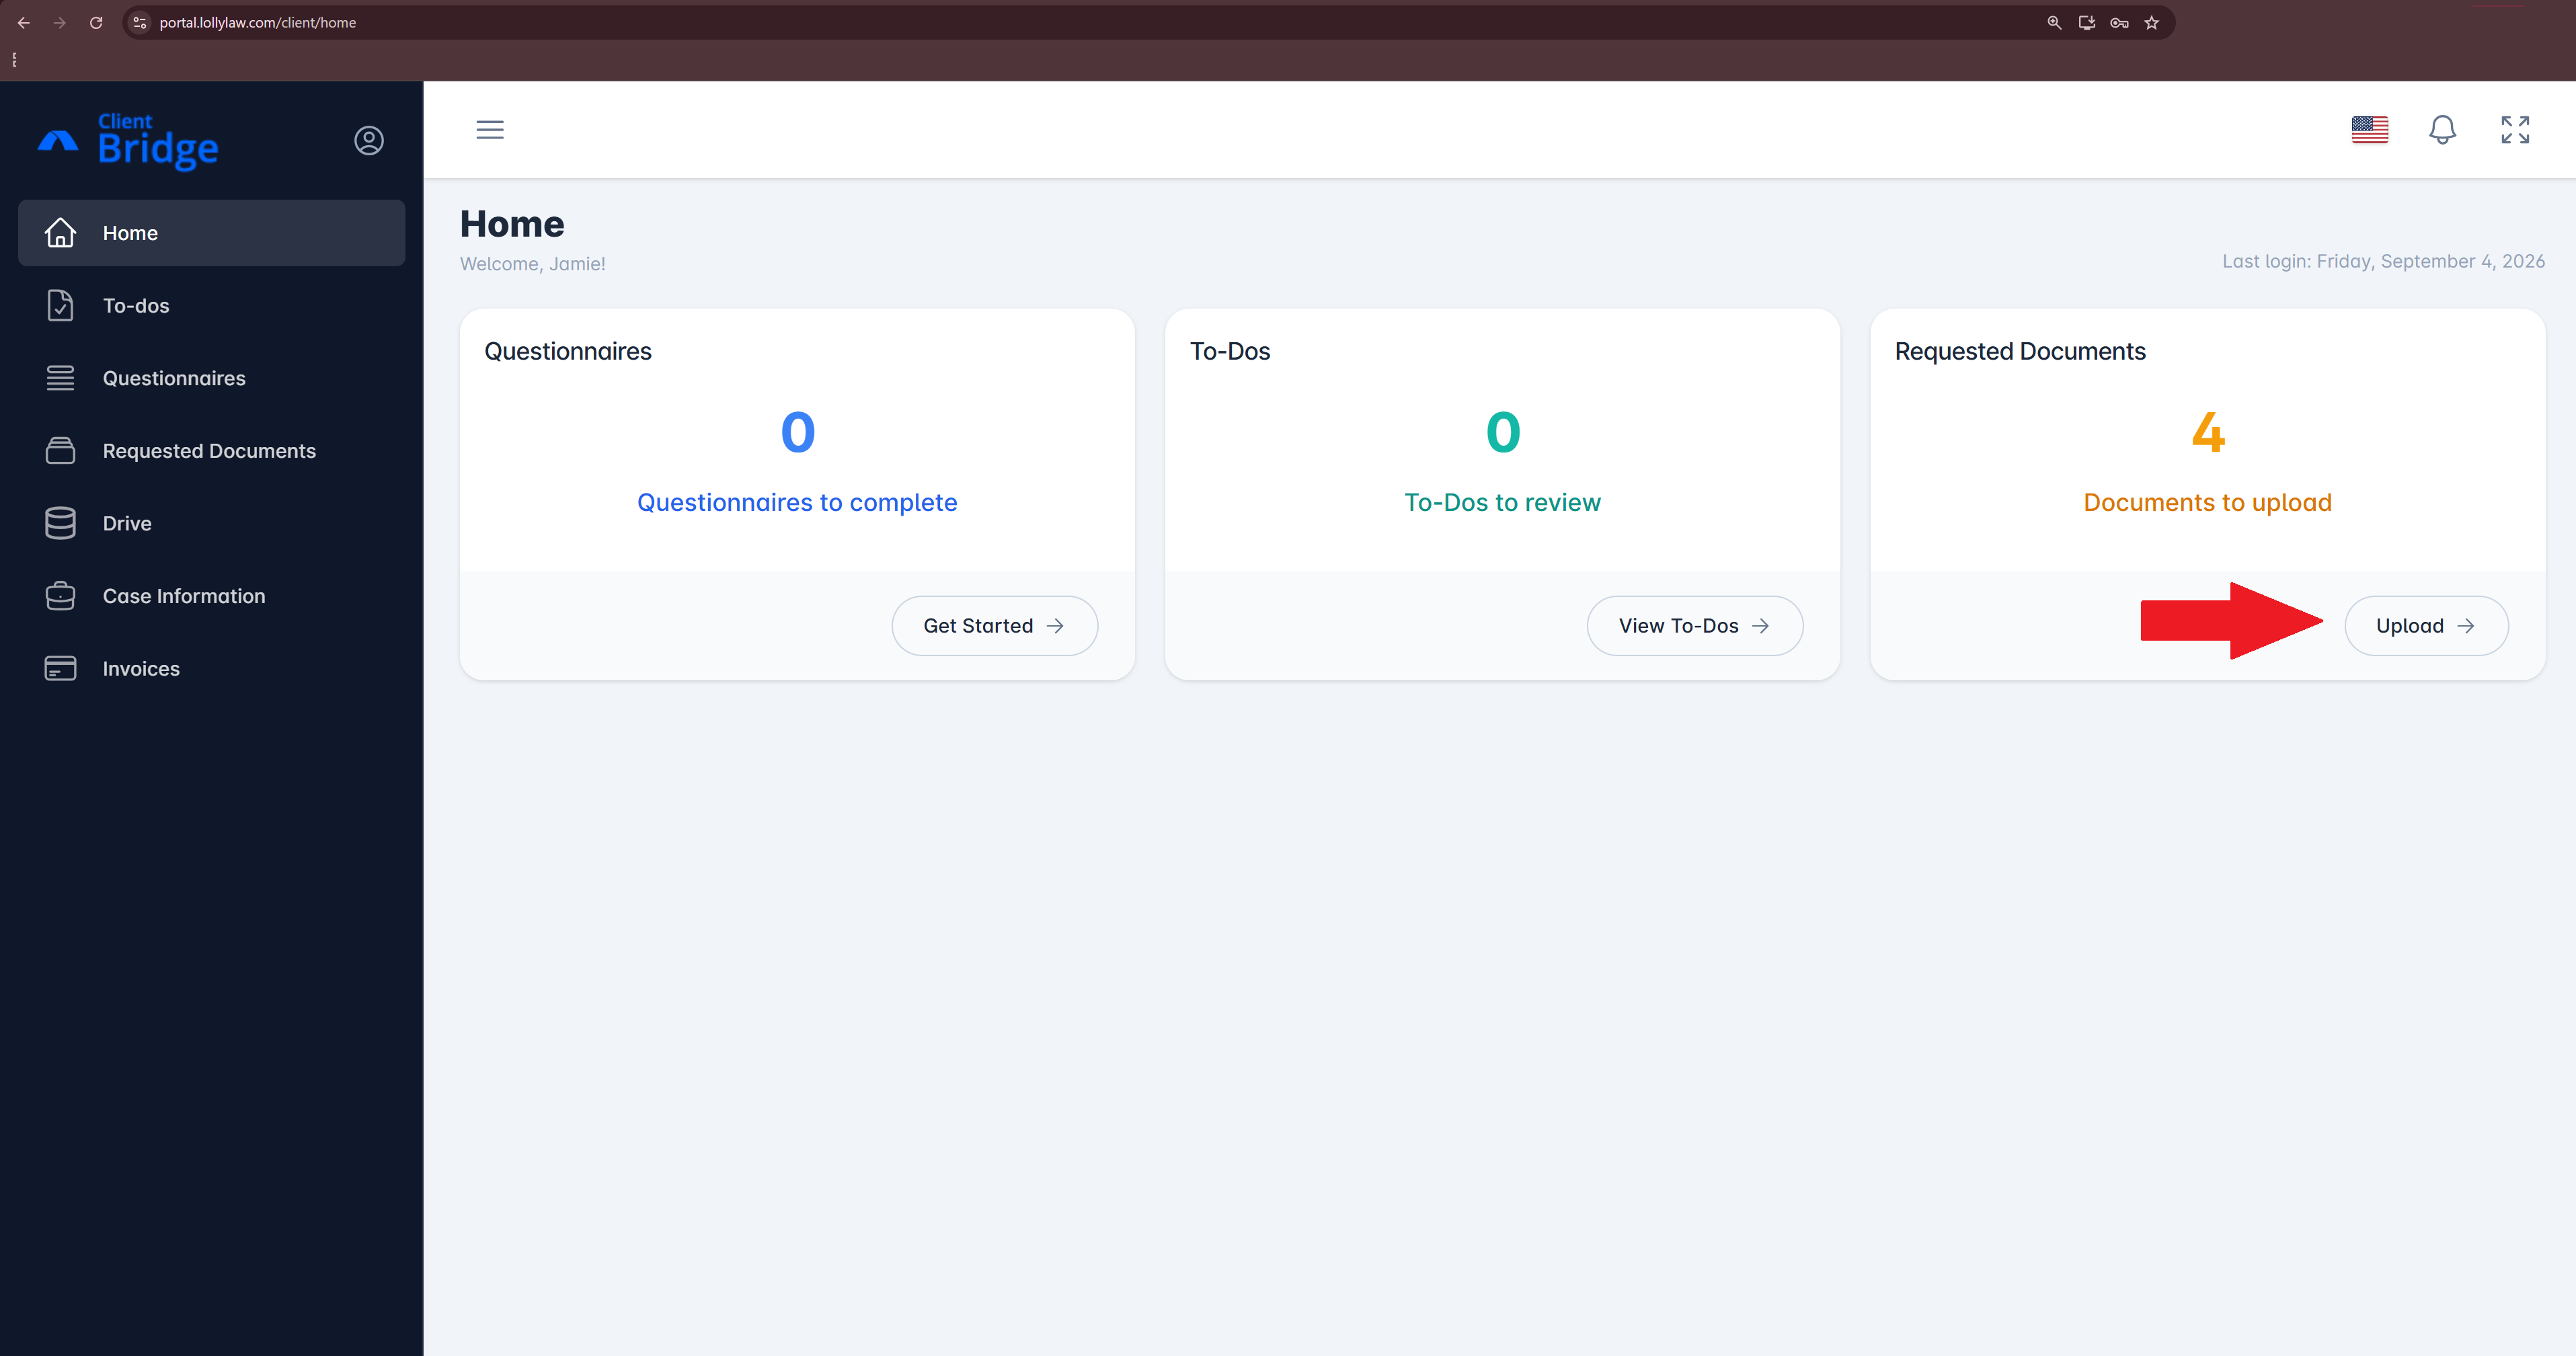
Step 2: On the Home page, click "Upload" in the Requested Documents box.
The Requested Documents box will list the number of documents that you will need to upload.
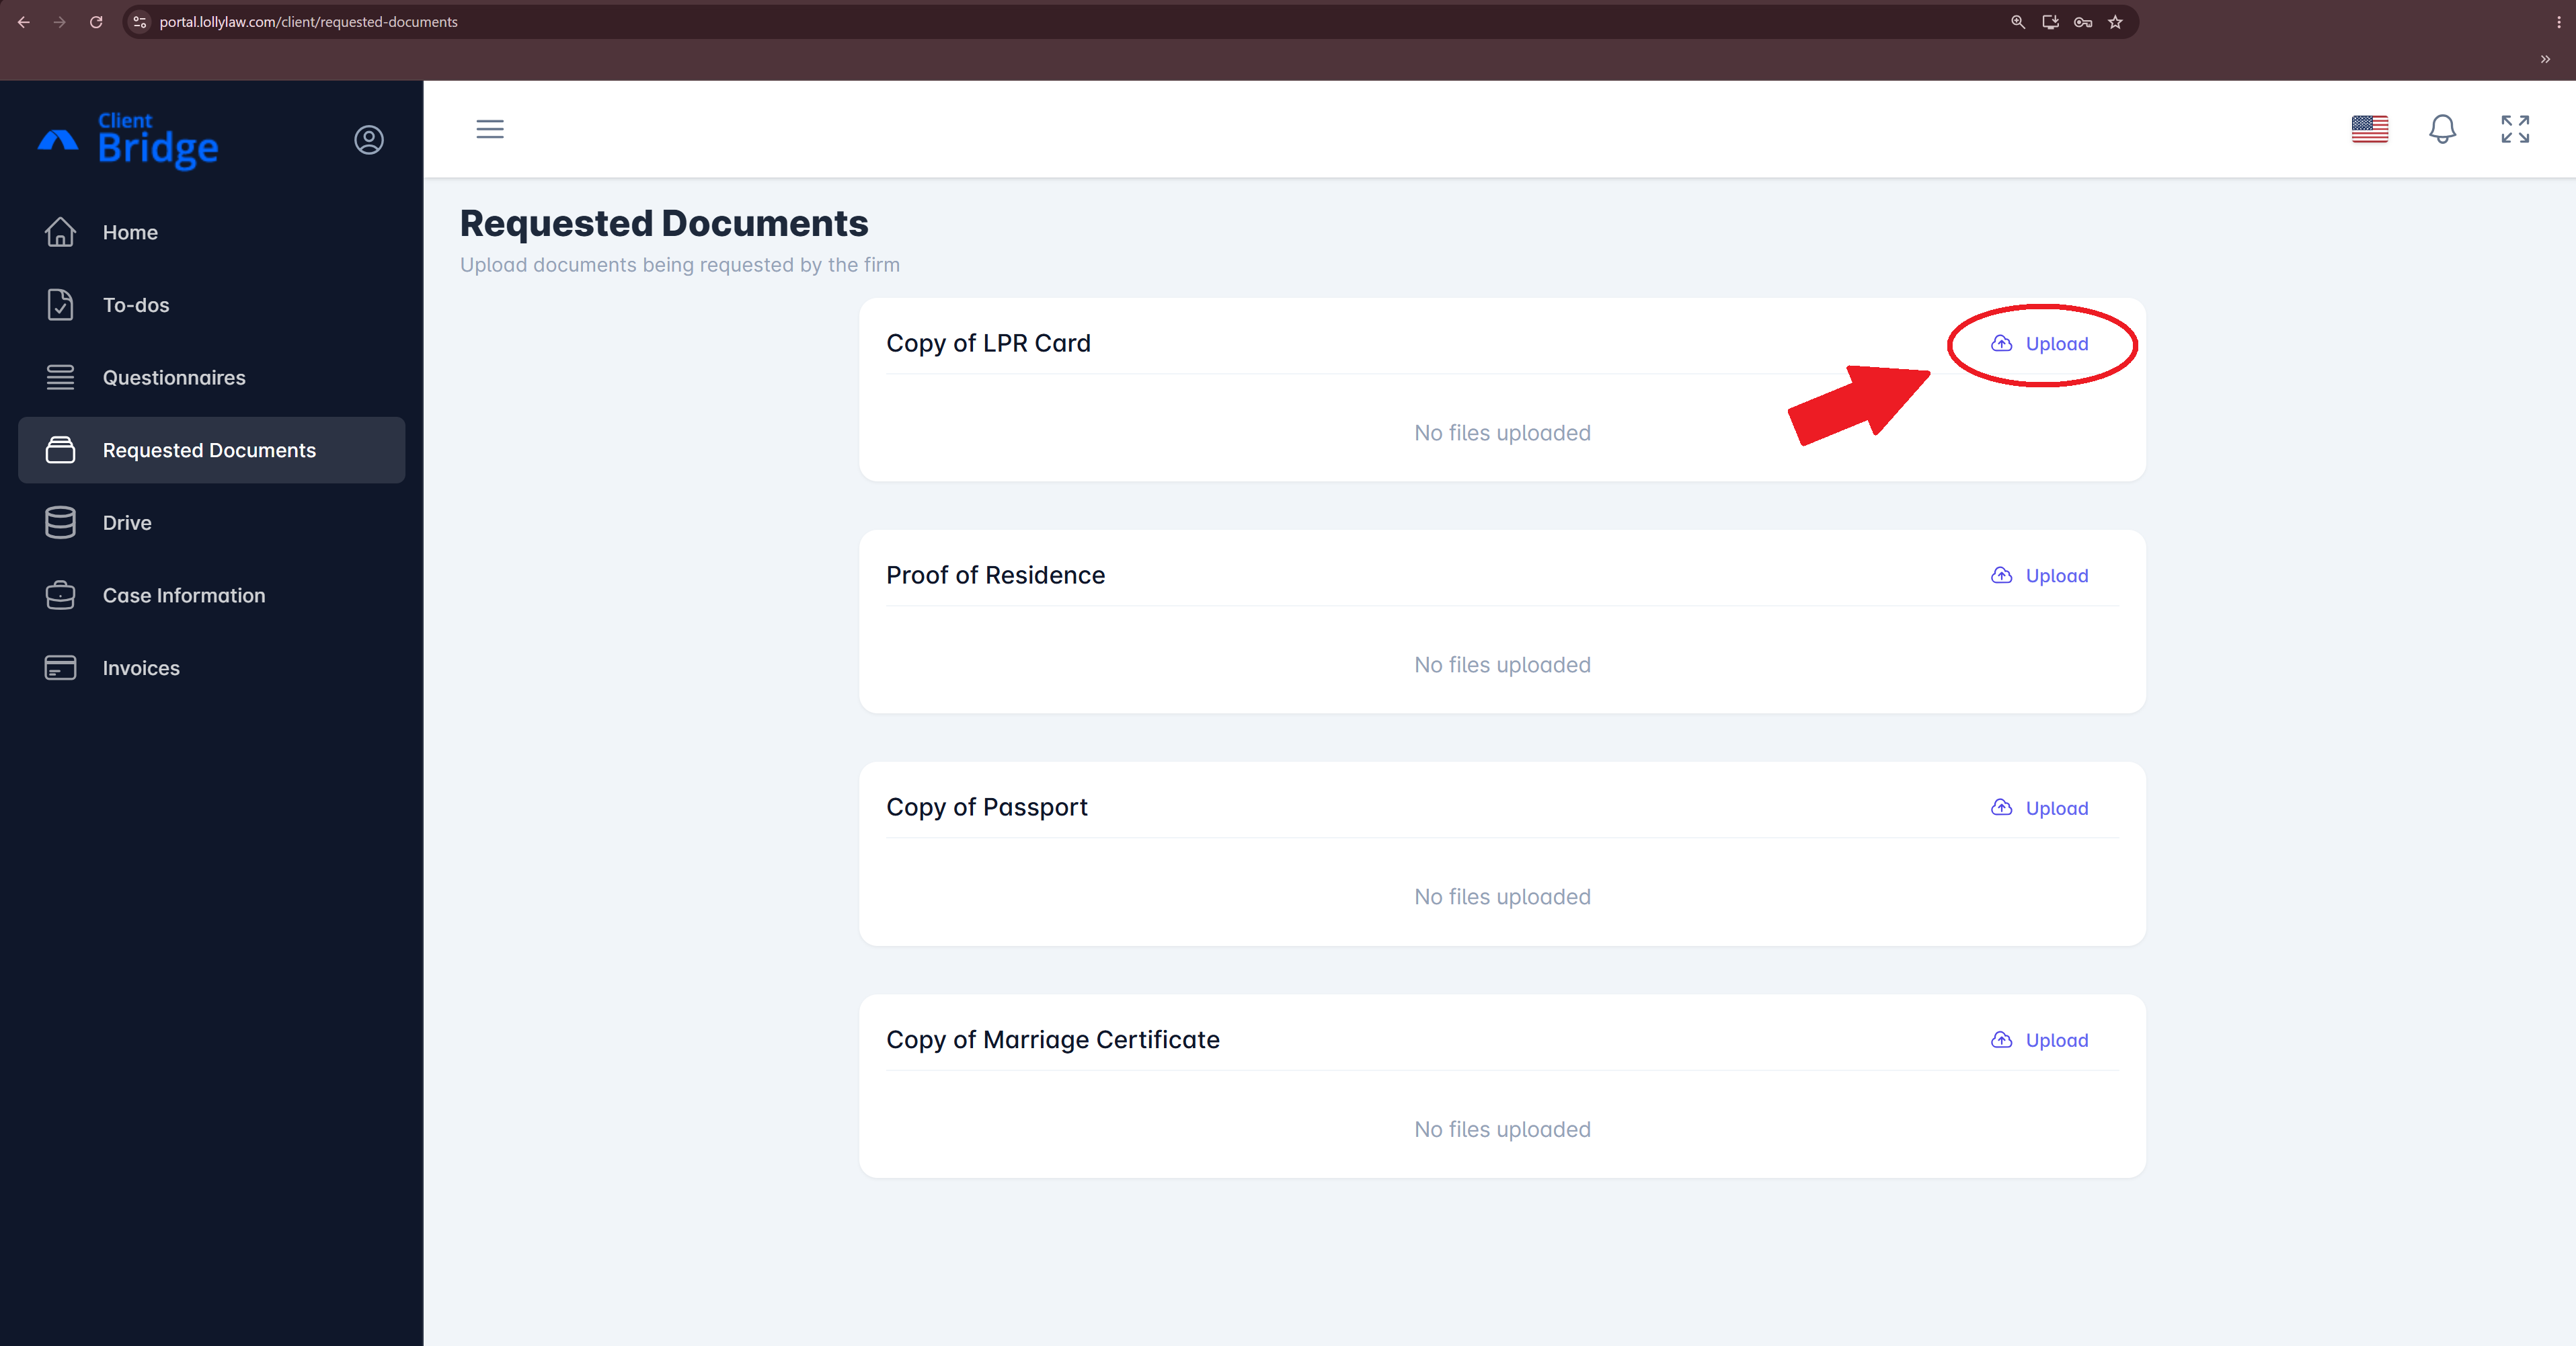
Step 3: Upload the requested documents.
On this page, you will find a list of documents to upload. Click the Upload button next to each document type.
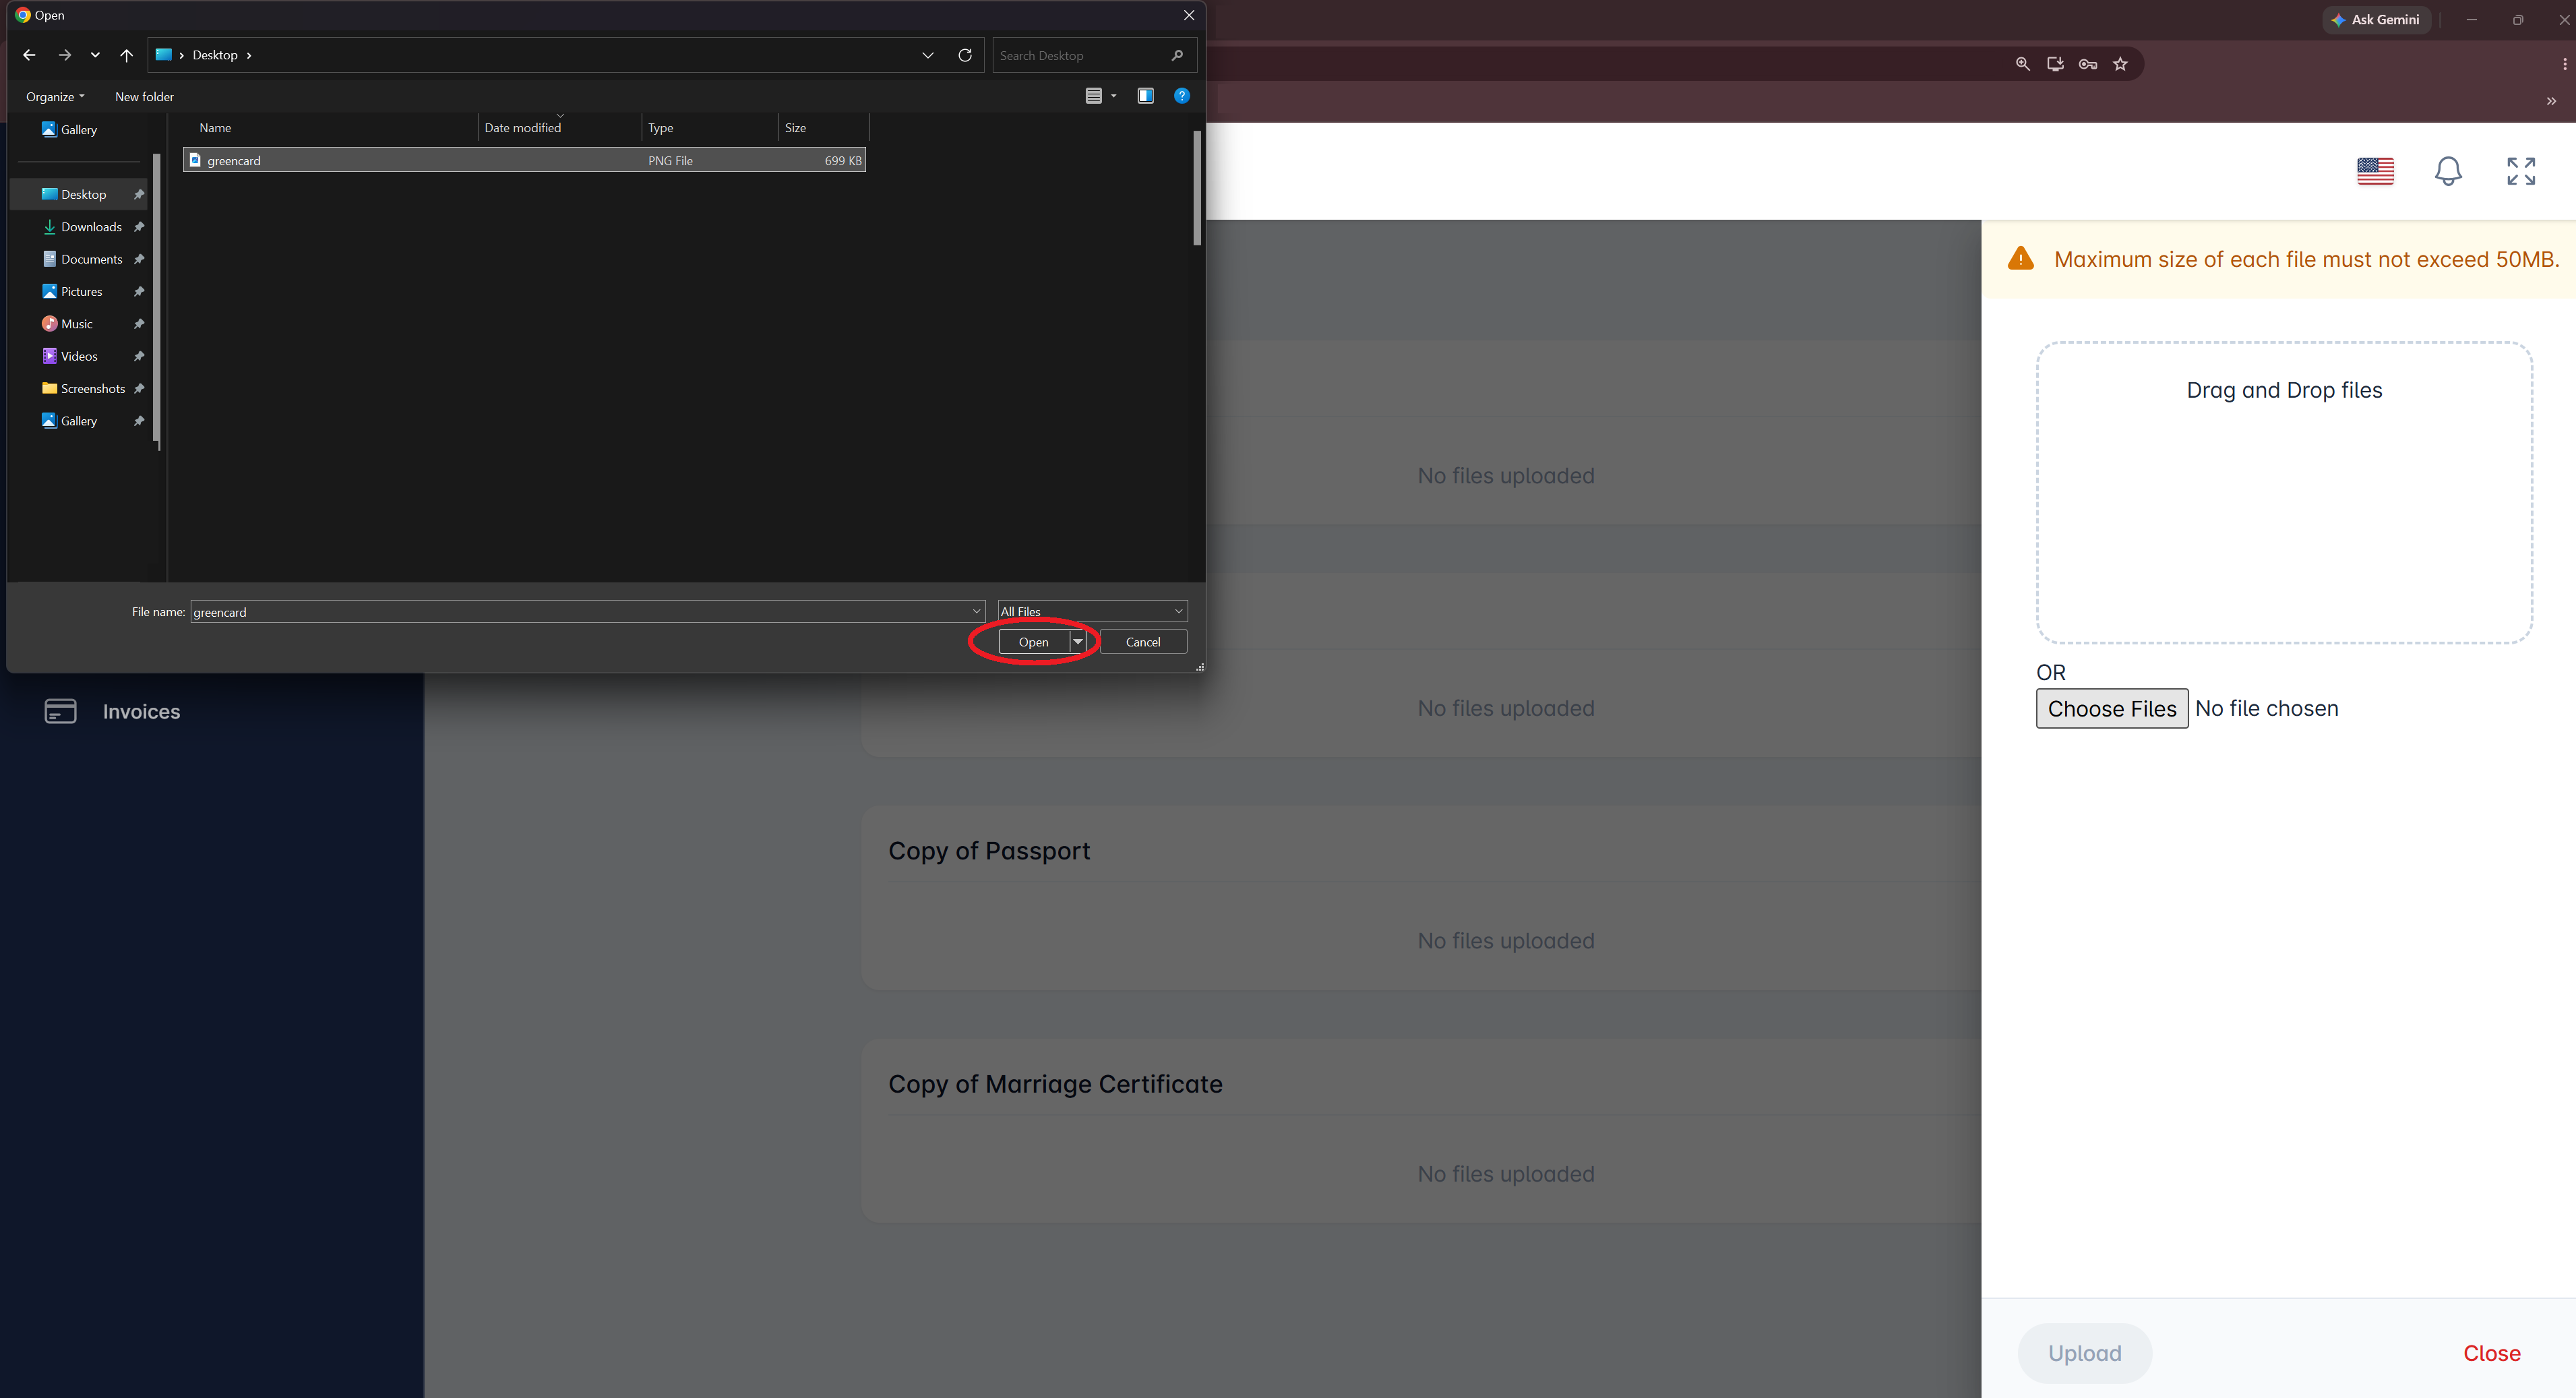
Drag and drop files from your computer, or select Choose Files, then click Upload.
Once uploaded, you will see the file name under the requested document type.
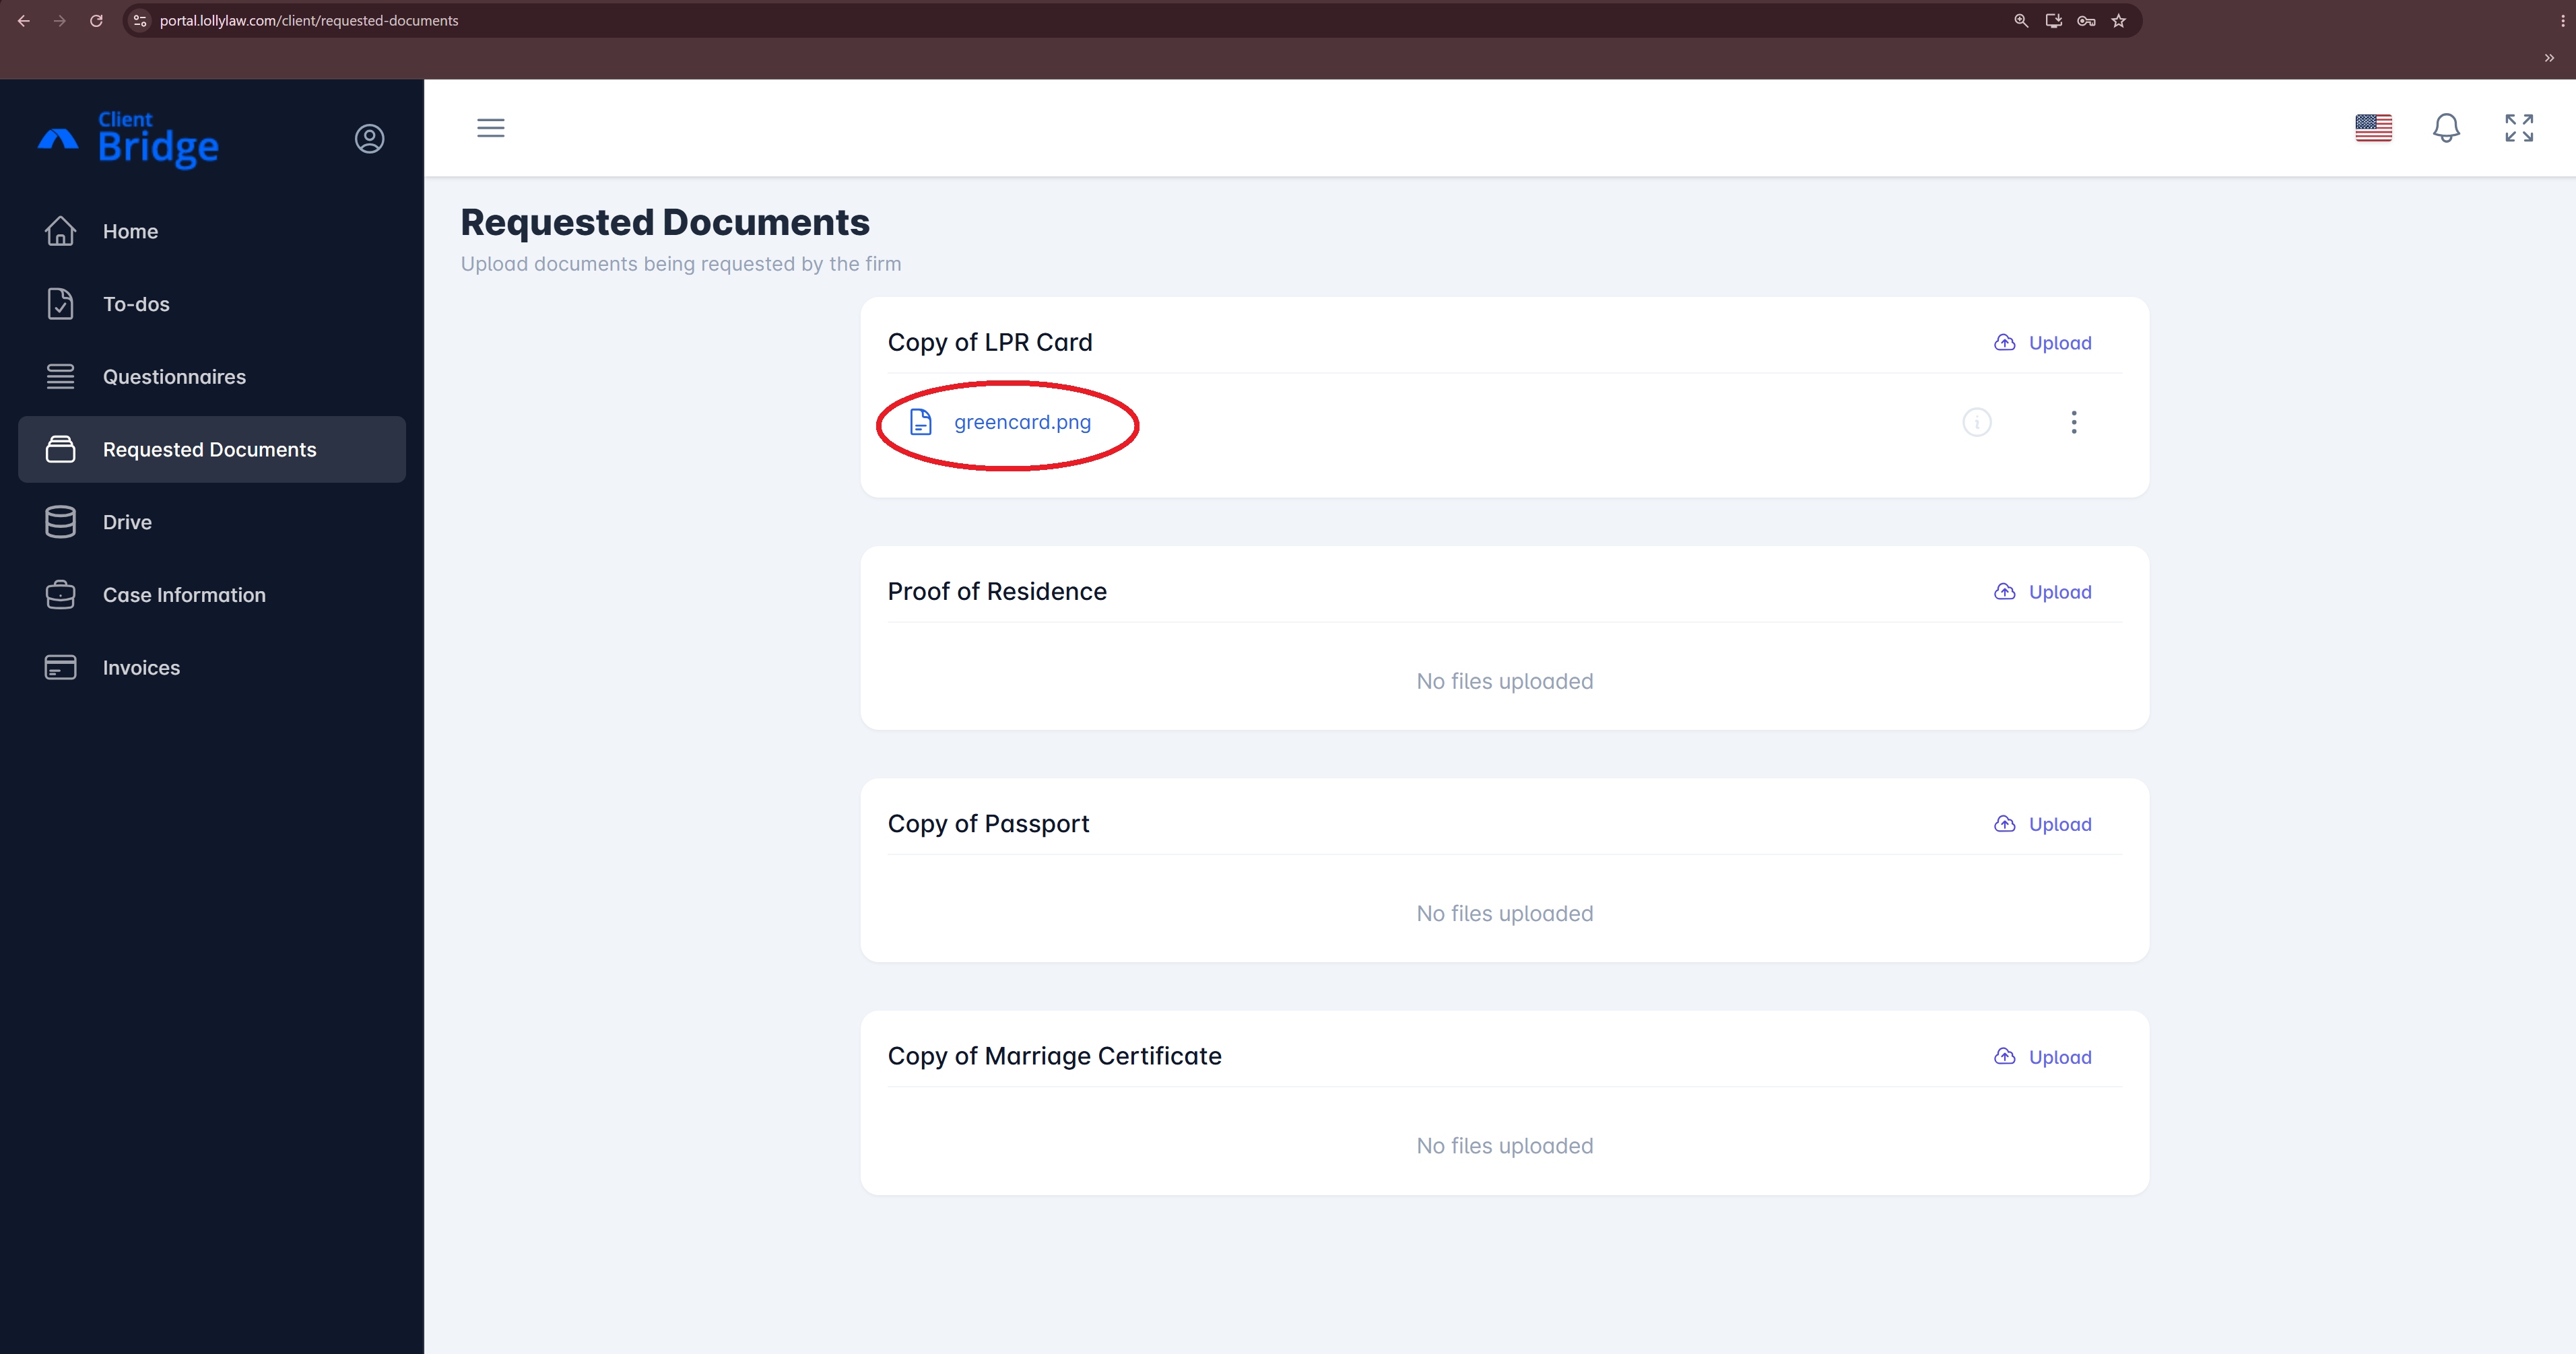
Continue to upload documents until all requested documents have been added.
If you need help uploading documents to the Client Bridge Portal, contact your attorney or case manager directly.