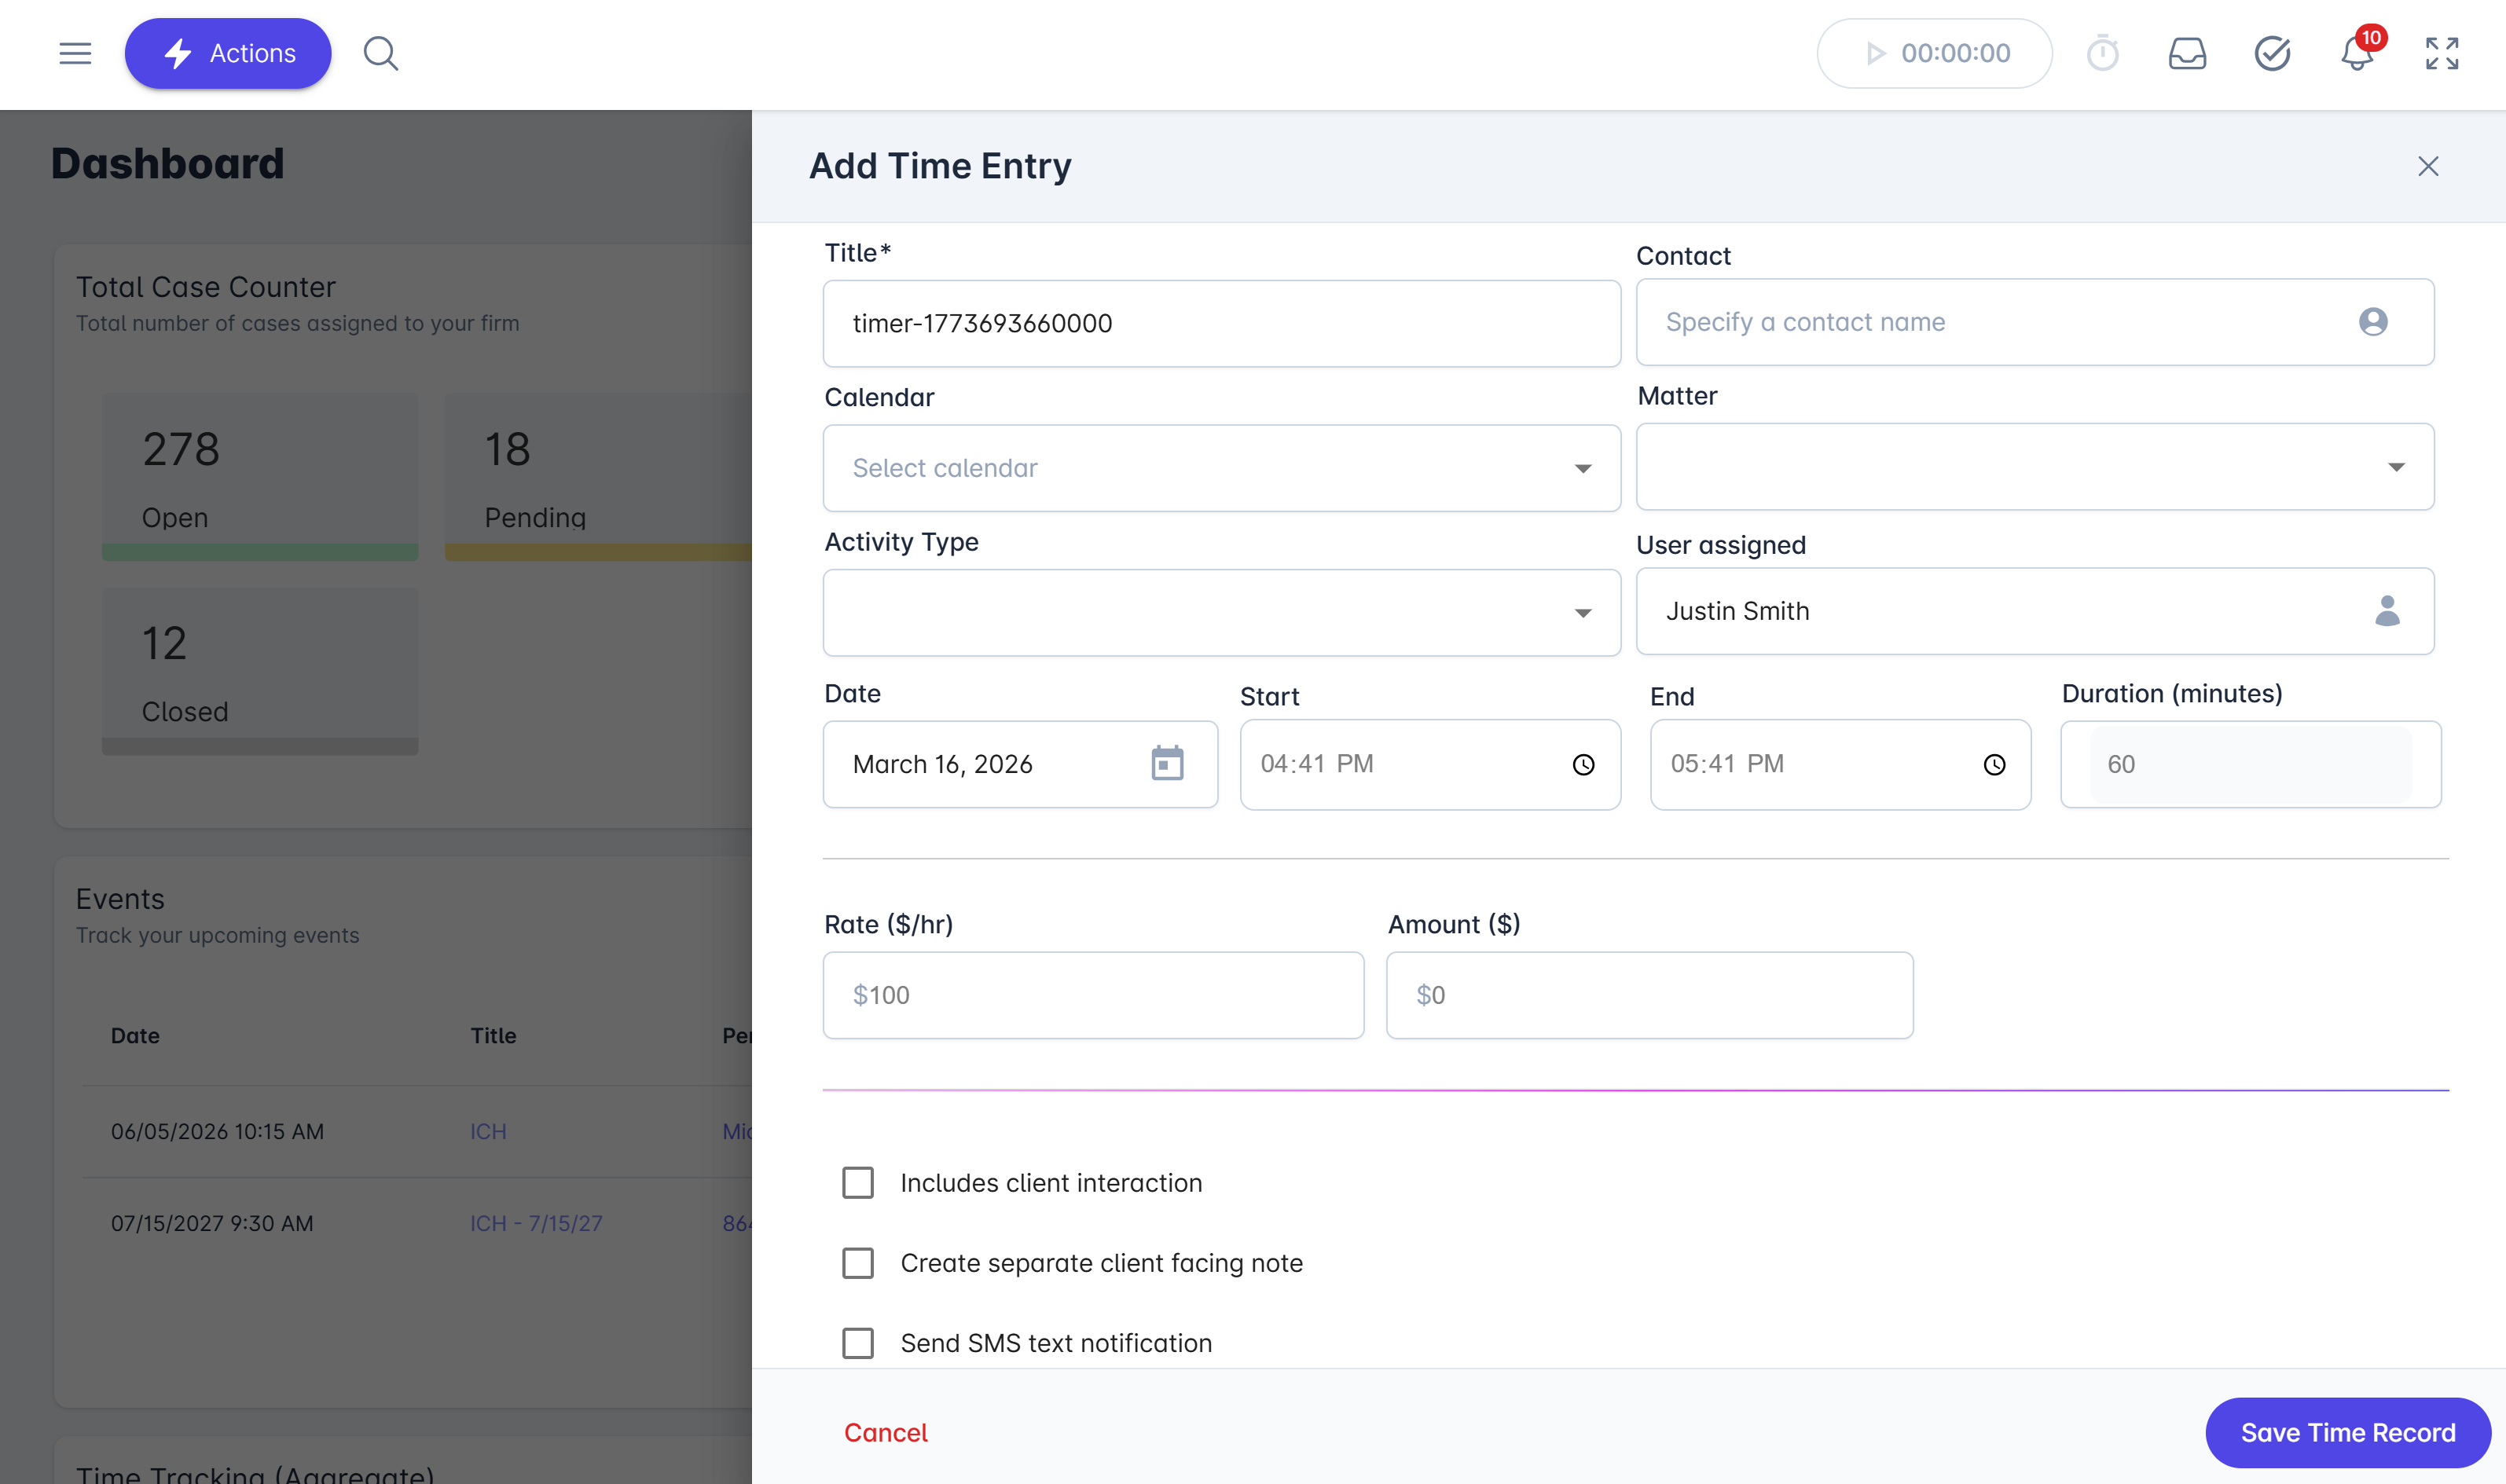
How to create a time entry
Select the Actions button at the top left next to the search bar
Select Add Time
Complete the Time Entry Form by filling out the required fields (Title, User Assigned, Date, Start Time, End Time).
Note: The software will detect the record you have pulled up on screen and default the Contact/Matter to match.Press Save to finish
How to add a time entry using the timer
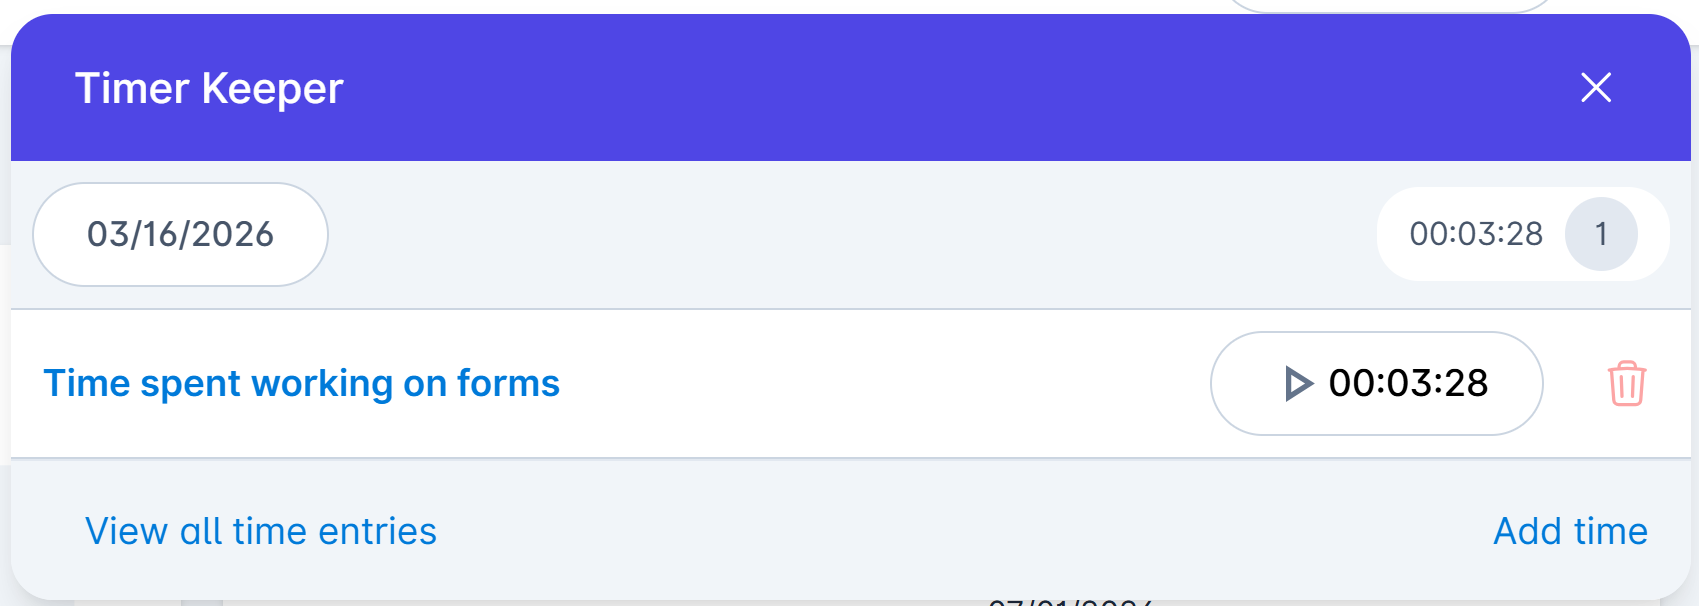
The timer widget organizes and tracks records of exact time. When a new timer starts, any other running timer will automatically be paused. A user's paused or active timers are managed in the timer widget drawer. The drawer can be accessed by clicking on the clock icon on the right side of the timer widget.
The drawer has controls to create new timers, pause or delete timers, as well as open the details of a time entry or navigate to another day in the past.
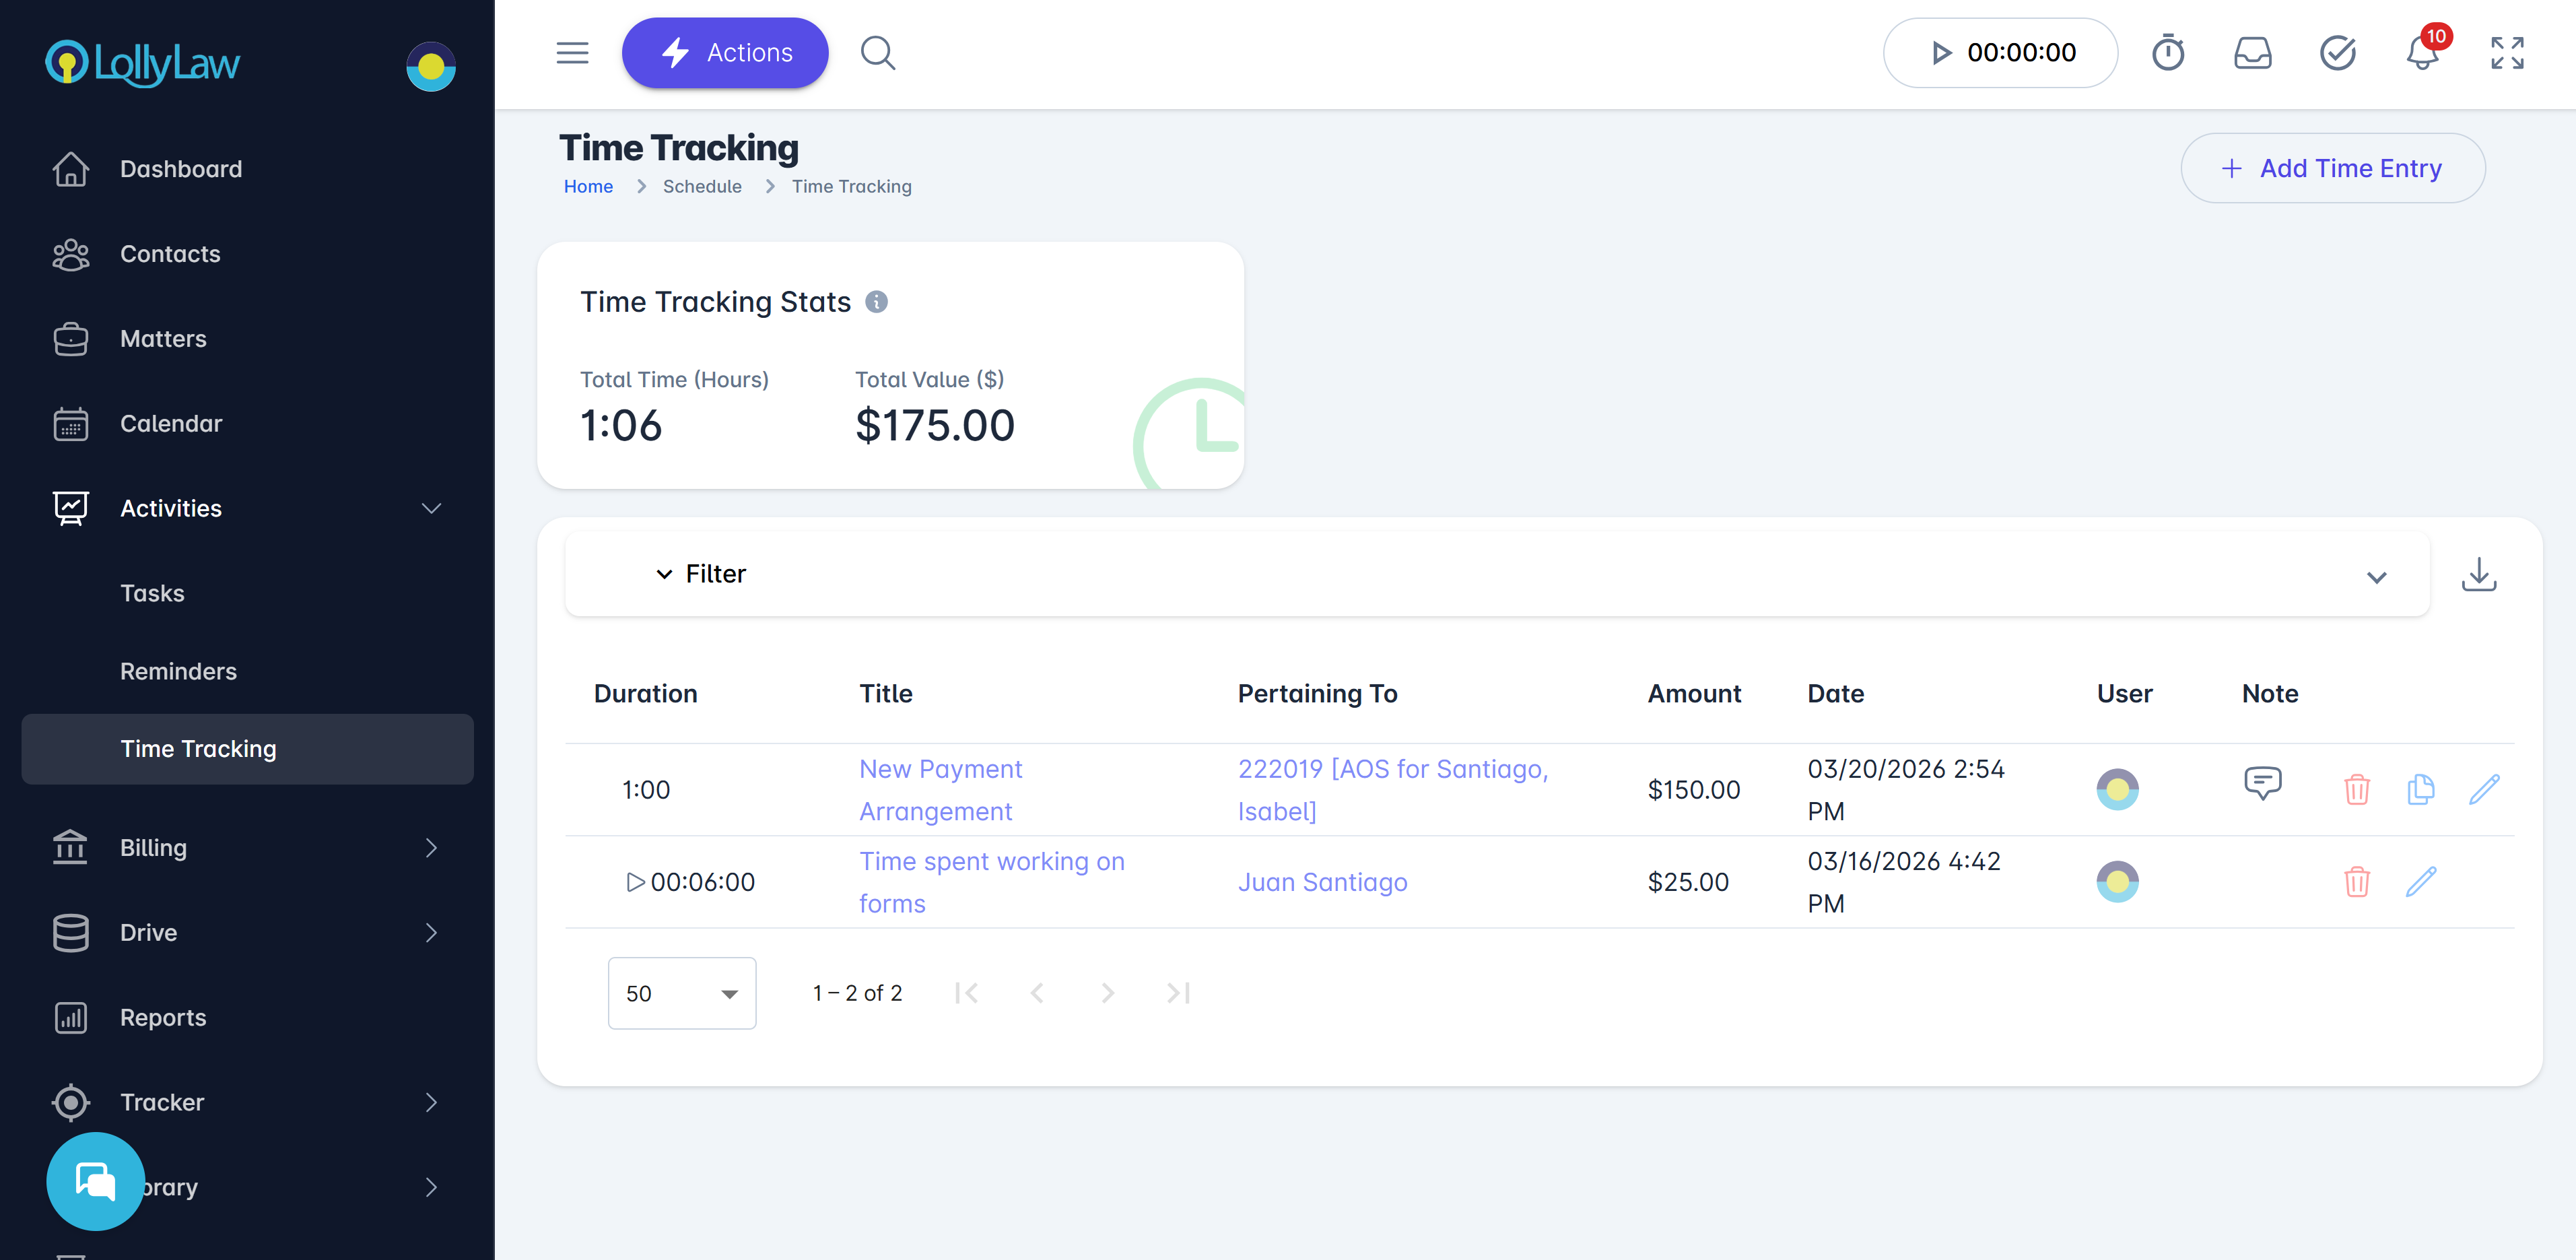
Alternatively, you can manage time entries in a larger view by going to Activities > Time Tracking.
Click on the Timer widget to start the timer
Pause or click on the timer again to stop/pause the timer
Note: The software will detect the record you have pulled up on screen and default the Contact/Matter to match.Complete the Time Entry Form by filling out the required fields (Title, User Assigned, Date, Start Time, End Time)
Press the Save button and finish

How to view and edit time entries
If you need to review the time entries you logged today, you can go to Activities >Time Tracking, which will automatically present you with all the time entries you recorded today. You have the option to search and filter by contact, matter, user-assigned, by activity type, and date range. So all of the time entries are accessible here and can be used by an administrator to check on work that day. It even shows time entries for a user who may have been suspended.
As a reminder, time entries that have been billed are read-only. Depending on the account settings, users may be able to edit the text of the note, but all other details, such as time/amount, etc will be read-only.