
Flexible payment plans can help make legal services more accessible for clients and improve your firm's payment consistency. Let's look at the steps:
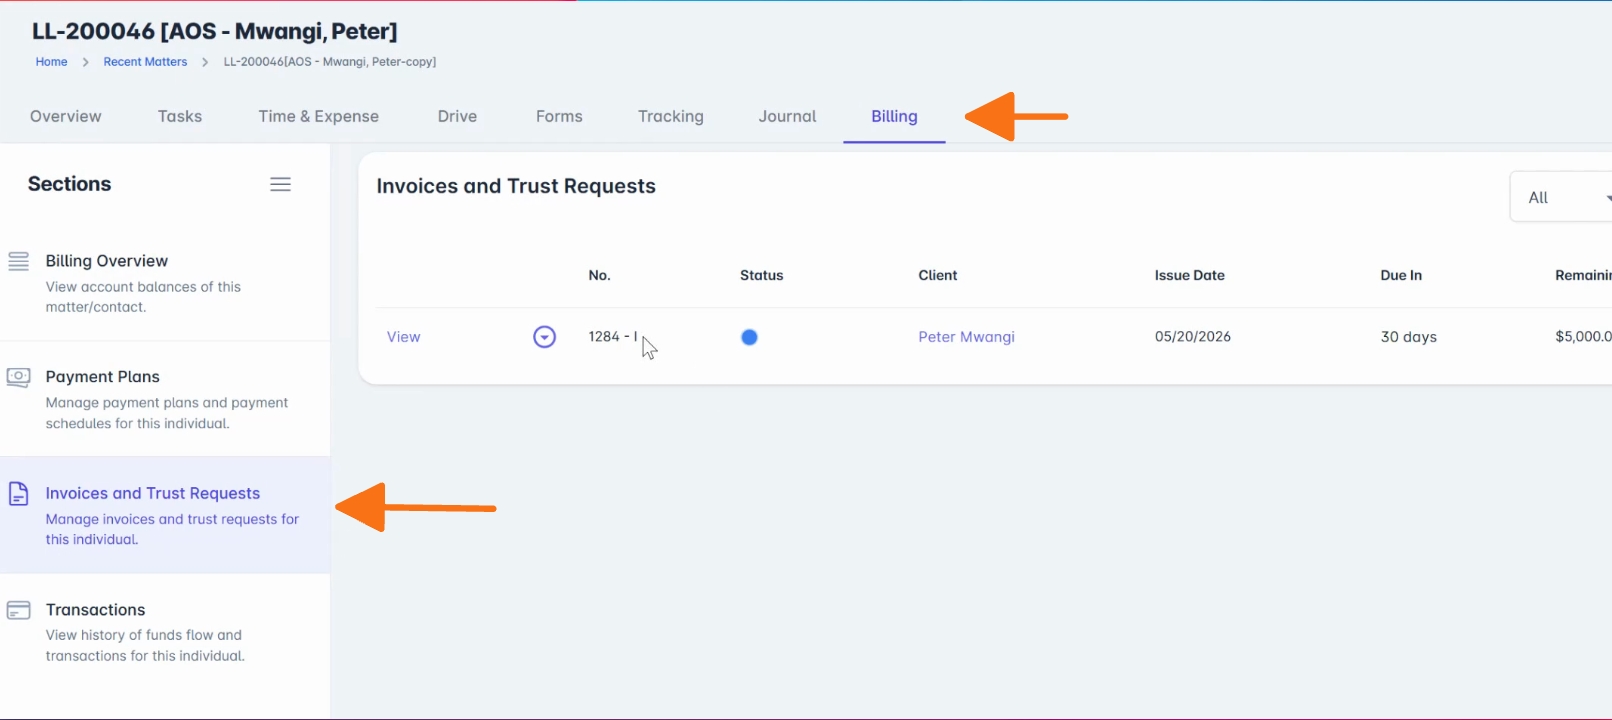
Step 1: Open Matter Record
Open the relevant matter record. Navigate to Billing, then select Invoices and Trust Requests.
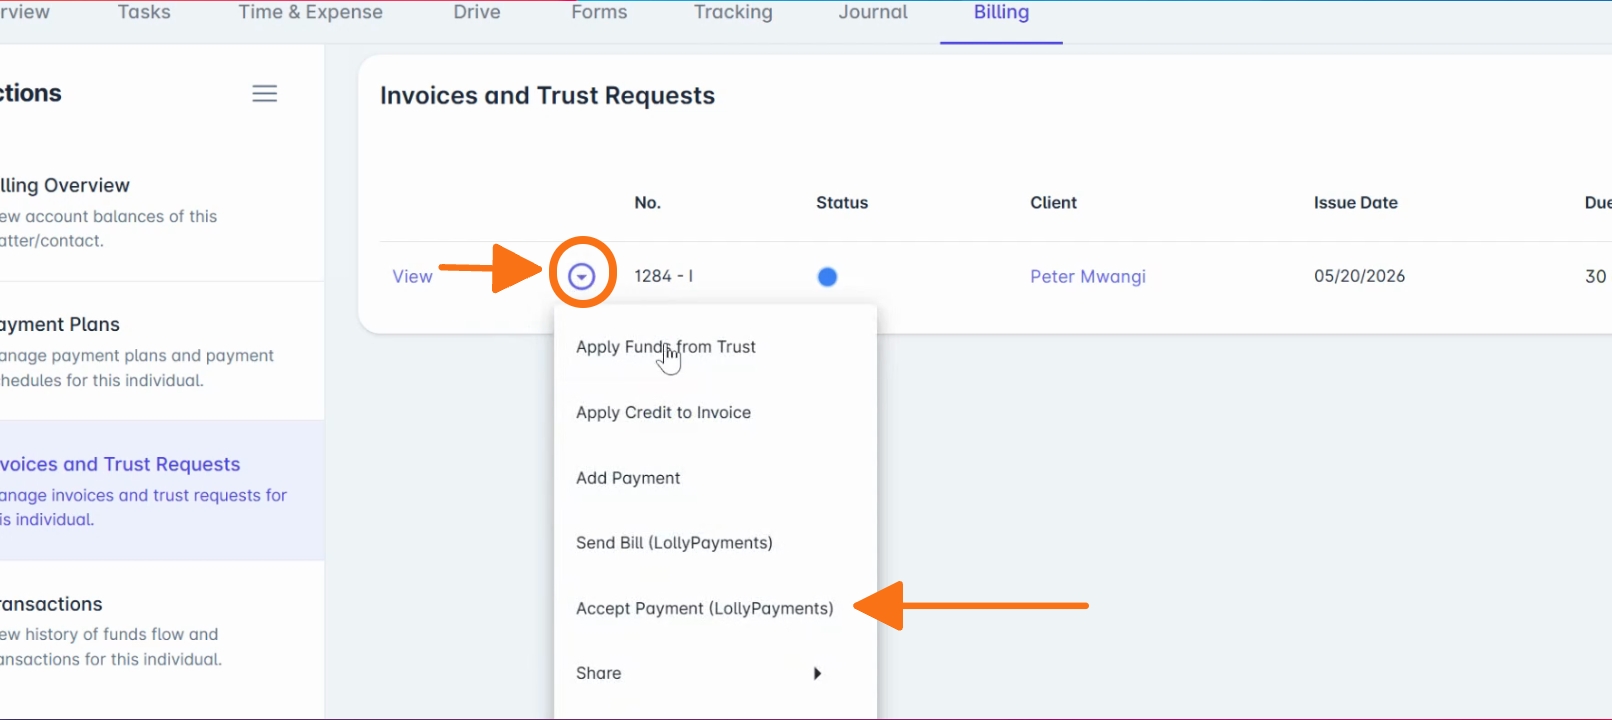
Step 2: Select Accept Payment
Find the invoice, open the Invoice Actions menu, and select Accept Payment (LollyPayments).
Step 3: Choose Payment Plan Auto
You'll see options for One Time Charge, Payment Plan (Auto), or Manual Recharges. Choose Payment Plan Auto to configure an automatic payment plan.
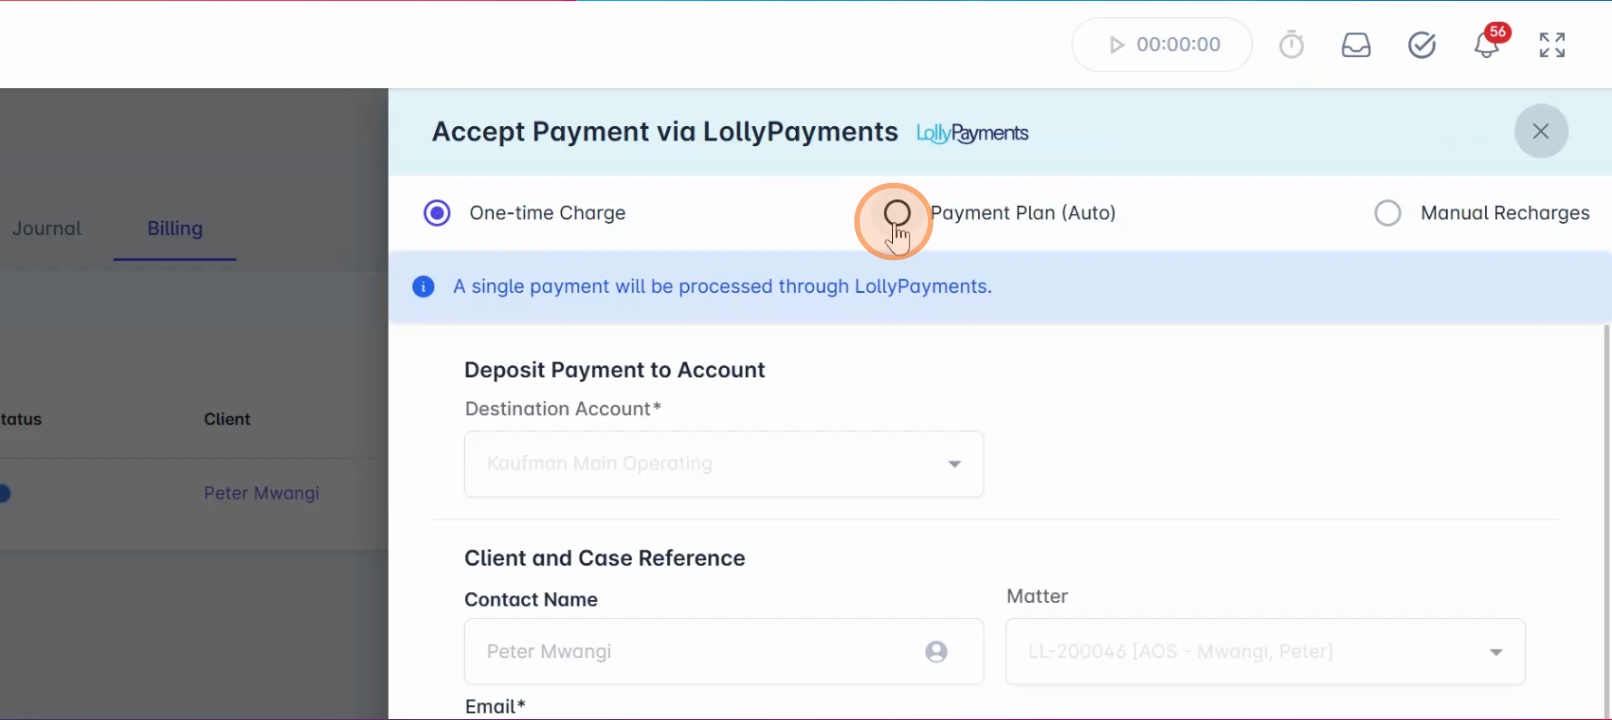
Step 4: Select Destination Account
Select the destination bank account where the funds should be deposited.
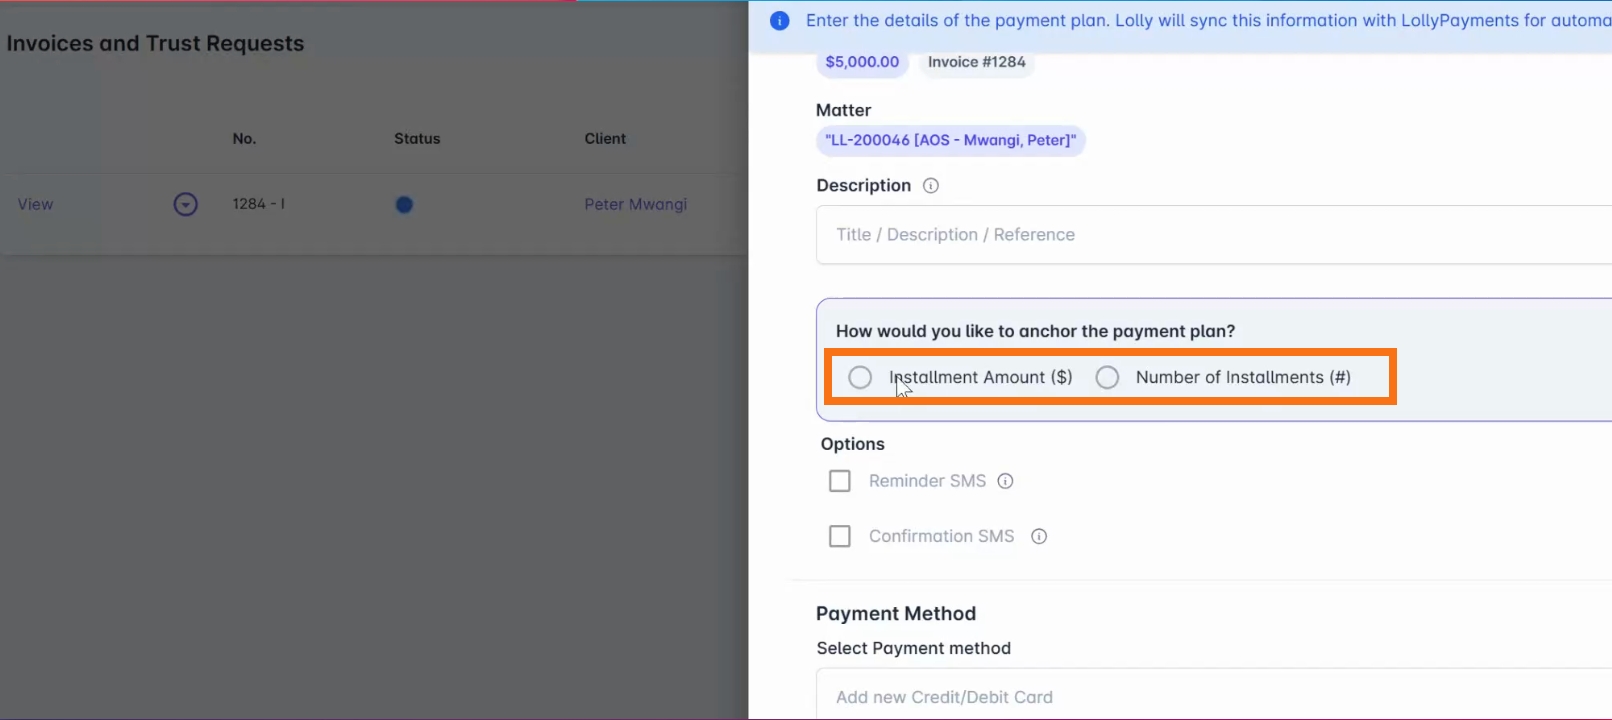
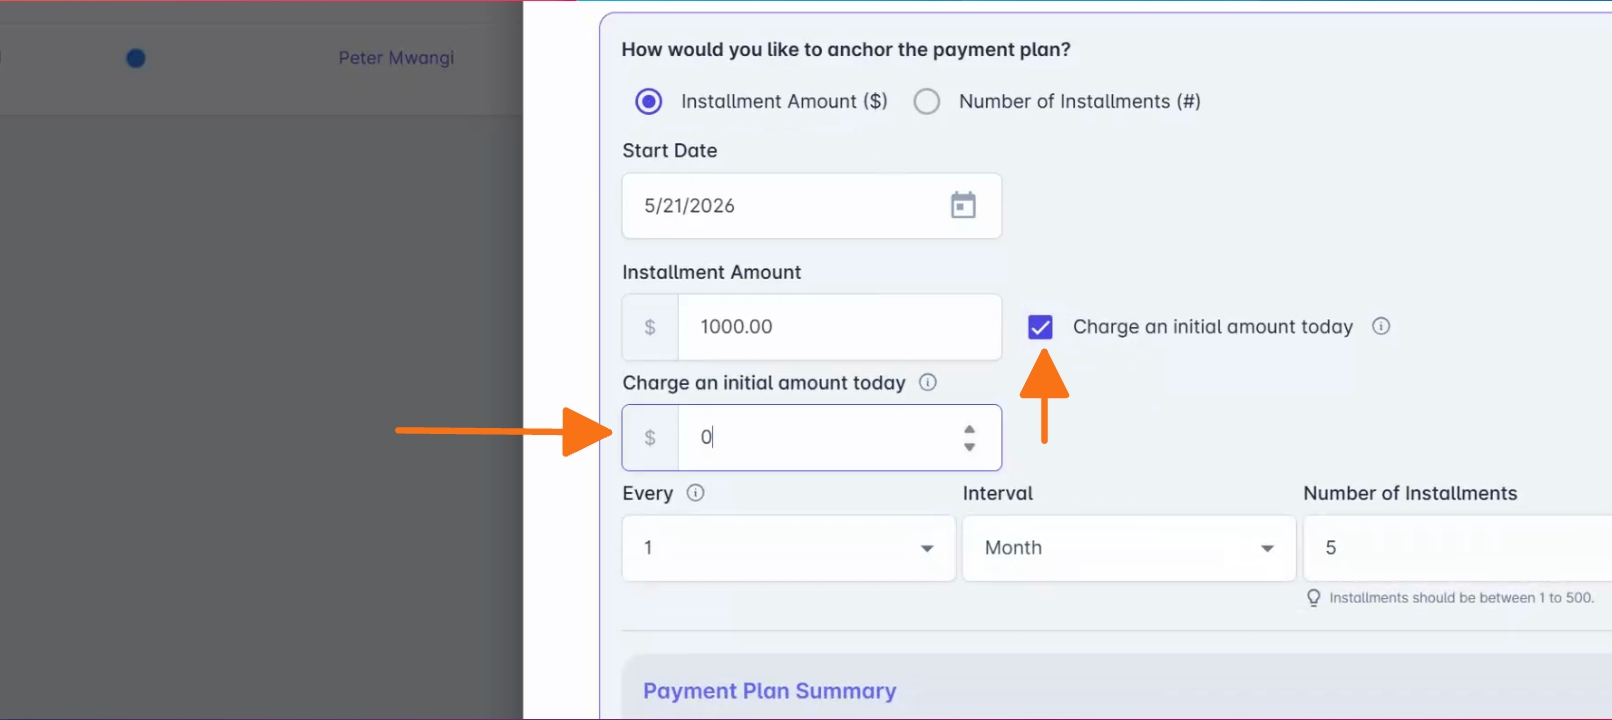
Step 5: Configure Payment Plan
Choose how to structure and configure the payment plan schedule. You can anchor the plan based on installment amount or total number of installments.
Step 6: Add Initial Retainer Payment
Optionally, include an initial retainer payment during setup.
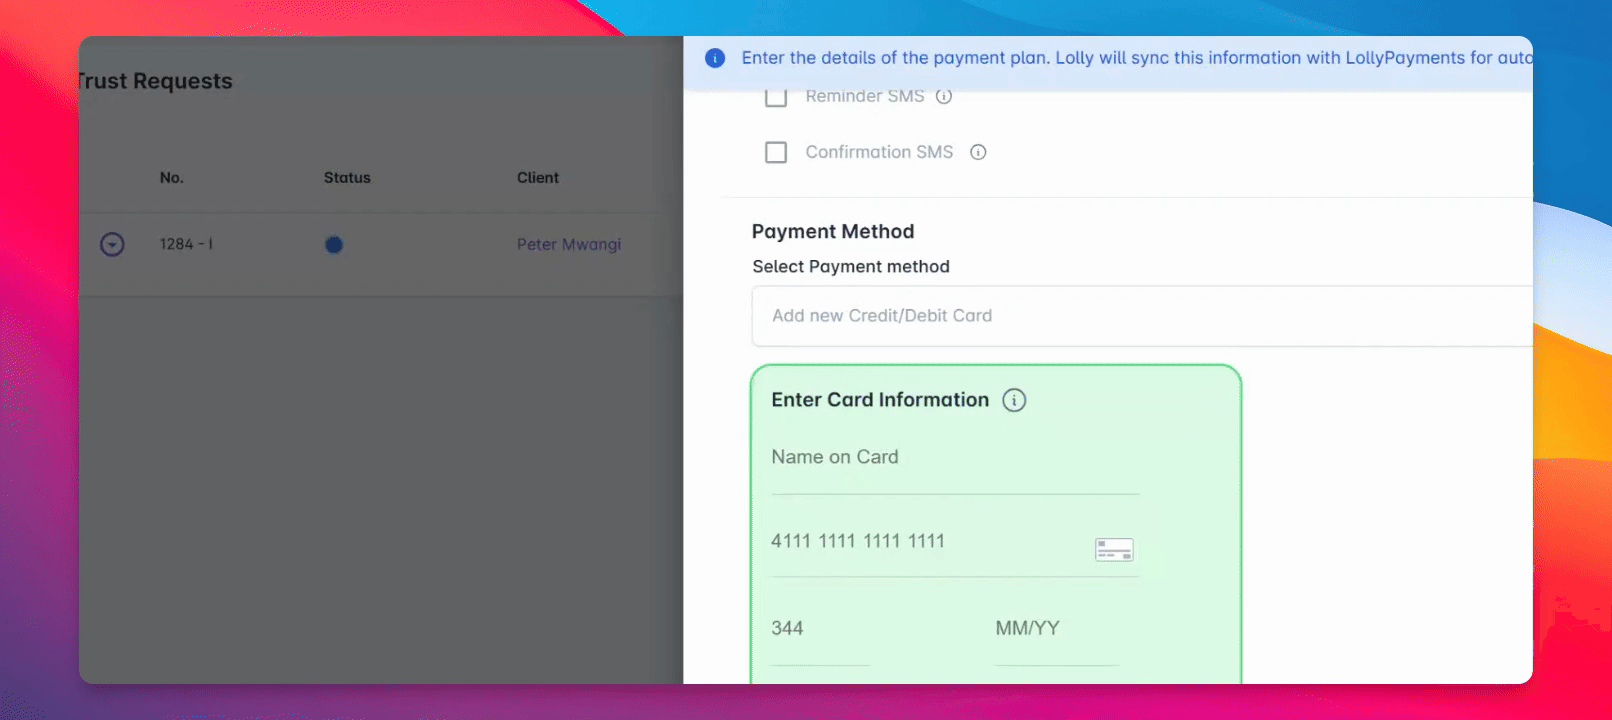
Step 7: Enter Client Payment Details
Enter the client's payment details. If the client has a saved payment method, select it from the dropdown. Otherwise, securely enter a new payment method during setup.
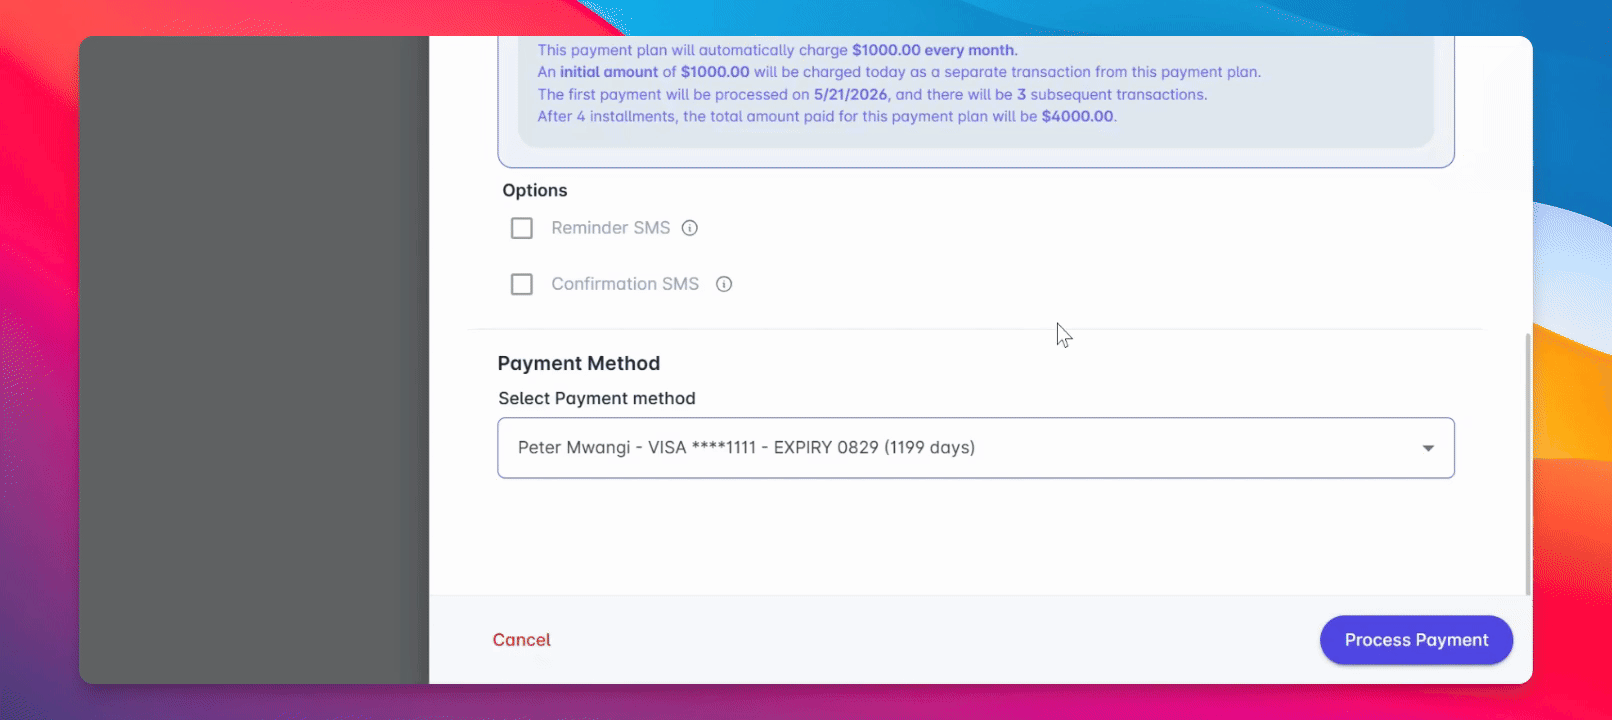
Step 8: Process and Confirm Payment
Once the schedule and payment details are confirmed, select Process Payment and Confirm.
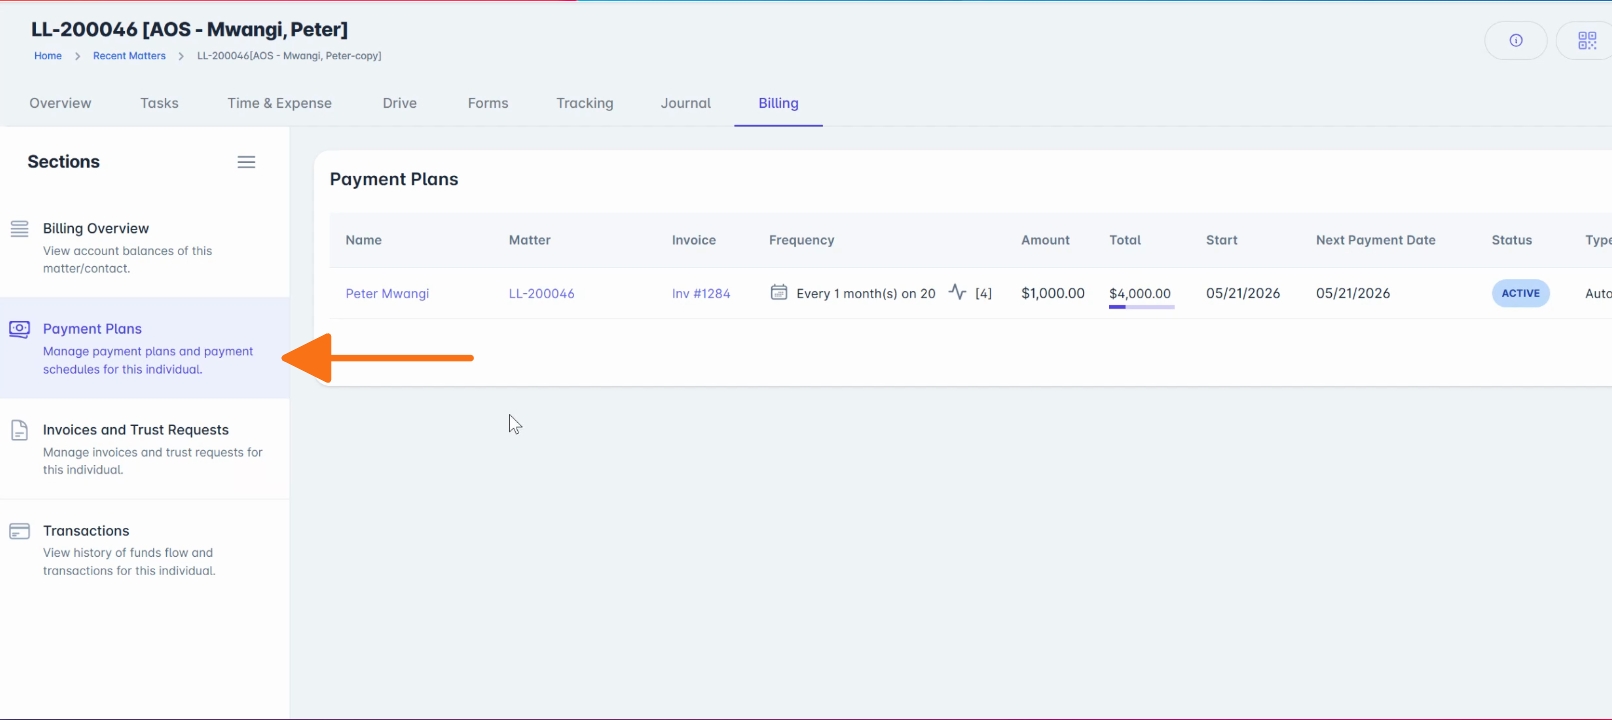
Review Completed Plan
Review the completed payment plan under Billing > Payment Plans. Here, you can see the remaining balance, payment frequency, and the associated invoice.
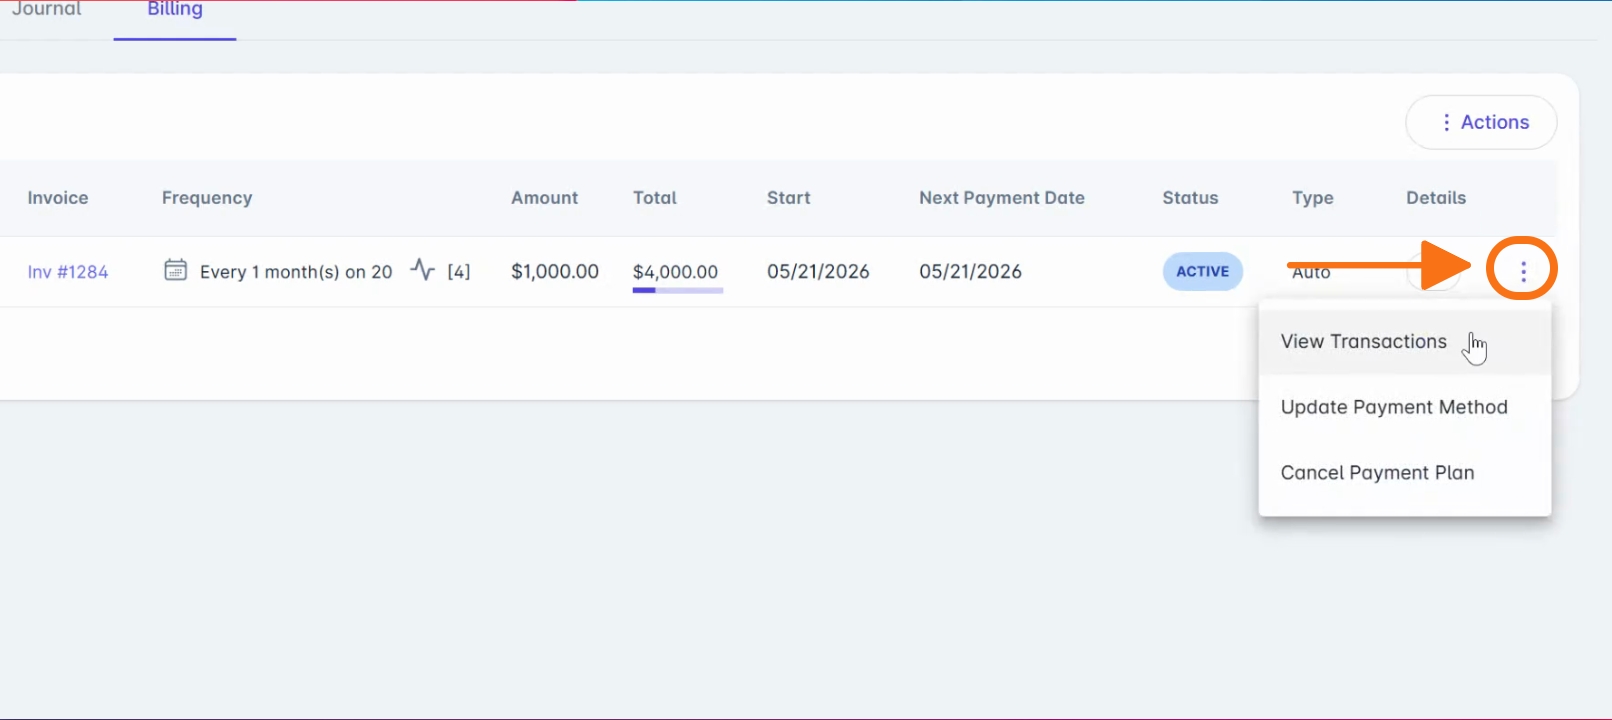
Manage Payment Plan
Use the Actions menu to view upcoming scheduled transactions, processed payments, update the payment method, or cancel the payment plan.
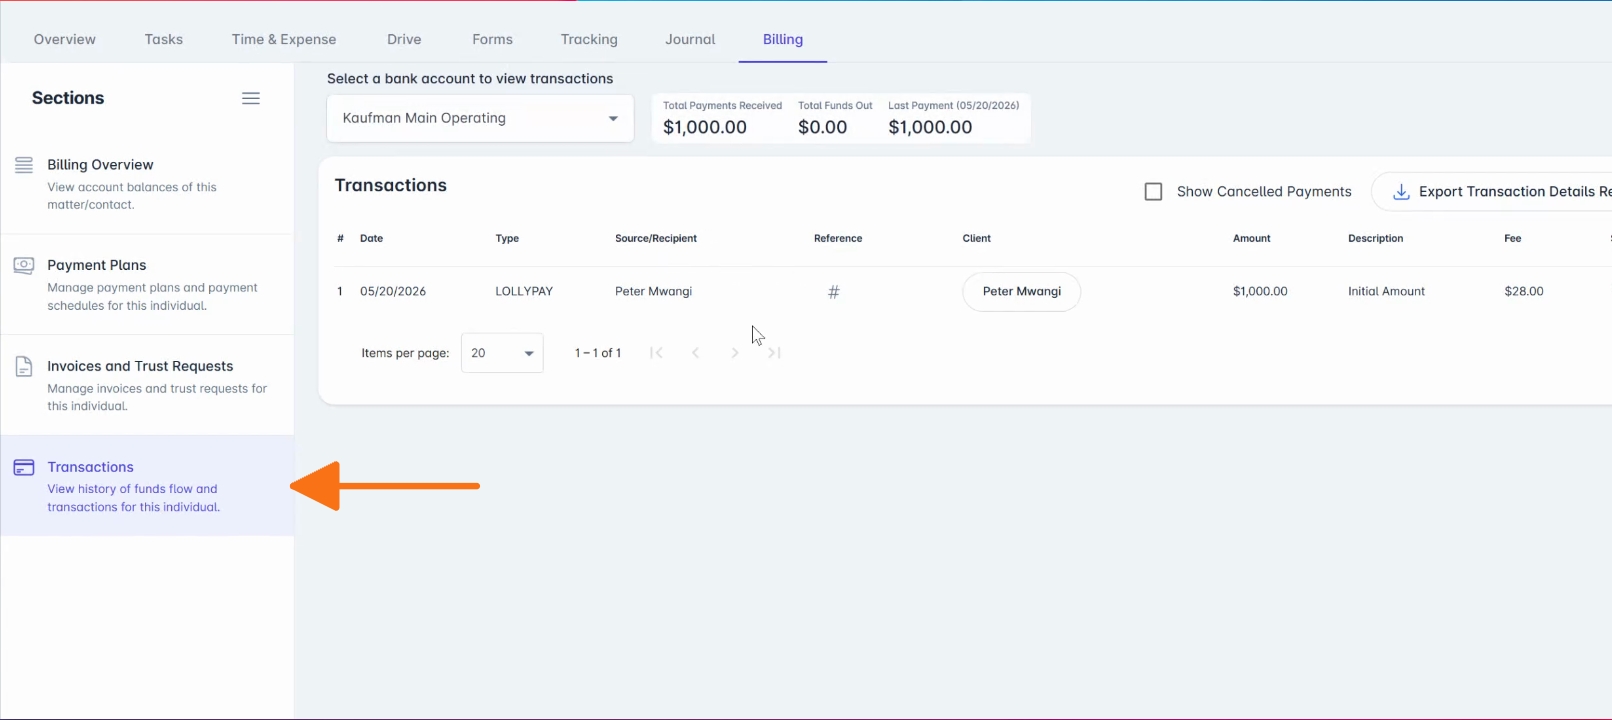
Track Automatic Payments
As payments are processed automatically, each successful transaction will appear in the Transactions tab for easy tracking and reporting.
With LollyPayments, your firm can automate recurring billing in a few steps and offer clients a more flexible payment experience.
To learn more, visit the help.lollylaw.com
or contact support@lollylaw.com