
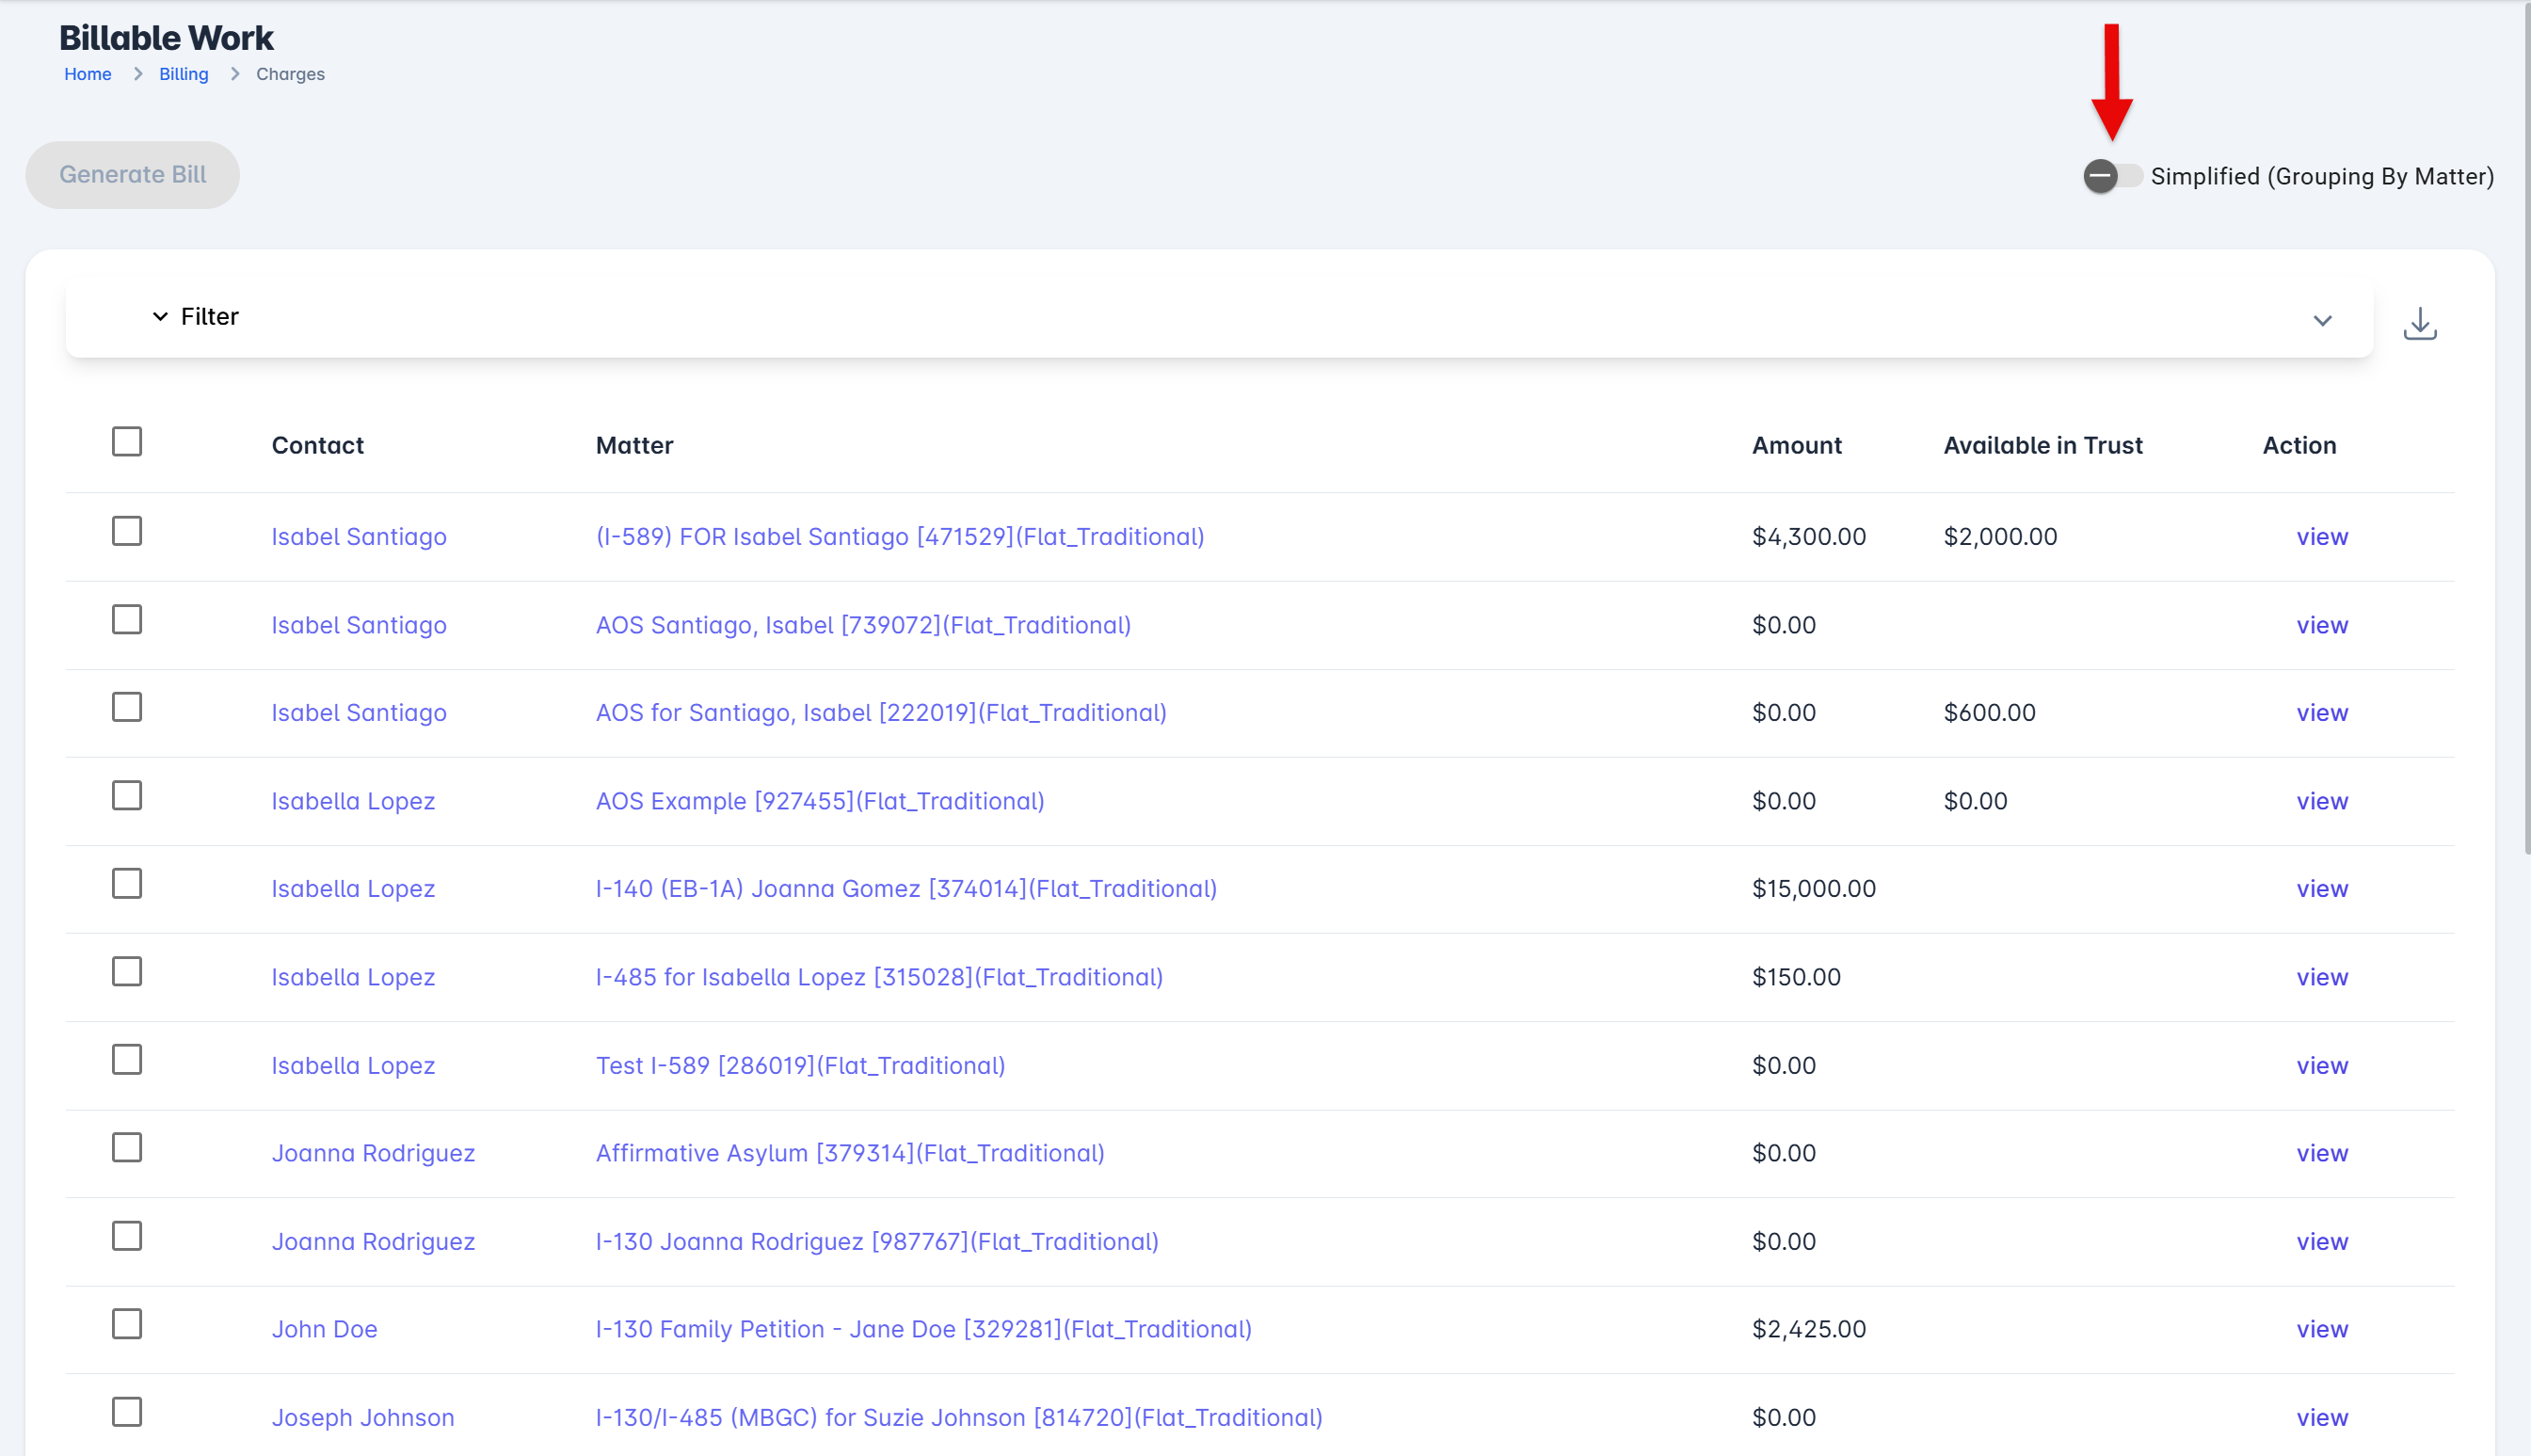
Advanced Viewing Options in Billing: View Charges 'Grouped by Matter (Simplified)'
LollyLaw allows users with billing permissions to view charges by matter or across all activities. The following steps will provide instructions on how to view charges 1) grouped by matter, and 2) across all activities.
To group charges by their matter, go to Billing>Billable Work, and make sure the toggle button in turned on so that "Simplified (Group by Matter)" is displaying.
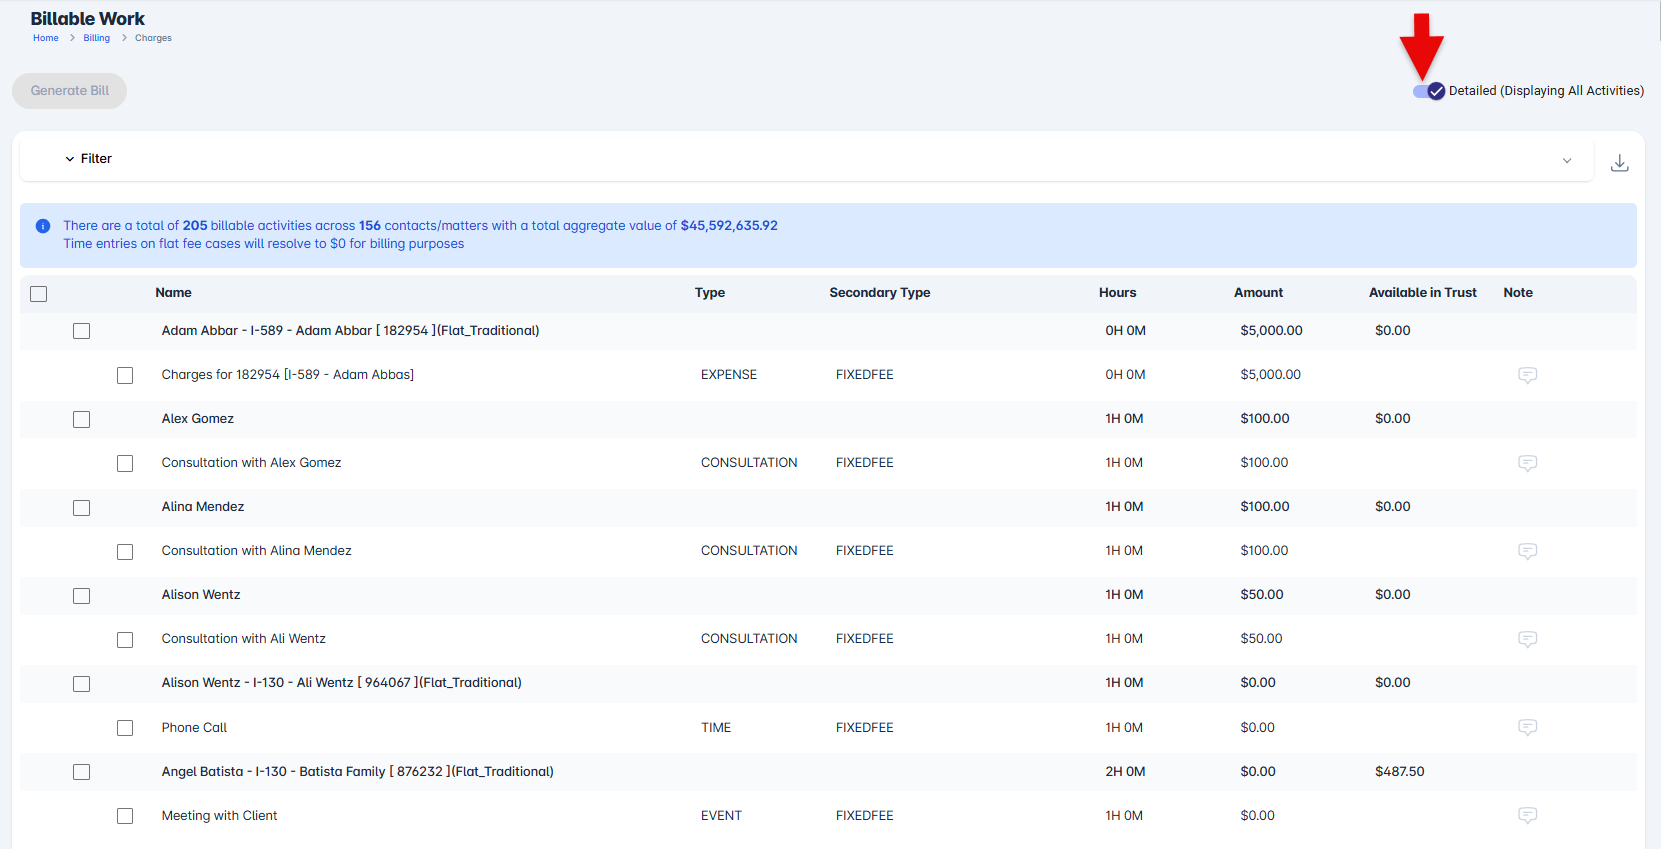
Advanced Viewing Options in Billing: View Charges as 'Display All Activities (Detailed)'
To get a detailed view of charges by their activities, go to Billing>Billable Work, and select the toggle button so that "Detailed (Display All Activities)" is displaying.
Apply Funds from Trust at the Invoice Creation Step
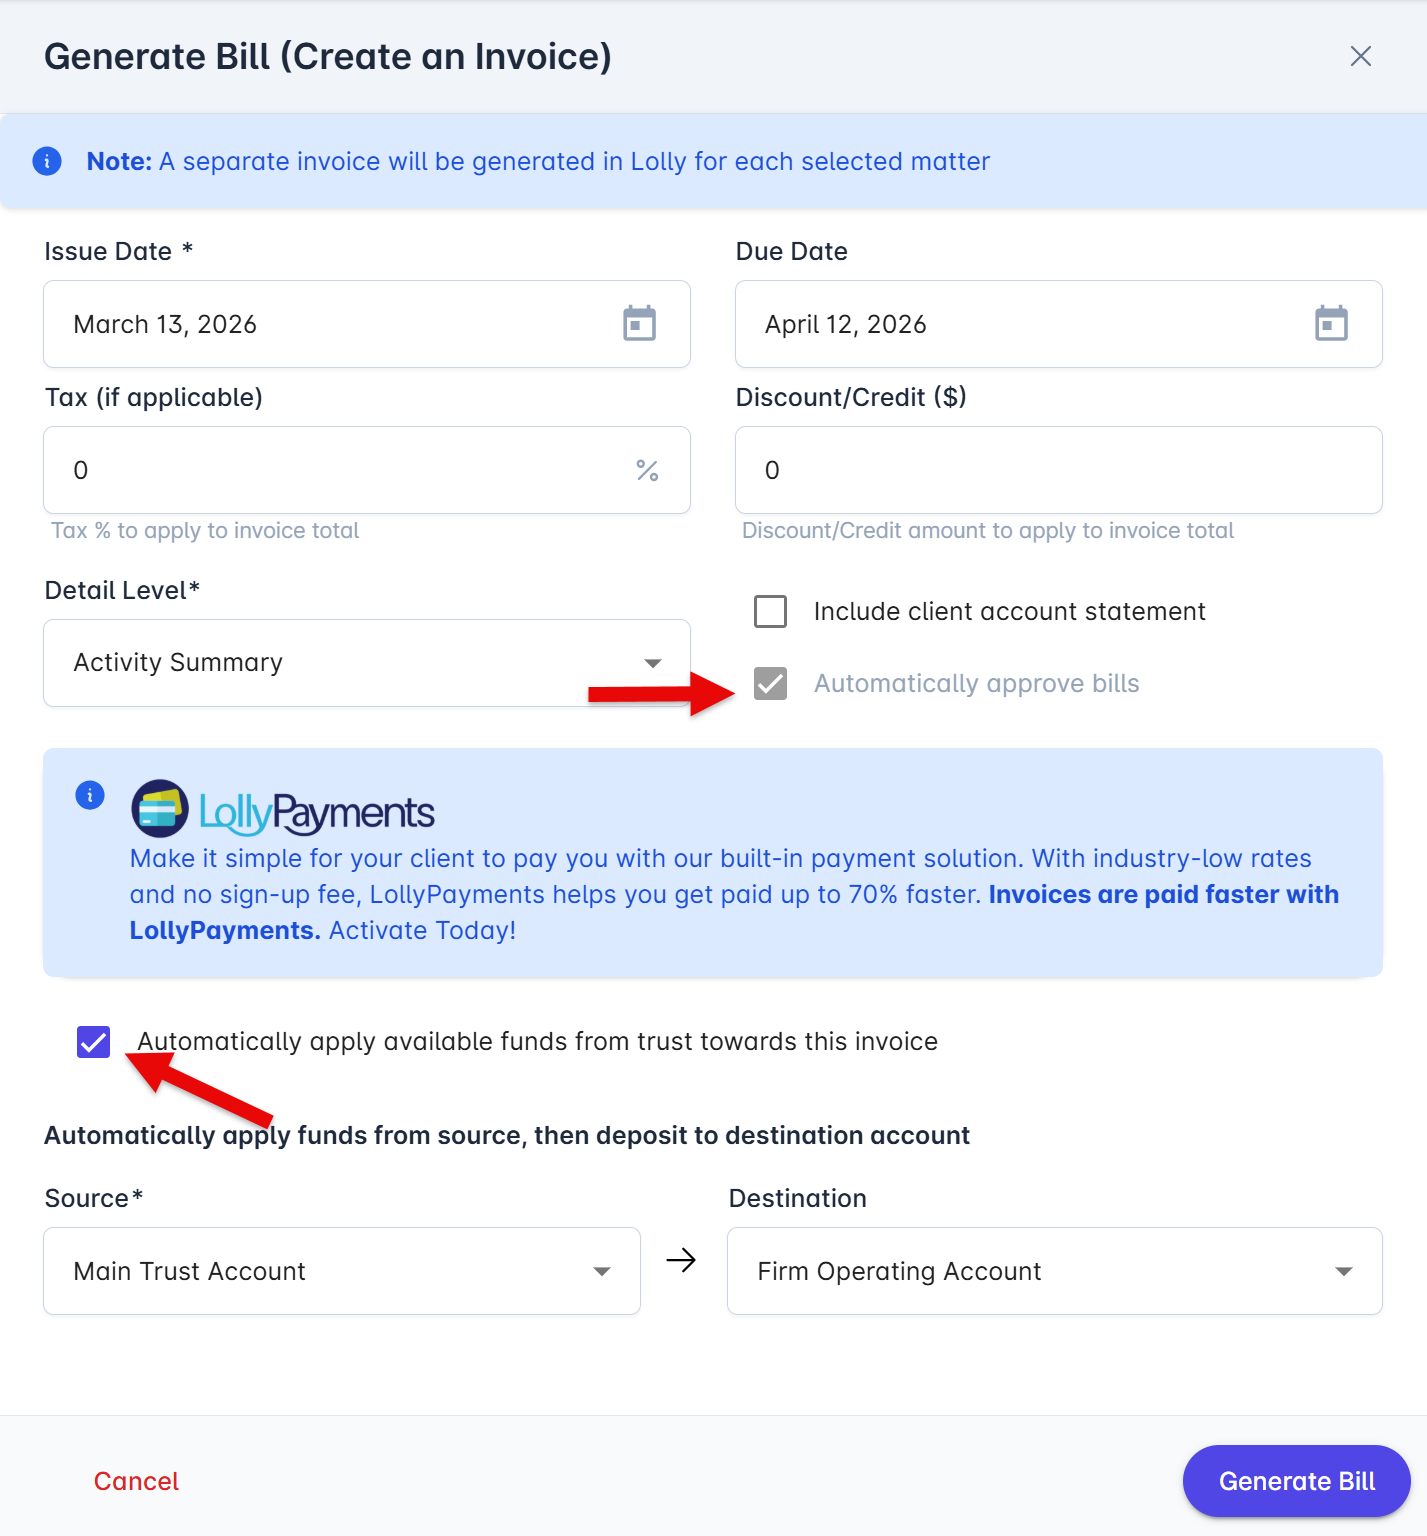
1. Go to Billing>Billable Work and select the charge(s) you would like to generate into an invoice.
2. Select Generate Bill(s).
3. A drawer will open where you can complete the required fields that will appear on the invoice. Select the checkbox for "Apply funds from trust immediately in invoice creation". This will automatically apply the funds from the selected trust account to the firm's selected operating account, upon generating the invoice.
4. Select the checkbox for "automatically approve bills" (if it is not already selected) to automatically approve the invoice upon generating it into a draft. This will skip the 'draft creation' step and immediately approve the invoice upon creation.
5. Click 'Generate Invoice and Apply Funds from Trust'. The funds from the selected trust account will apply to the selected operating account.
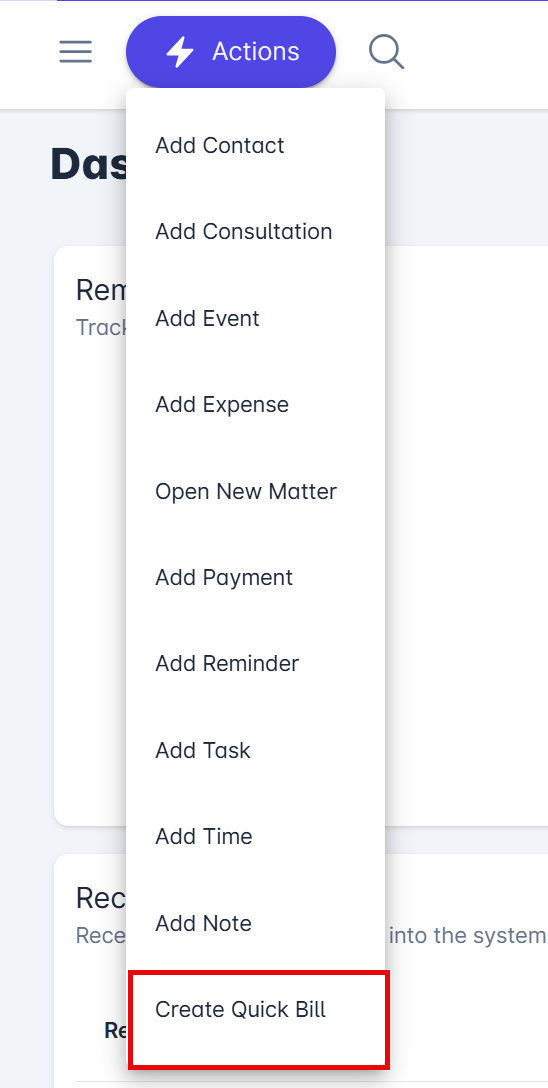
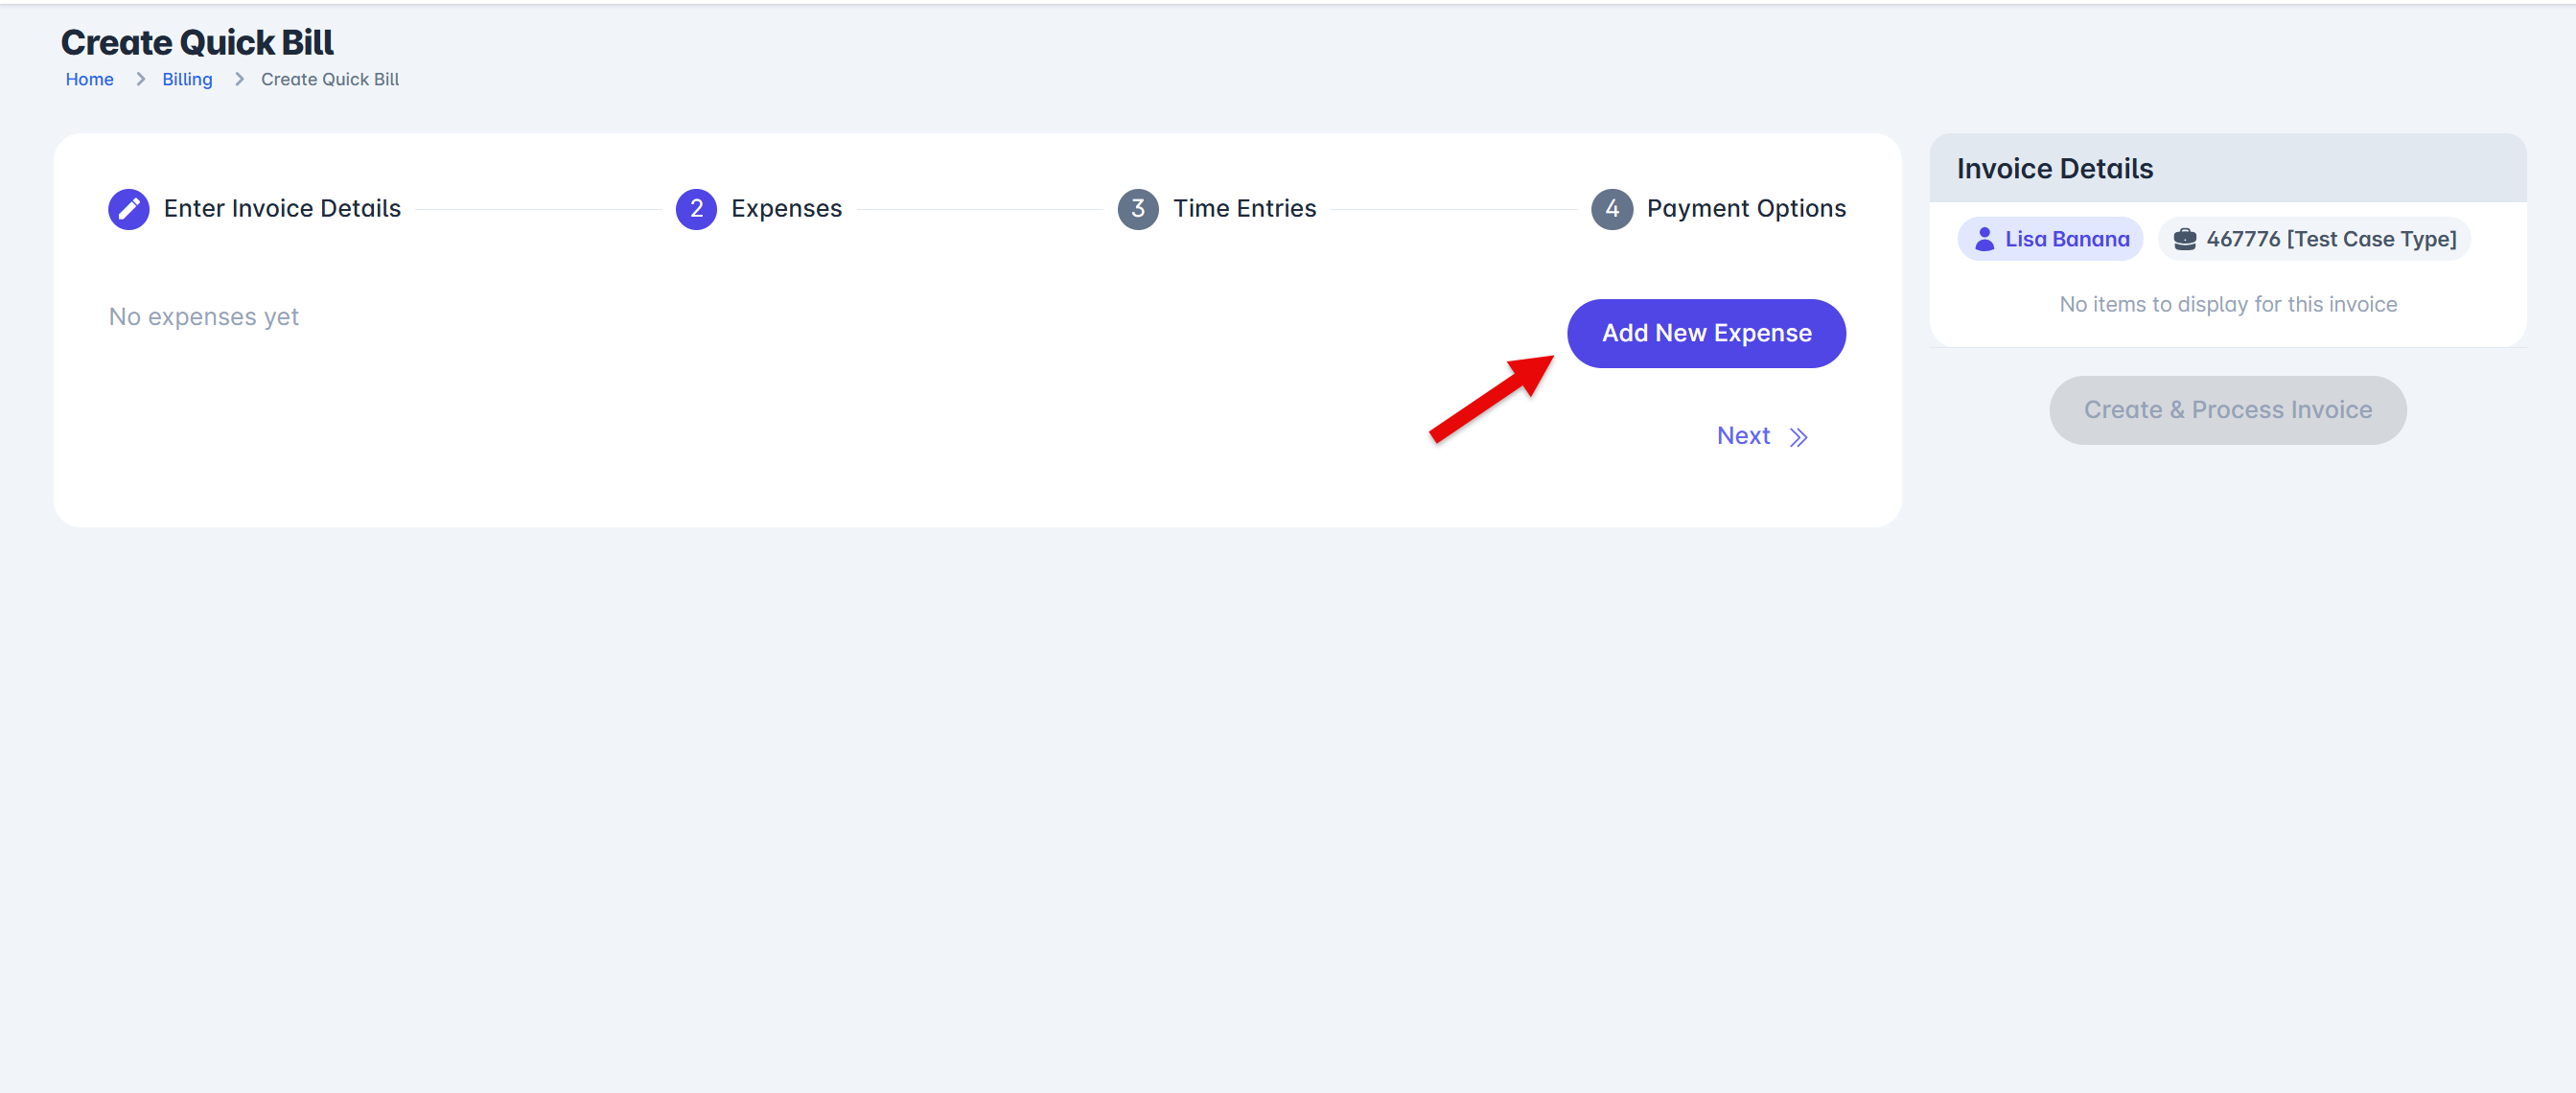
'Quick Bill' Feature
1. If you have user permissions, go to Settings>Security Groups, select your user security group, and turn on the permission to allow for 'Quick Bill'.
2. Once the permission is turned on, click the Actions button and select the Quick Bill option at the bottom of the action menu.
3. A 'Quick Bill' screen will appear where you will enter the Contact, Matter, and the invoice details that will appear on the invoice.
4. On this screen, under Expenses, enter the expense details and amount, and click the Save button. If billing for a time entry, instead add any time entry if applicable and click Save.
5. Under Payment Options, select the payment mode and the destination account where the funds should be deposited. For payment mode, you can select any of the following: 1) Apply Funds from Trust, 2) Accept Payment via LollyPayments, 3) Send Bill to Clients for Full Payment, or 4) No Payment at this time.
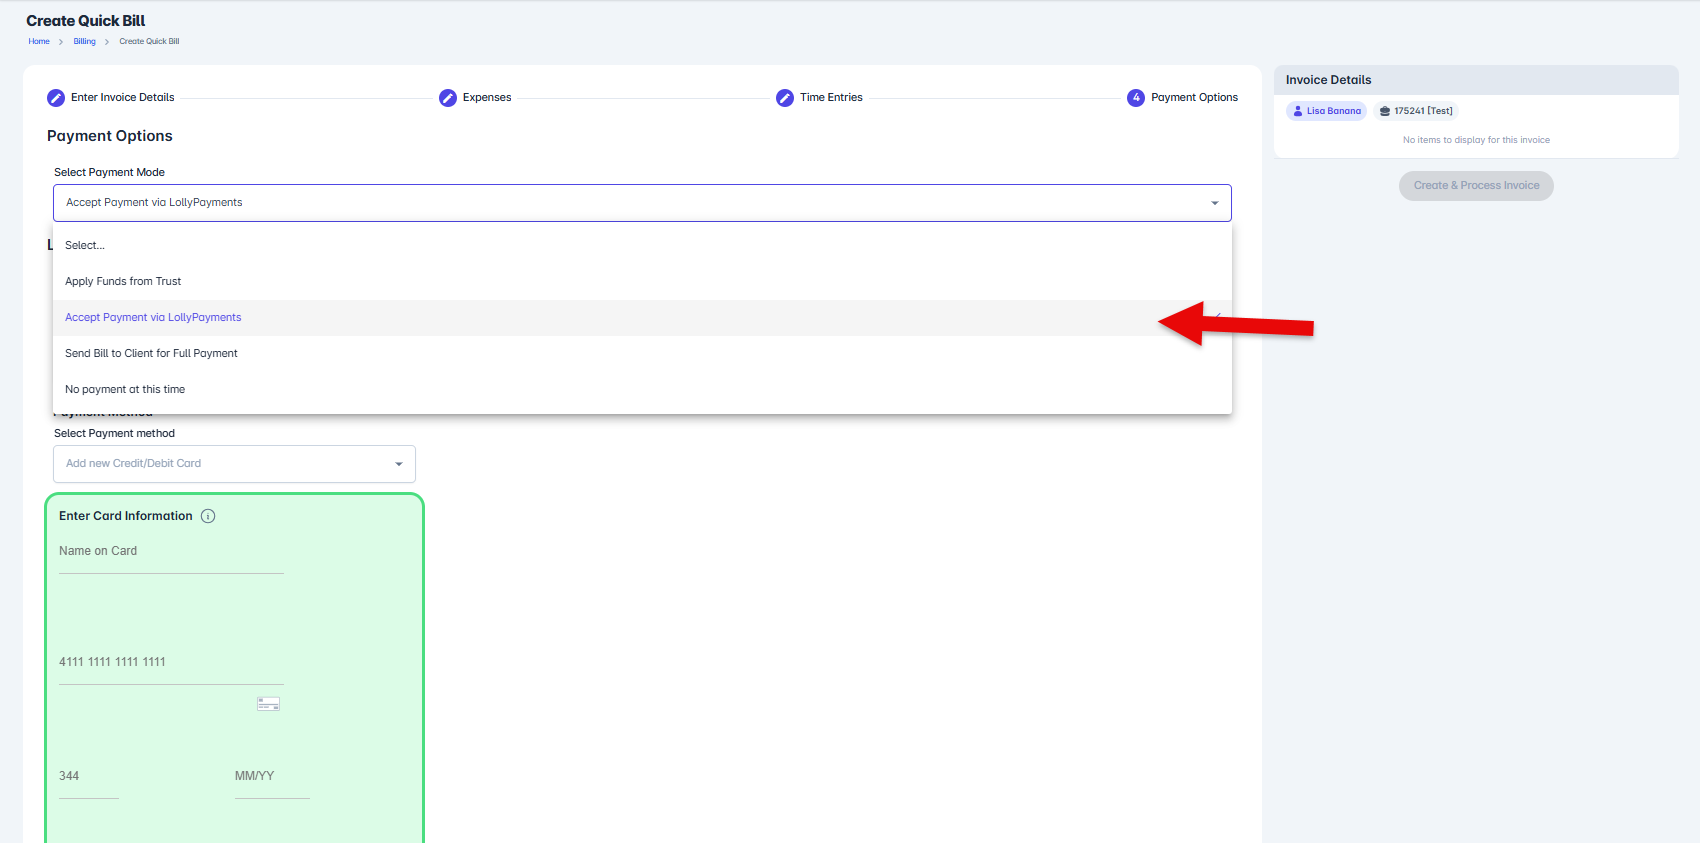
6. If accepting payment via LollyPayments Details, select the type of payment you would like to process (one-time charge, automatic payment plan, or manual recharge). Enter the email address and the payment method details.
7. Scroll back to the top of the Quick Bill screen to review the invoice and payment details, and click "Create and Process Invoice." LollyLaw will 1) create the expense, 2) generate and approve the invoice, and 3) process the payment mode selected, all within 30 seconds.