
To create an automated payment plan for your client's invoice, follow these steps below:
1. Go to Billing>Invoices and use the filter feature to find the invoice you would like to create a payment plan for
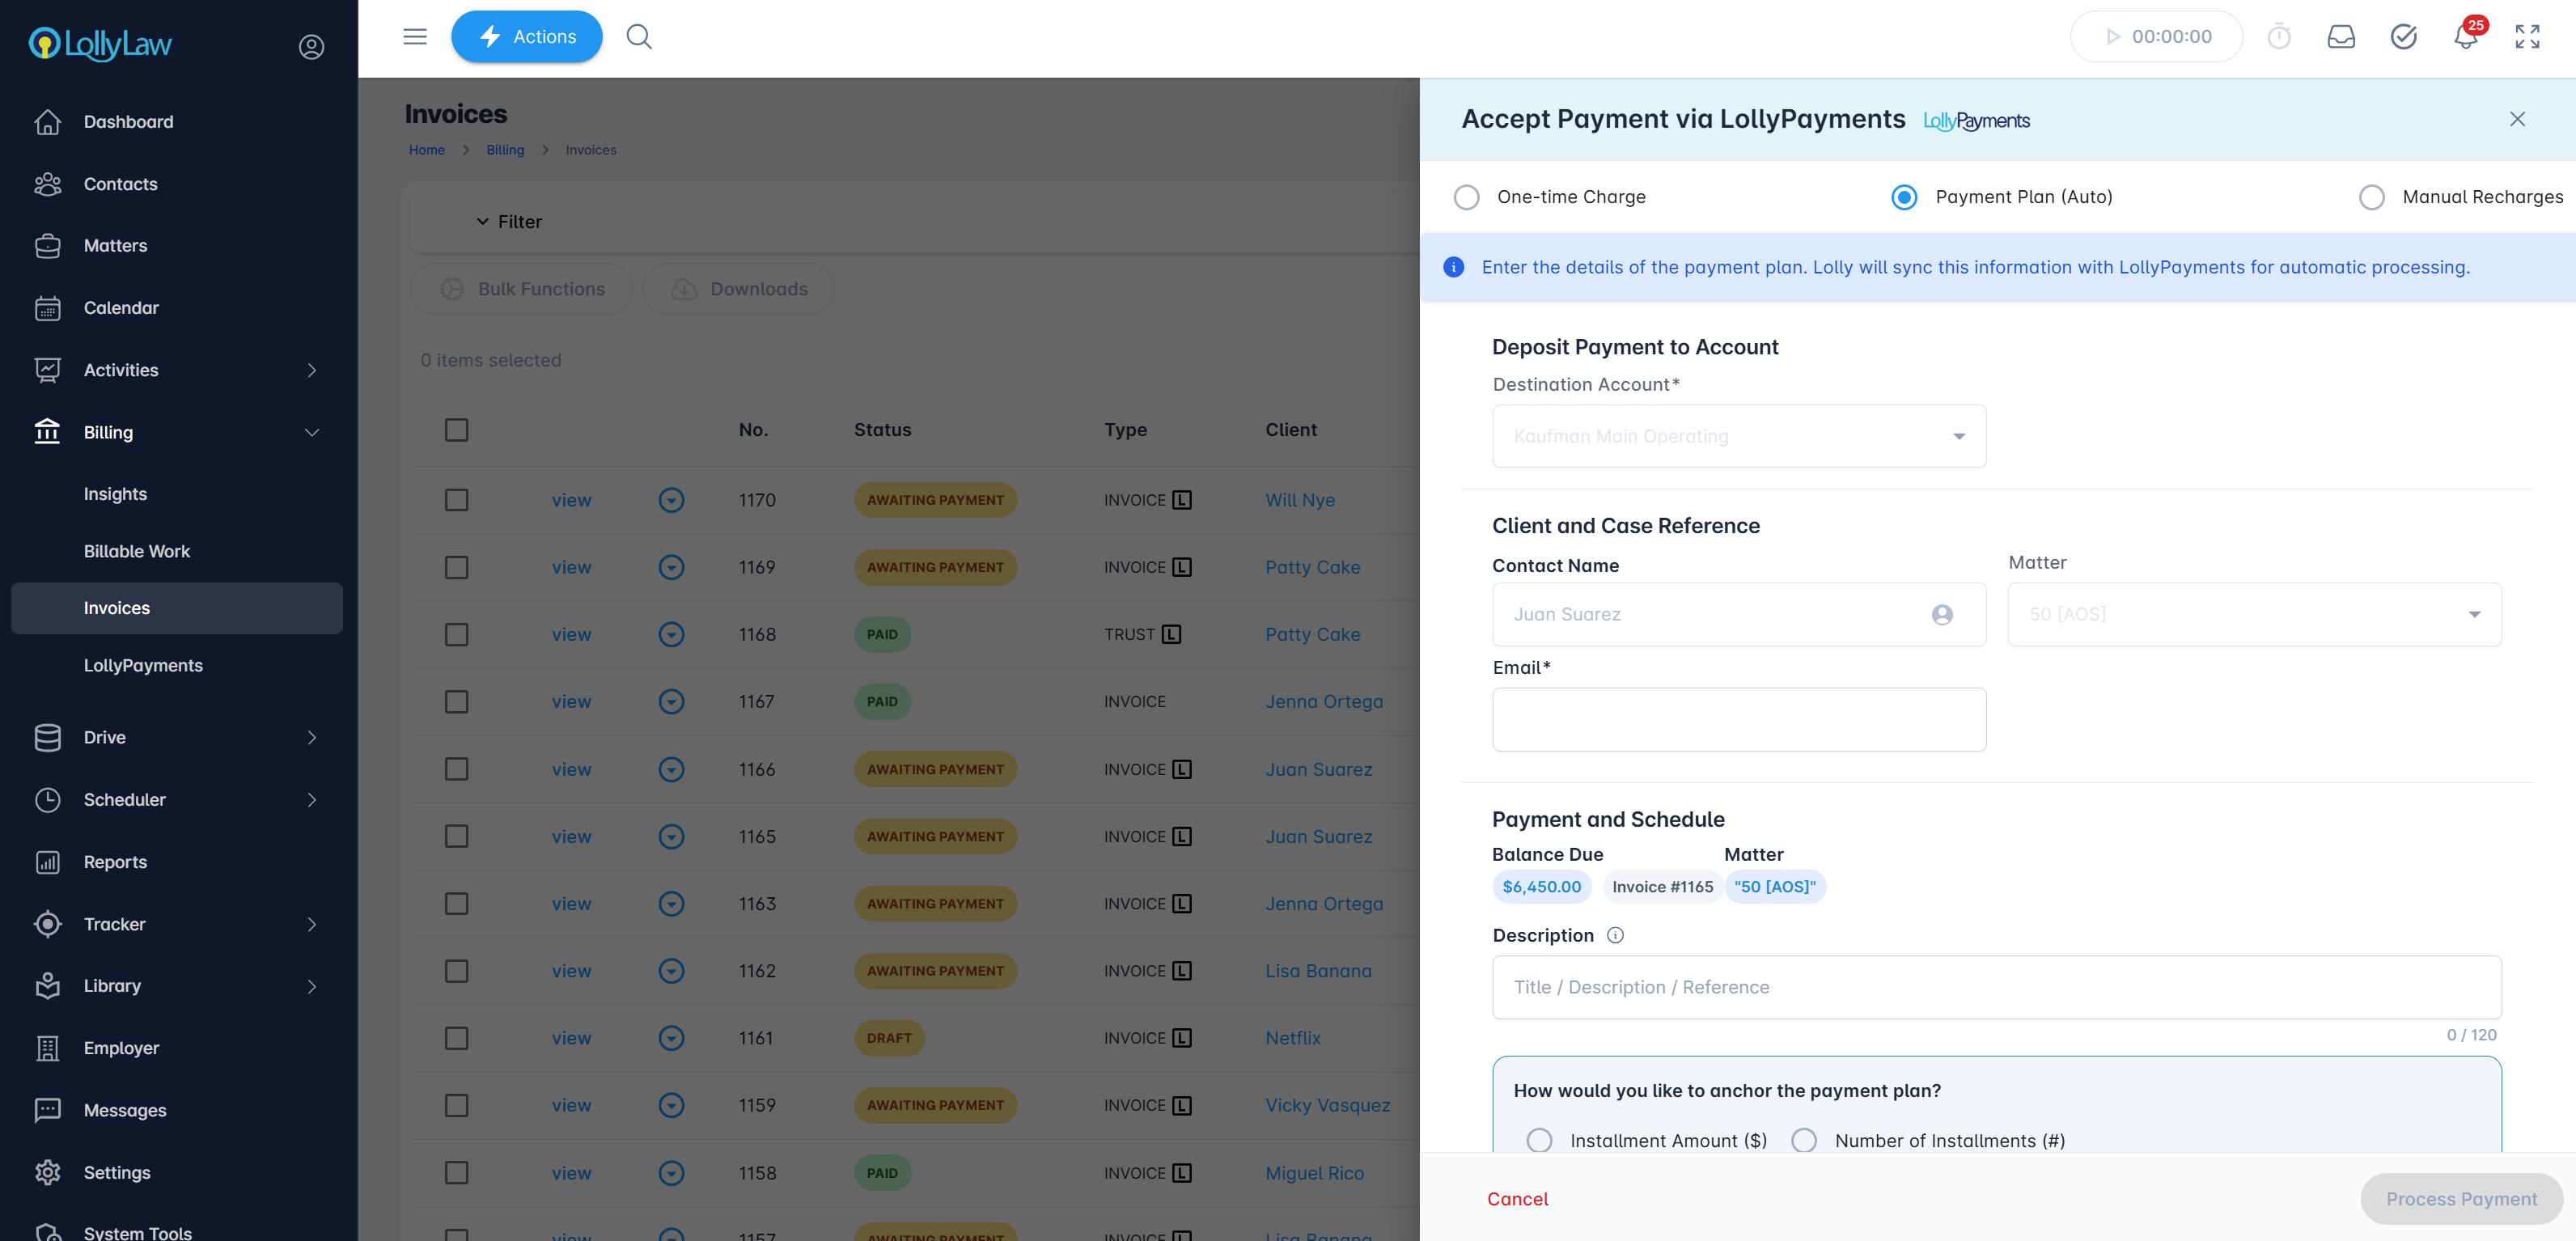
2. Click on the ▼ button and select Accept Payment (LollyPayments)
3. Choose Payment Plan (Auto) at the top of the form and select the destination bank account where the payments should be transferred to
4. Enter your client's and case's details, the payment amount and schedule, and the number of installments and start date for the payment plan
5. Enter the Payee's authorized payment method and press Process Payment
Finally, once the first installment of the payment plan has been initiated, the Payee will receive a notification for each payment made, until the payment plan has completed.