

A contact record represents individuals or entities (i.e., organizations) connected to your firm. They help organize and manage key information for seamless interactions between you and your clients. You can create a contact at any time, then link it to consultations, cases, and forms as needed. Information saved to a contact profile can also be automatically used to fill forms and generate documents.
This article will cover how to create new Contacts in your LollyLaw account.
Creating a New Person Contact
To add a new Person contact:
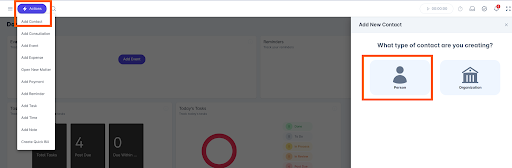
Select Actions at the top left of your screen, and choose Add Contact
Select Person as the contact type
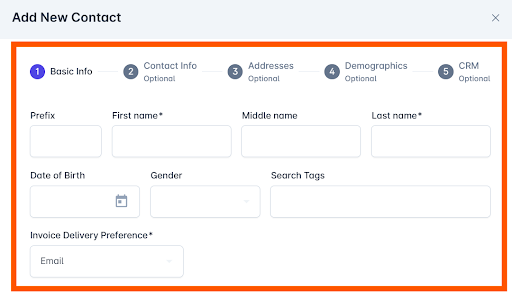
Fill in the Basic Info fields for the Contact. This includes First Name, Middle Name, Last Name, Date of Birth, Gender, Invoice Delivery Preference, as well as any necessary Search Tags
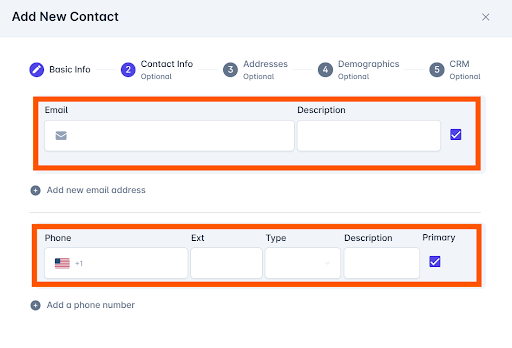
Click Next >> to fill out the Contact Info for the contact. This includes Email and Phone
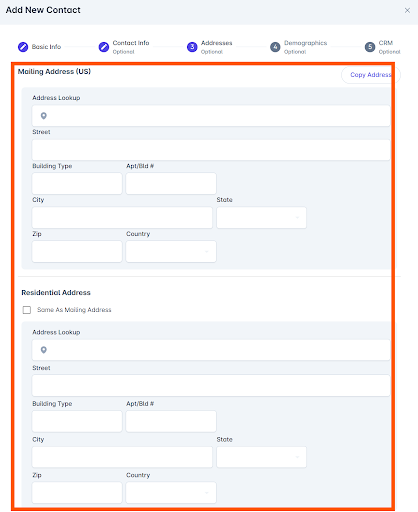
Click Next >> to fill out the Addresses for the contact. This includes Mailing Address and Residential Address
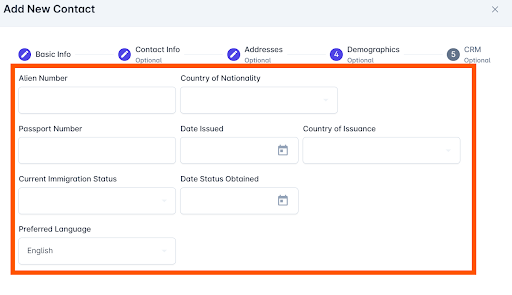
Click Next >> to fill out the Demographics for the contact. This includes Alien Number, Country of Nationality, Passport Number, Date Issued, Country of Issuance, Current Immigration Status, Date Status Obtained, and Preferred Language
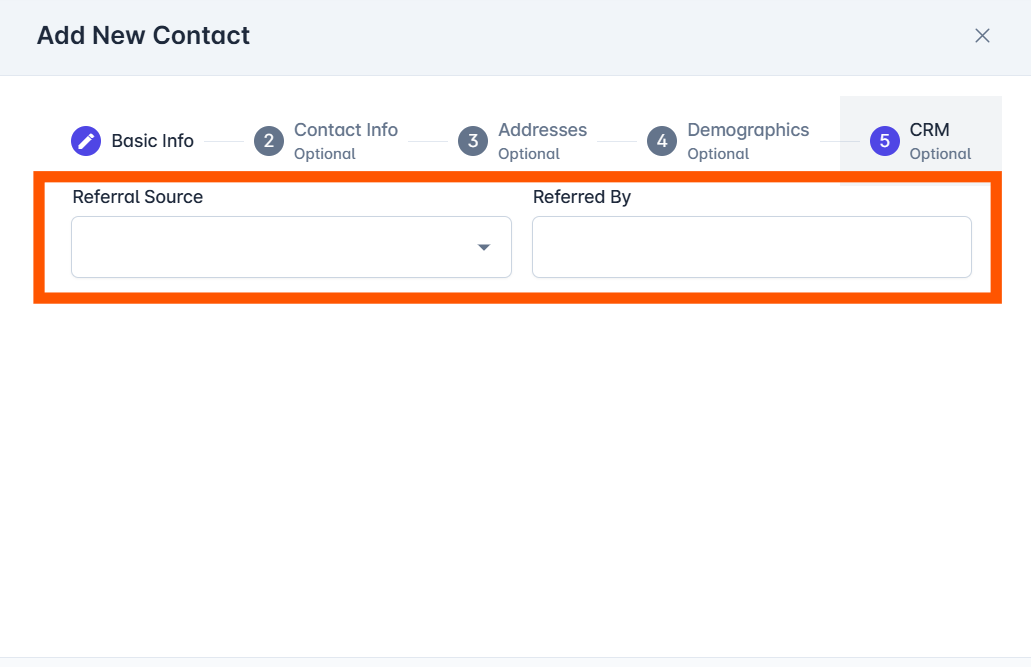
Click Next >> to fill out the CRM details for the contact. This includes Referral Source and Referred By
Click the Save Contact button once finished
You will automatically be taken to the contact snapshot page, where you can see a high-level view of the contact details. From here, you can continue building out the contact by uploading a profile photo, enabling the Client Bridge portal, adding documents, time entries, and more
Note: You can return to this Contact record at any time by using the Search bar in the Contacts area.
Creating a New Organization Contact
To add a new Organization contact:
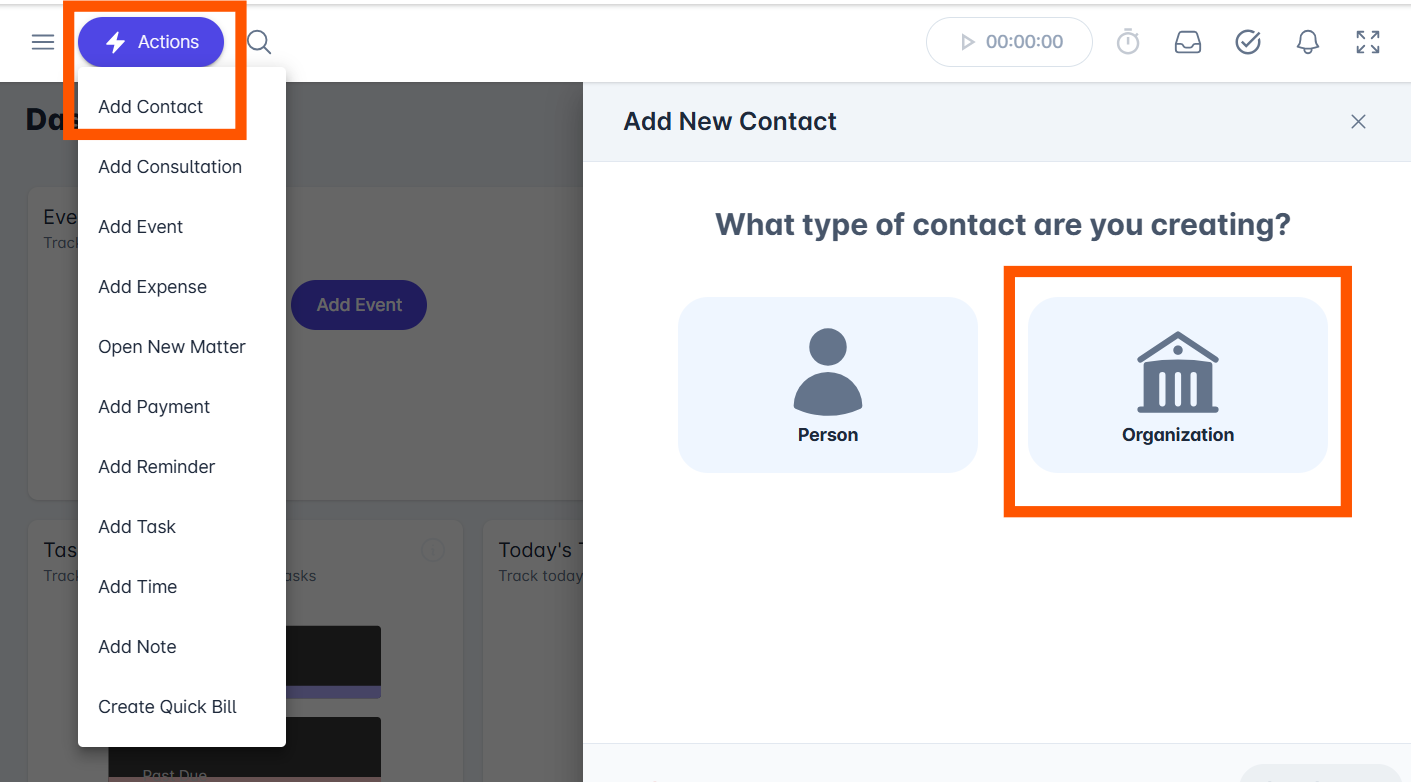
Select Actions at the top left of your screen, and choose Add Contact
Select “Organization” as the contact type
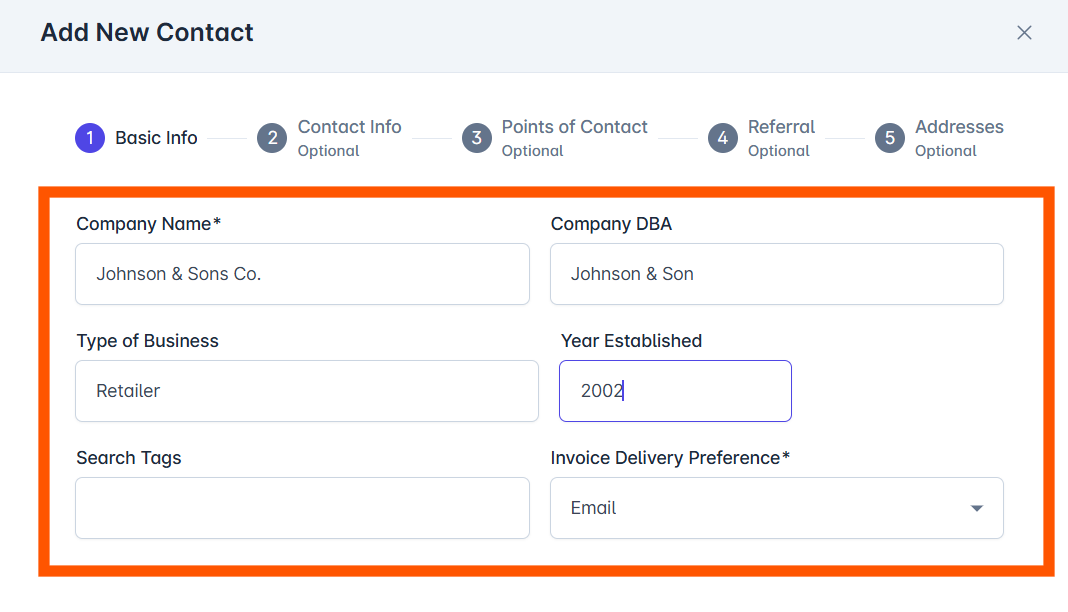
Fill in the Basic Info fields for the Contact. This includes Company Name, Company DBA, Type of Business, Year Established, Invoice Delivery Method, as well as any necessary Search Tags.
Click Next >> to fill out the Contact Info for the contact. This includes Email and Phone
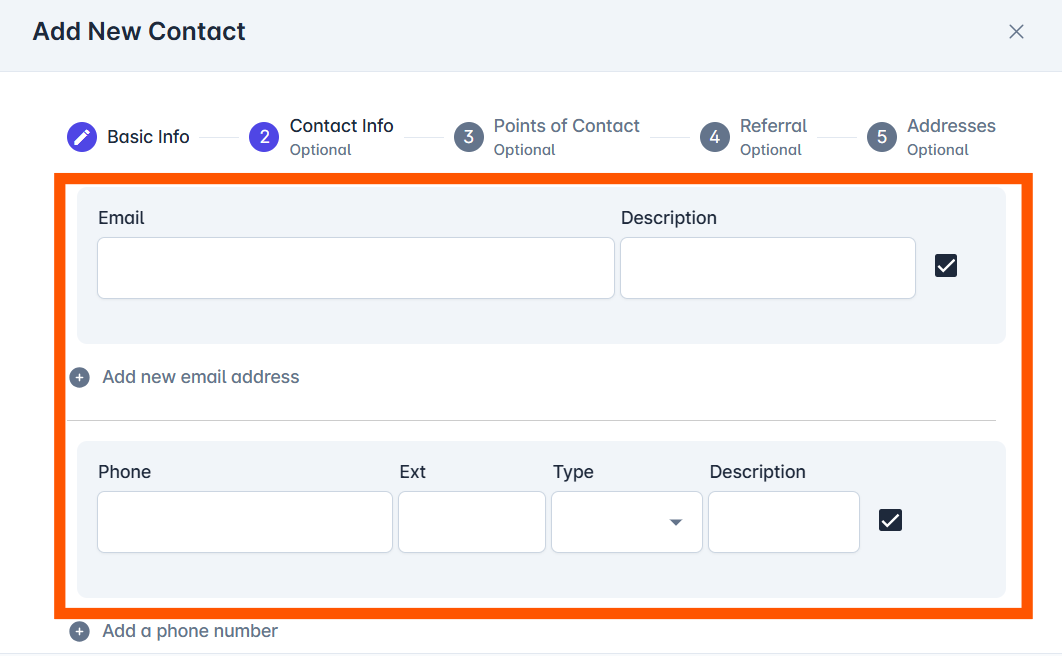
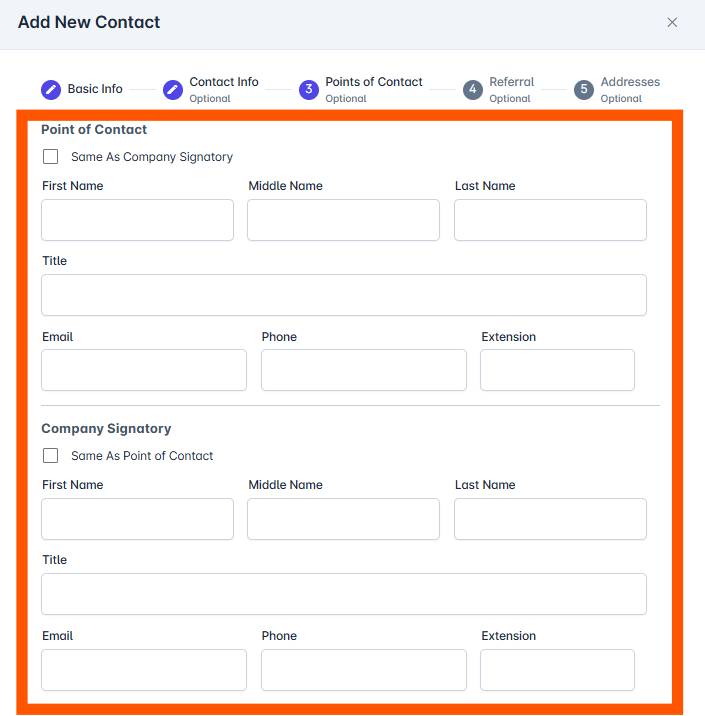
Click Next >> to fill out the Points of Contact for the contact. This includes the primary Point of Contact as well as the Company Signatory
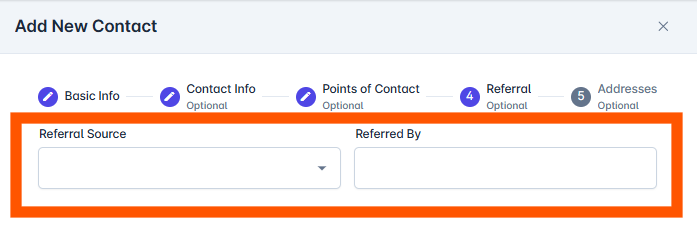
Click Next >> to fill out the Referral details for the contact. This includes Referral Source and Referred By
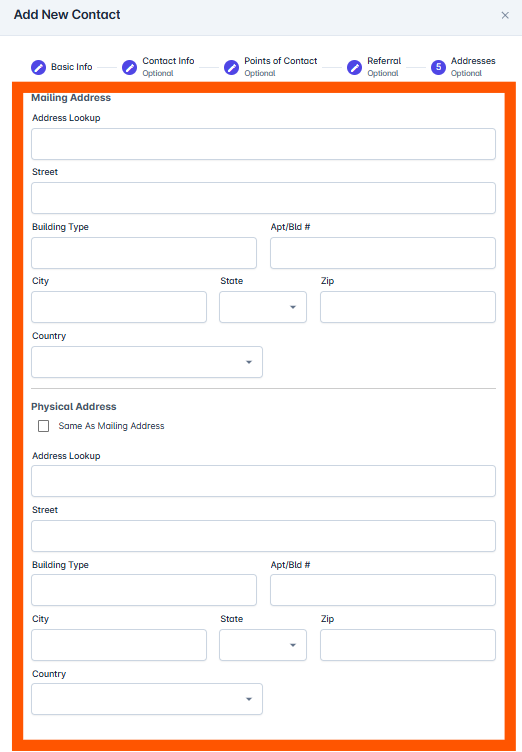
Click Next >> to fill out the Addresses for the contact. This includes Mailing Address and Physical Address
Click the Save Contact button once finished
You will automatically be taken to the contact snapshot page, where you can see a high-level view of the contact details. From here, you can continue building out the contact by uploading a profile photo, enabling the Client Bridge portal, adding documents, time entries, and more
To learn about managing your Contact records, read our article on Managing Existing Contact Records.
Note: You can return to this Contact record at any time by using the Search bar in the Contacts area.