

As an administrator, you can create calendars in LollyLaw that your users can post events to. Each calendar has a "type" that determines where events live:
Firm Internal: Events exist only within LollyLaw.
Google or Outlook: Available once you've enabled the corresponding integration. Selecting one of these types syncs events from LollyLaw to that outside calendar.
Keep in mind: Google Calendar and Outlook Calendar are third-party services outside LollyLaw's control. Permissions and any changes made directly in those services need to be managed there, not in LollyLaw.
Important: LollyLaw syncs event data to Google Calendar or Outlook Calendar, but it does not pull data back from them. This is a one-way sync. One reason is that LollyLaw events include fields like client, matter, and billing amount, which don't have equivalents in Google Calendar or Outlook.
Step 1: Enable the Integration
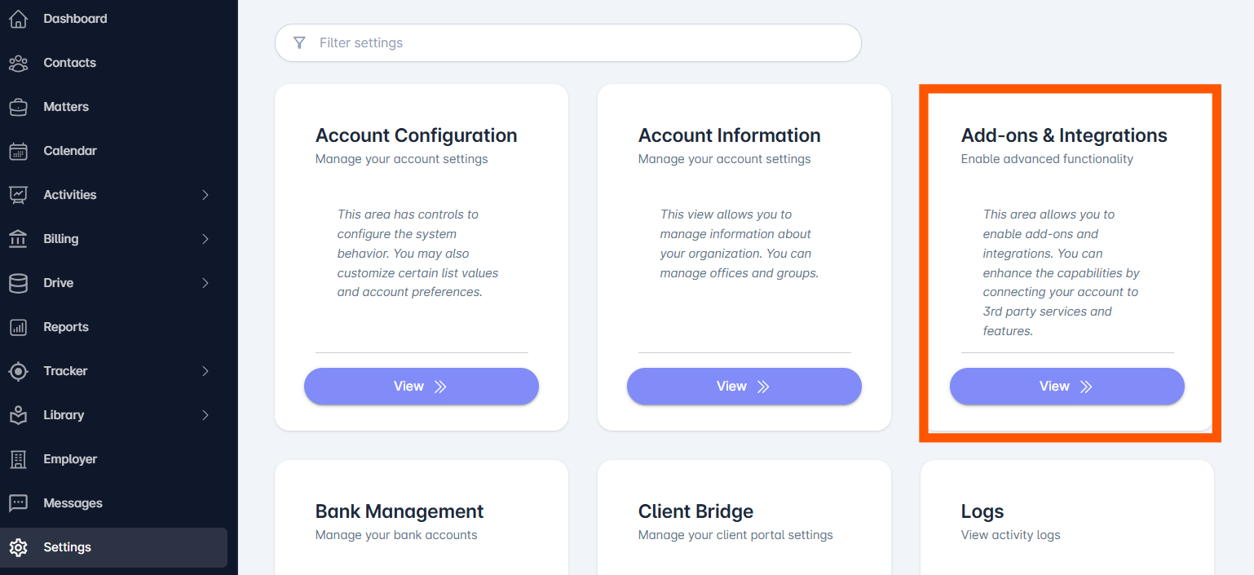
Go to Settings > Add-Ons & Integrations
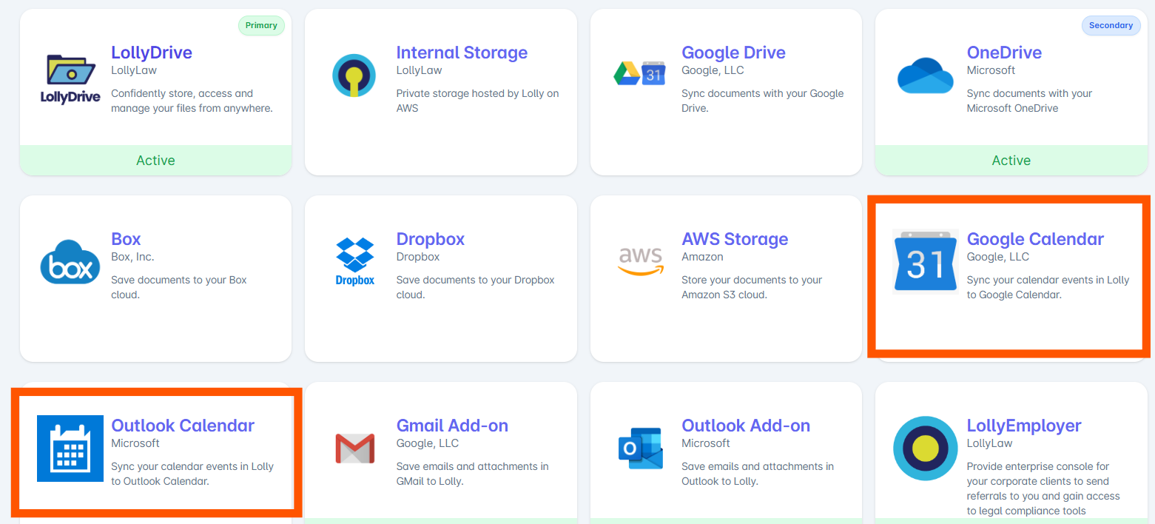
Select Google Calendar or Outlook Calendar. You can enable both if needed.
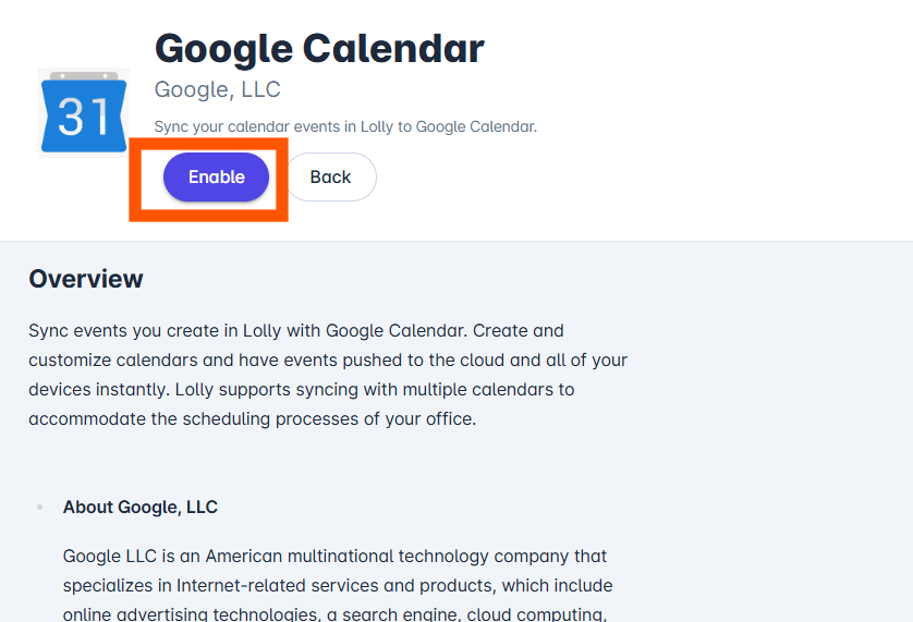
Click Enable.
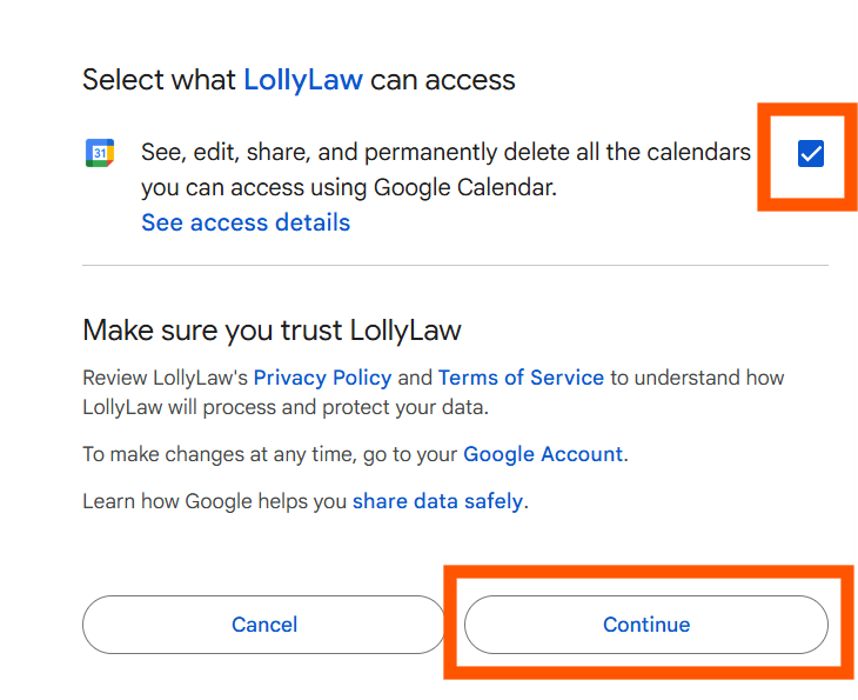
Sign in to your Google or Microsoft account when prompted
Allow LollyLaw permission to make edits to your calendar
Refresh the page once you're redirected back to LollyLaw.
Step 2: Create a New Calendar
Once the integration is active, add a calendar to your LollyLaw account:
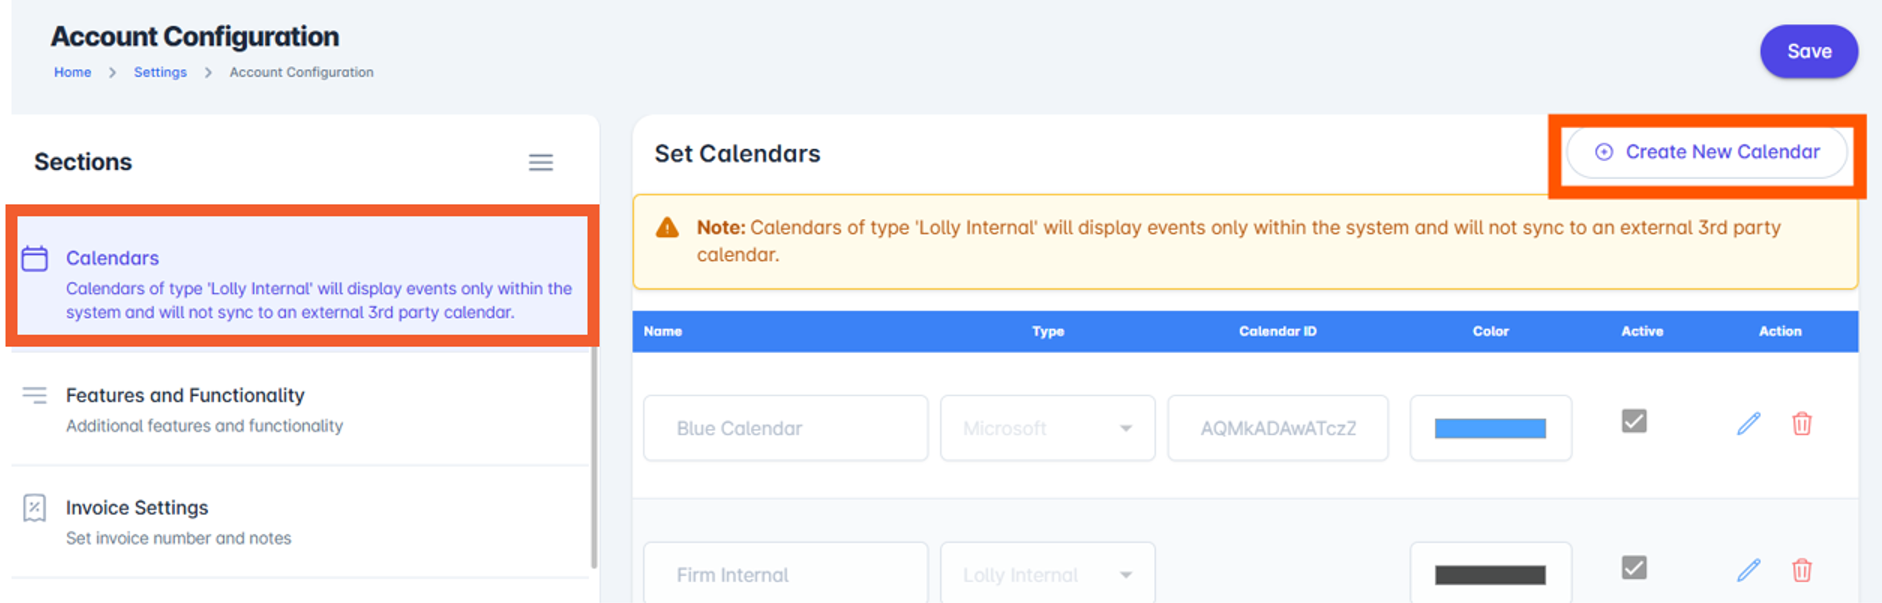
Go to Settings > Account Configuration
Click the Calendars section
Click Create New Calendar at the top of the table
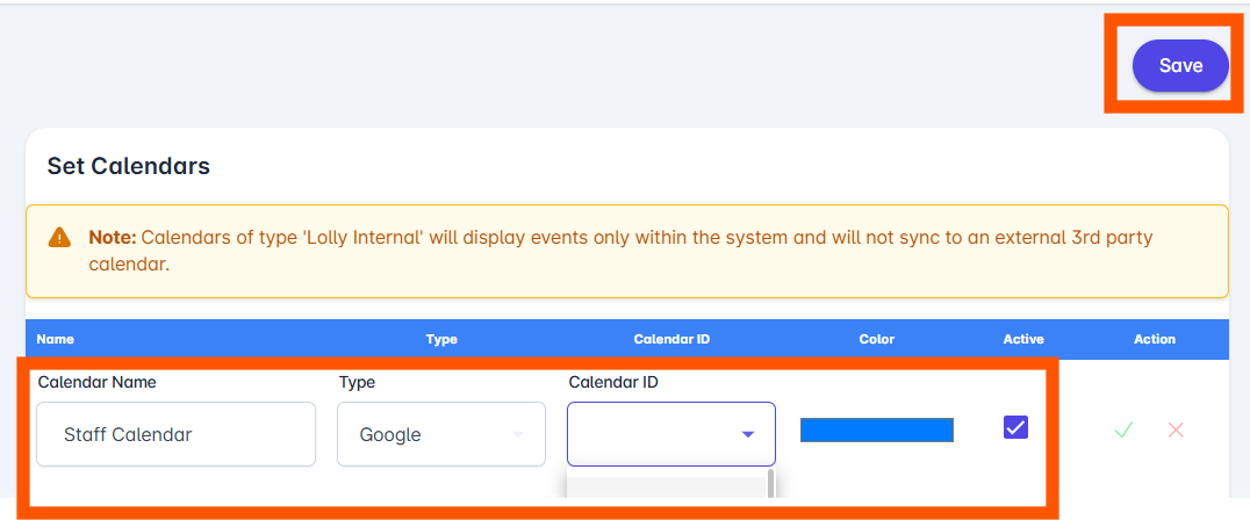
Enter a Name for the calendar
Select a Type
Choose a Calendar ID from the dropdown of calendars available in your Google or Microsoft 365 account. Leave this field empty if you want LollyLaw to create a new calendar in Google Calendar or Outlook Calendar automatically
Click the Active checkbox to add the record
Click Save at the top right of the page
Once added, the calendar will appear as an option in the Select Calendar dropdown when users create events, time entries, and other records.